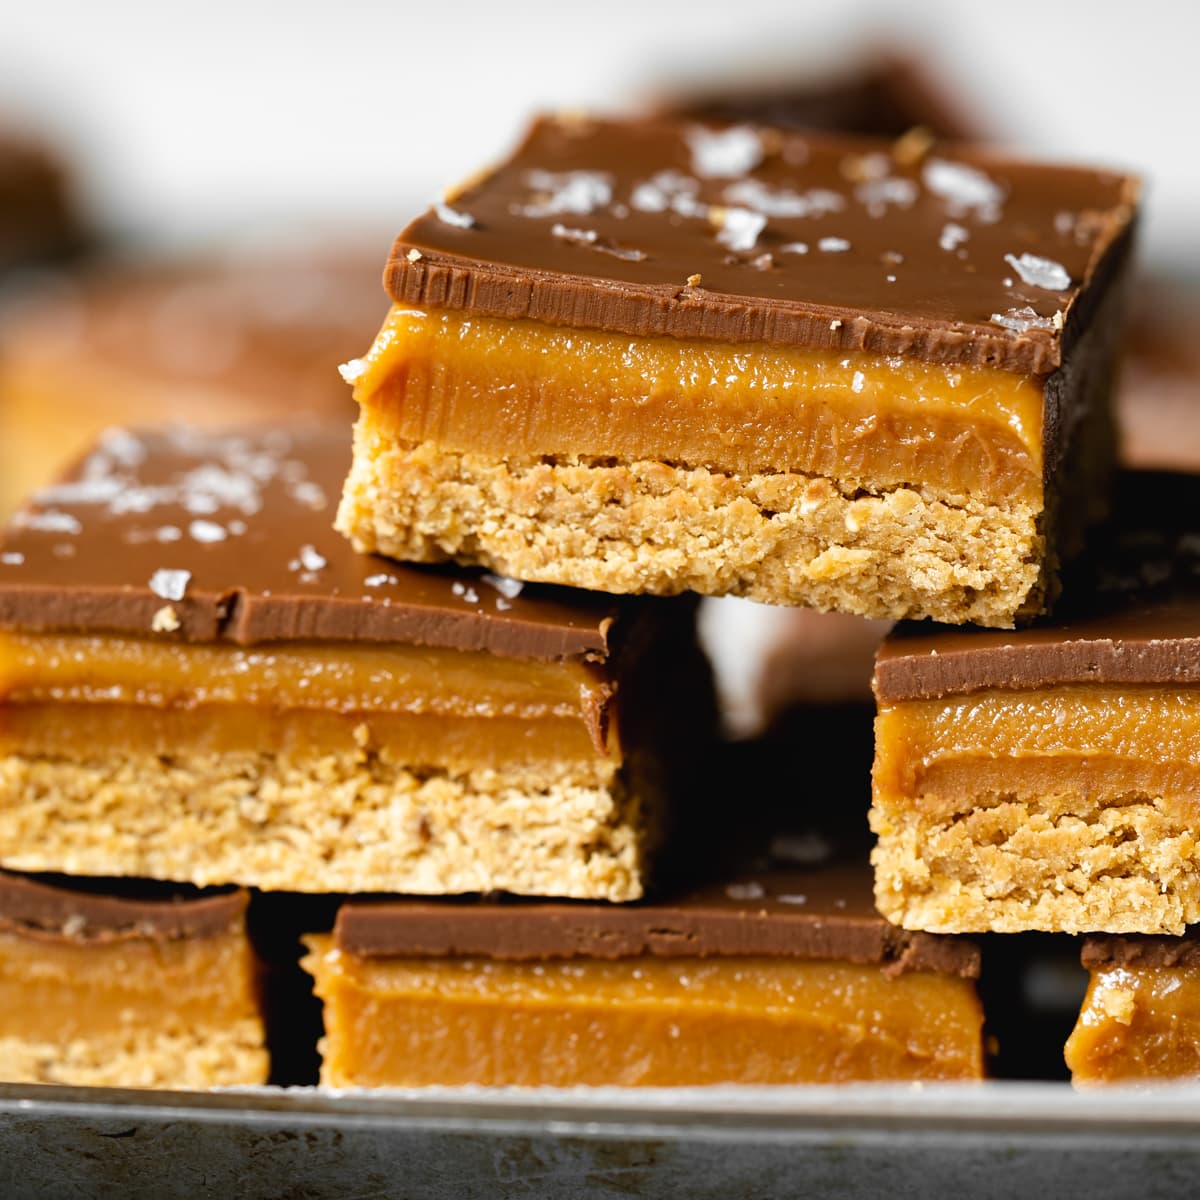

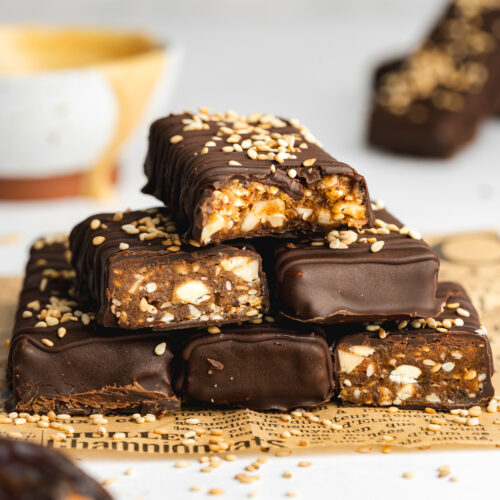
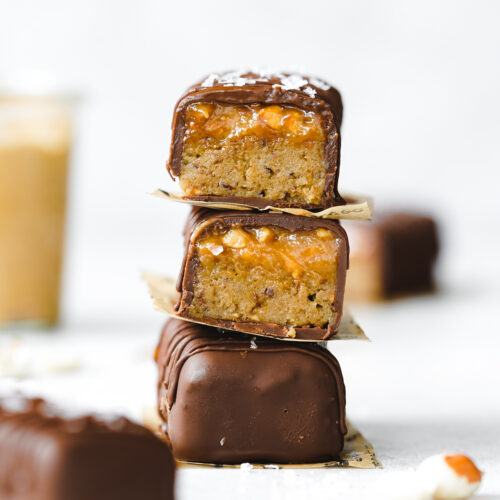
These vegan chocolate peanut butter oat bars are everything you could want from a snack. Layers of no-bake oaty crust, homemade peanut butter caramel, and of course chocolate.
The recipe is based on my vegan peanut butter millionaires which use the same caramel and topping. Except these ones don't require any baking, making them fuss-free and pretty much fail-proof.
What to expect from this recipe
📖 Recipe Overview
- Made with just 6 simple ingredients.
- No-bake and incredibly easy to make.
- Make a perfect afternoon snack with a cup of tea or coffee.
- Completely eggless and dairy-free.
🥜 Ingredients Needed
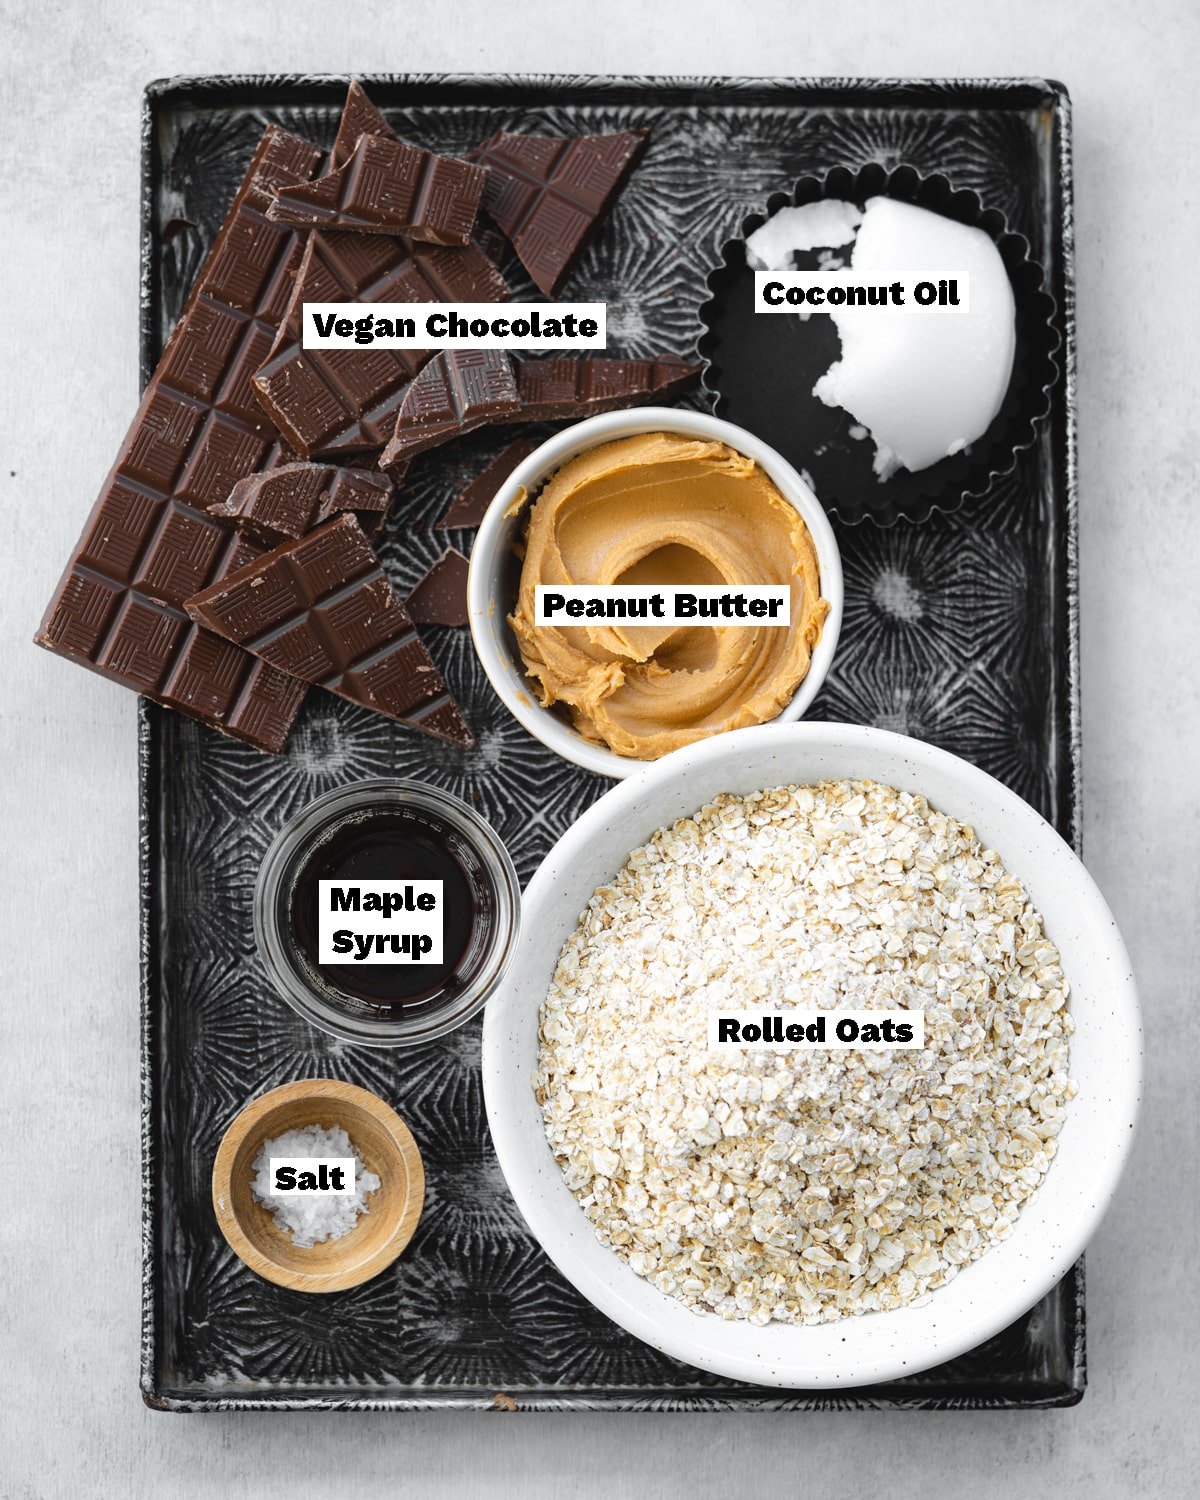
You won't find any unusual ingredients in these no-bake chocolate peanut butter oatmeal bars. In fact, just like my peanut butter twix bars, you'll only need 6 ingredients to make them!
Ingredient Notes
The crust is based on rolled oats. If you want to make gluten-free oatmeal bars, this is the ingredient to look out for, so opt for certified GF oats.
Make sure you go for creamy peanut butter, not crunchy peanut butter as this won't allow you to get a nice smooth caramel layer. Some peanut butter has added oils and sugars, so avoid these if you don't want the recipe to be as sweet.
You can use vegan milk chocolate or dark chocolate depending on your taste. If you want to keep the recipe refined sugar-free, go for a naturally sweetened dairy-free chocolate. You can also make your own vegan milk chocolate with coconut sugar and melt it for the topping.
🥣 How To Make Chocolate Peanut Butter Oatmeal Bars
Find the complete list of ingredients, quantities, and instructions in the recipe card at the end of this post.
No-Bake Crust
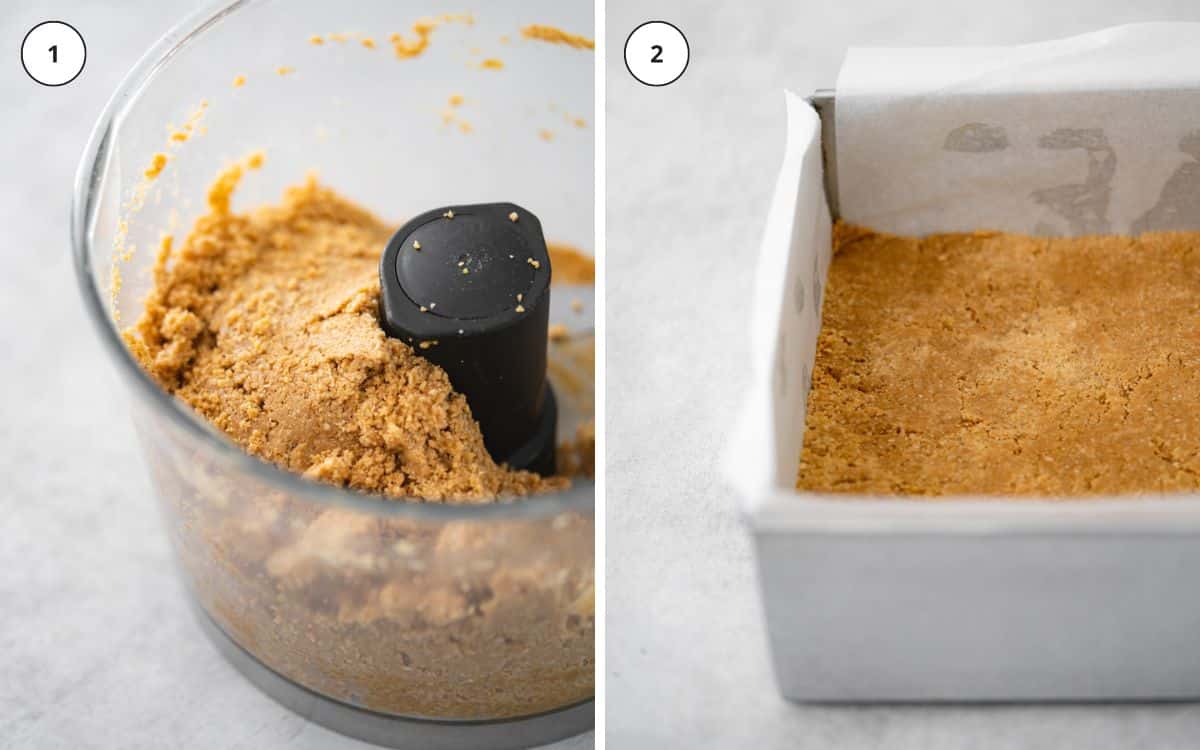
To make the easy no-bake crust start by blending the oats and salt down into a fine powder. Once they resemble a floury consistency, add in the peanut butter and maple syrup and blend again until the ingredients stick together.
Using the back of a spoon, press the oaty base into an 8-inch square pan lined with parchment paper. Place it in the fridge while you make the peanut butter caramel.
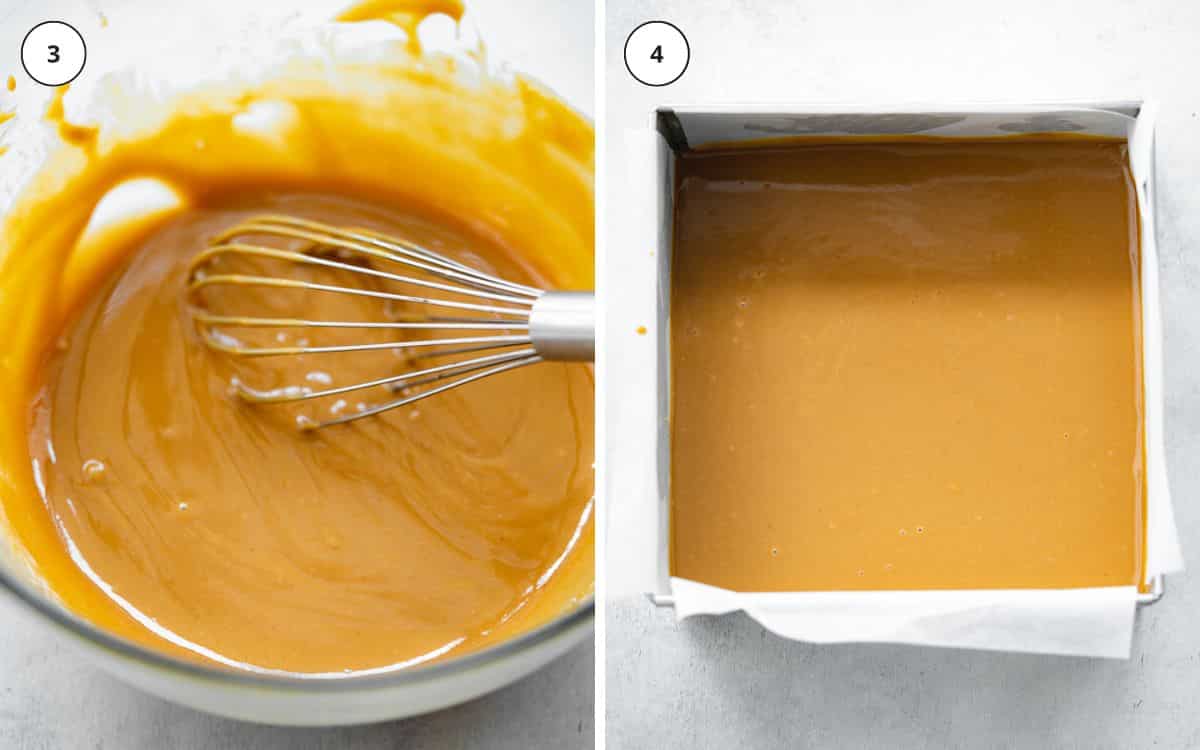
Peanut Butter Filling
The peanut butter caramel is super easy, I use it all the time in no-bake desserts. You'll find it in these peanut butter brownies and millionaires too. You can also use it as a healthier alternative to regular vegan caramel sauce.
Simply add the peanut butter, maple syrup, and coconut oil to a large bowl and melt them over a double boiler (bain-marie). With the double-boiler method, the bowl is placed on a saucepan with simmering water in it. The steam rises and gently melts the ingredients in the bowl.
Whisk the melted ingredients together until you have a smooth caramel and pour it into the lined pan and chill for 1-2 hours until set.
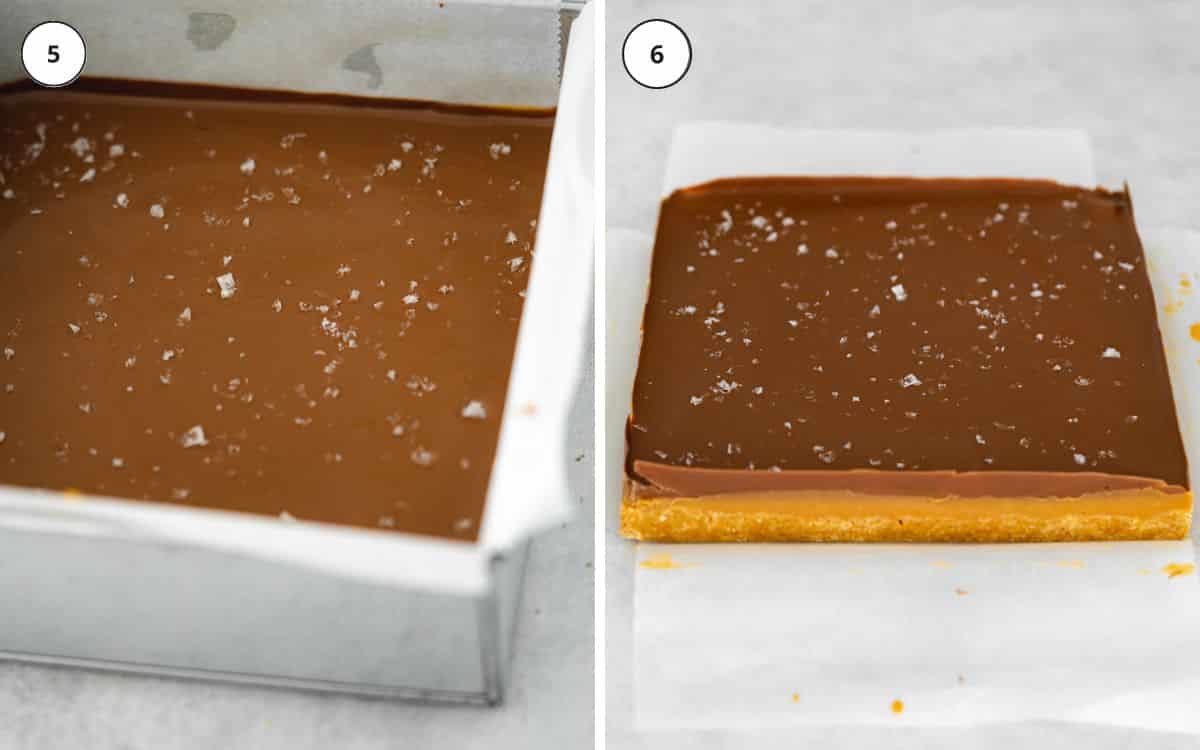
Chocolate Topping
To make the topping, melt the vegan chocolate and peanut butter over a double-boiler. Pour the melted chocolate on top of the peanut butter layer and chill for another 15-20 minutes until set.
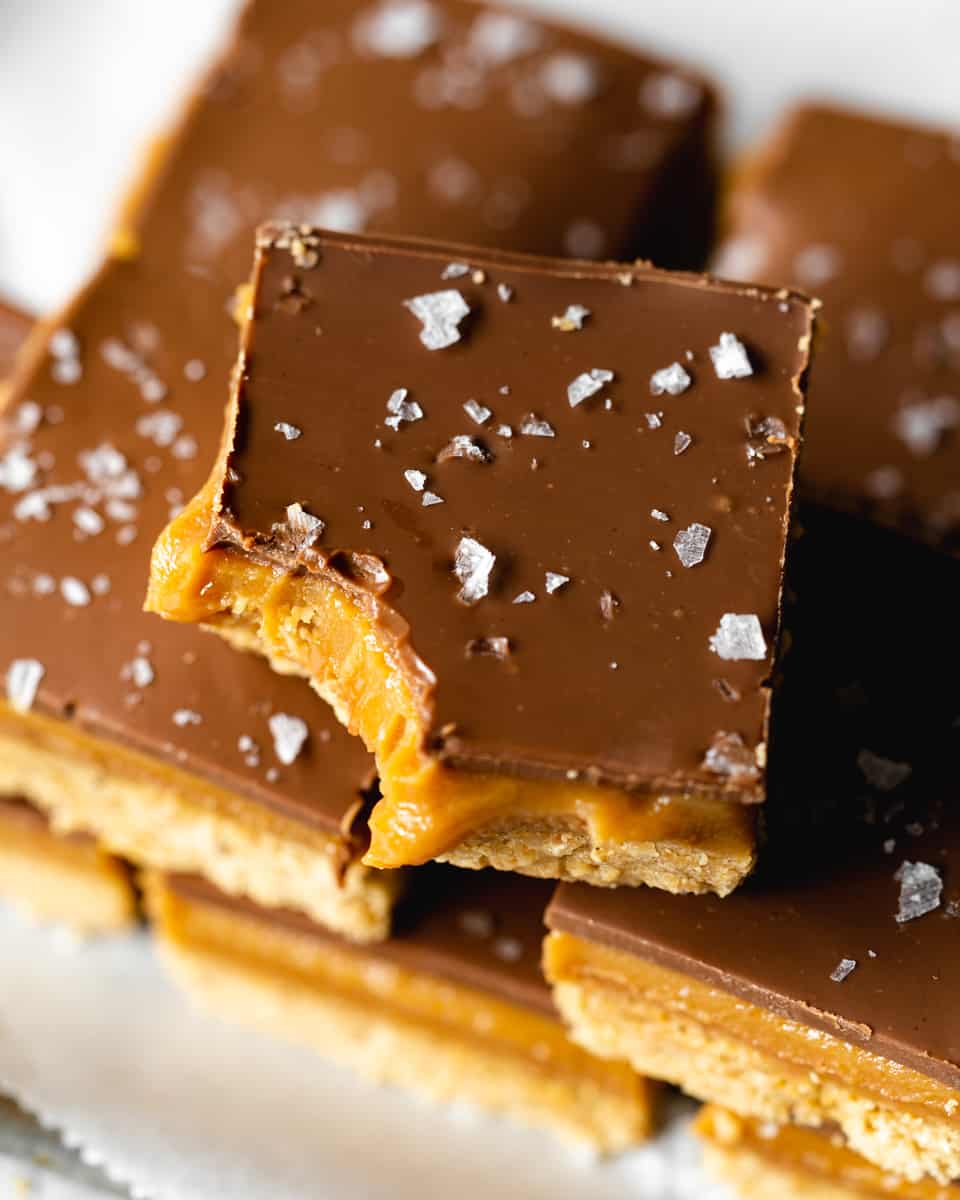
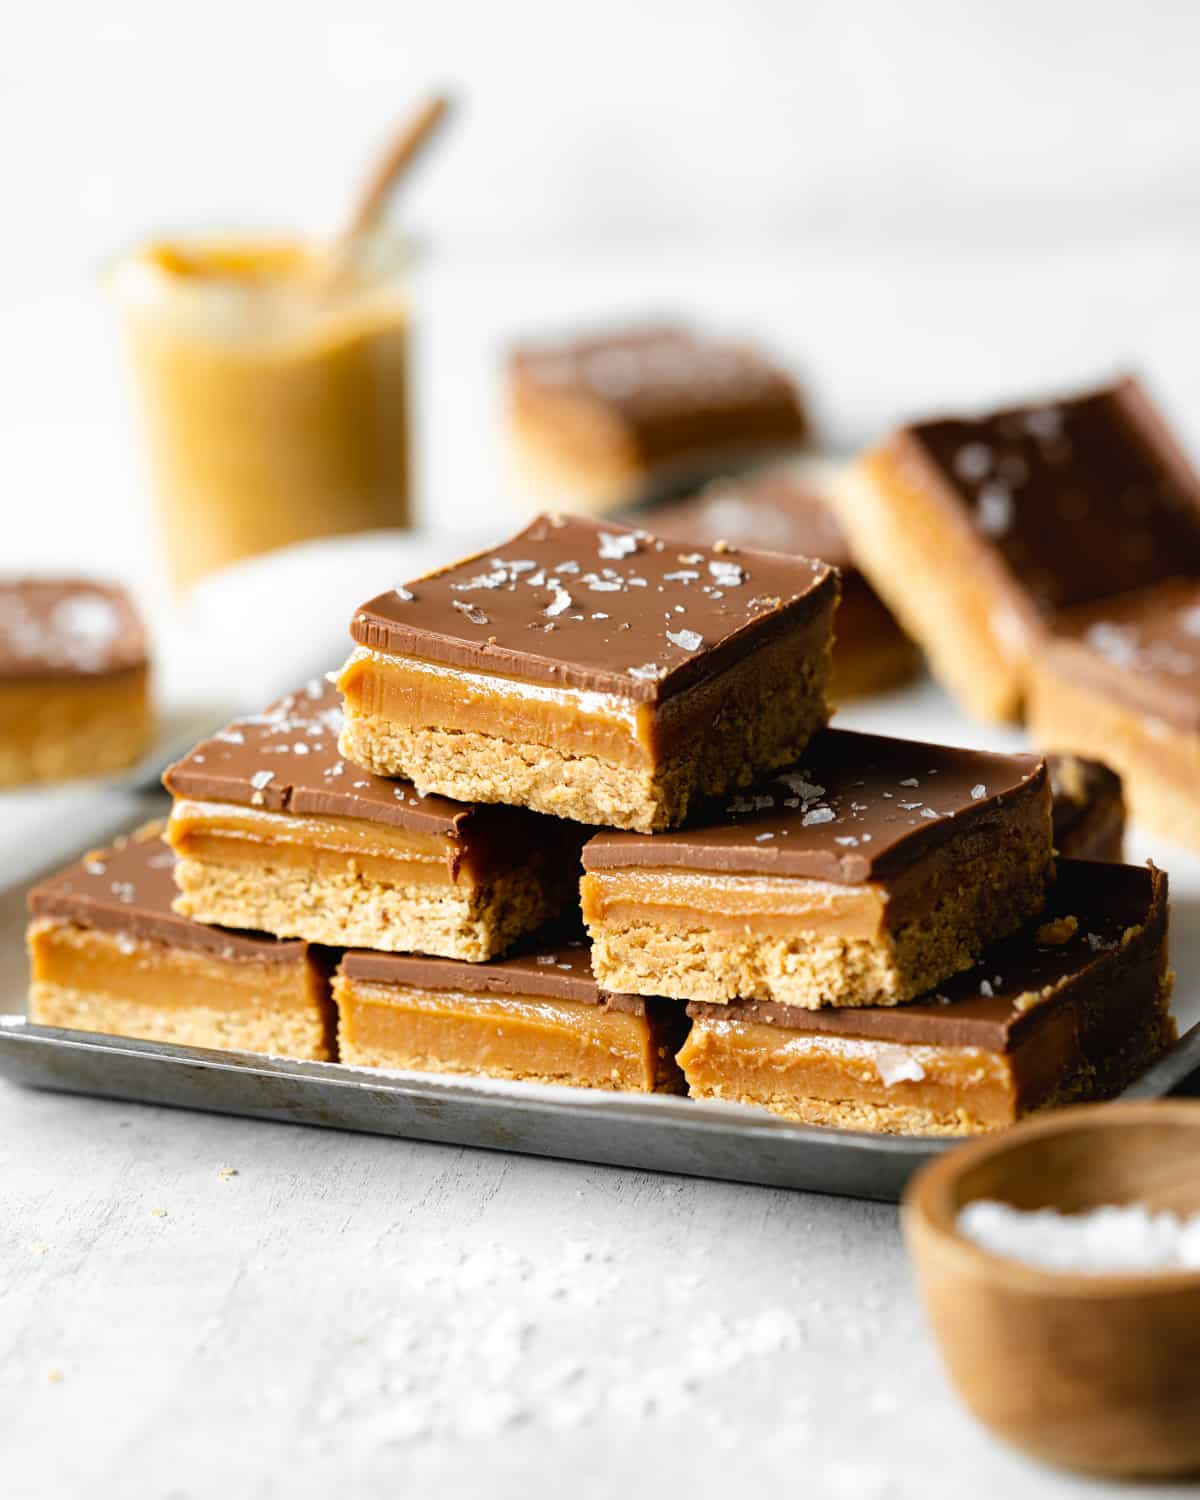
Once chilled, carefully remove the square pan and slice oat bars into servings. Fill a cup with boiling water and dip the knife in between each cut. Use some paper towels or a clean kitchen towel to wipe the knife dry before slicing it into the peanut butter bars.
Additions
- I love adding a good pinch of Maldon sea salt flakes to the top of these peanut butter caramel slices. This creates a sweet and salty combination that is so delicious.
- Roasted peanuts can be stirred into the caramel to make these more like snickers no-bake oatmeal bars!
- Pumpkin seeds, sunflower seeds, and/or flaxseeds can be sprinkled on top of the chocolate layer before it sets. This will add crunch and make them the perfect breakfast bar for on the go.
📝 Recipe Tips
Always use a double-boiler and avoid direct heat when working with chocolate or peanut butter. The fats can burn pretty easily and you'll be left with a grainy and unpleasant consistency.
Adding a little peanut butter, vegan butter, or coconut oil to the chocolate while melting helps the topping to become less hard once set so you can bite into it more easily!
Like with all brownies and slices, I recommend that you use a large sharp knife, and ideally a chef's knife if you own one. A blunt knife will make it really tough to cut nice even slices.
💬 FAQs
For up to a week. Store these vegan brownies in the fridge in order to keep them fresh as long as possible. Place them in an airtight container or wrap them well in plastic wrap.
You can freeze these bars in an airtight container for up to 2 months. Defrost overnight in the fridge or at room temperature for 2 hours before serving them.
Yes, you can swap the peanut butter for any nut butter you fancy. Cashew butter and almond butter both work well. Or go for tahini or sunflower seed butter to make them nut-free.
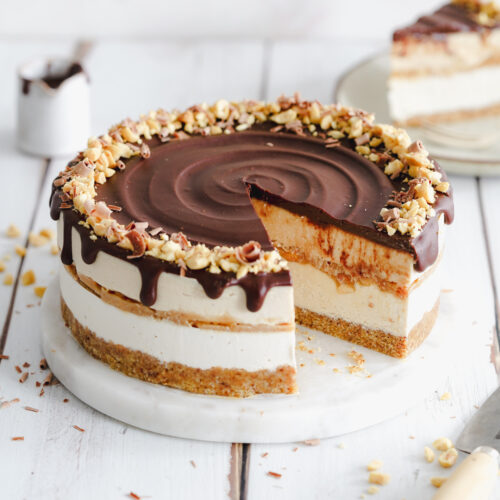
➕ More No-Bake Recipes

Love this recipe? Please leave a 5-star ★★★★★ rating in the recipe card below and consider leaving a comment as well, thanks!
Stay in touch with me through social media @ Instagram, Pinterest, TikTok, and Facebook. And subscribe via email to get all our new recipes!
📖 Recipe
Chocolate Peanut Butter Oatmeal Bars
Ingredients
Crust
- 200 g (2 ½ cups) rolled oats certified GF if needed
- 200 g (¾ cup) smooth peanut butter
- 100 ml (⅓ cup) pure maple syrup
- ½ teaspoon sea salt plus extra for garnish
Filling
- 280 g (1 ⅛ cups) smooth peanut butter
- 150 ml (⅔ cups) pure maple syrup
- 55 g (¼ cup) coconut oil solid
Topping
- 200 g (7.05 oz) vegan chocolate
- 50 g (⅕ cup) smooth peanut butter
Instructions
Crust
- Line the base and sides of a square 8" pan with parchment paper. Add the oats and salt to your food processor and blitz for a couple of minutes until finely ground. Add in the peanut butter and maple syrup and blend again until the mixture sticks together to form a dough. If needed, add a little more maple syrup to bring the mixture together.
- Evenly press the crust into the base of the pan and smooth it out with a spatula or flat bottomed glass. Set aside in the fridge while you prepare the filling.
Filling
- Add all of the ingredients to a heat-resistant bowl. Heat over a double boiler (bain-marie) while stirring until all of the ingredients have melted into a smooth caramel.
- Pour the caramel on top of the crust and place it in the fridge to set for 1-2 hours, or until set. Overnight works well too.
Topping
- Melt the chocolate and peanut butter over a double boiler (bain-marie) and stir to combine. Pour the chocolate over the caramel layer and sprinkle with flaky sea salt. Place it in the fridge to set for 15-20 minutes.
- To slice, place a sharp knife in a jug of boiling water to heat it. Wipe the knife dry and gently cut, allowing the heat from the knife to melt through the slices.
Storage
- Store these slices in an airtight container in the fridge and consume them within a week. Alternatively, you can freeze any unused portions and defrost them as needed.
Notes
- Peanut butter: Feel free to swap it out for another nut butter of your choice, or a mix if you're trying to clear out the cupboards! You can also use Biscoff spread.
- Roasted peanuts can be stirred into the caramel to make these more like snickers oatmeal bars!
- Pumpkin seeds, sunflower seeds, and/or flaxseeds can be sprinkled on top of the chocolate layer before it sets.
- Use a large sharp knife, and ideally a chef's knife if you own one. A blunt knife will make it really tough to cut nice even slices.
© addictedtodates.com. All content and images are protected by copyright. If you want to share this recipe, please do so using the share buttons provided. Do not screenshot or republish the recipe or content in full. Instead, include a link to this post for the recipe. Thank you!