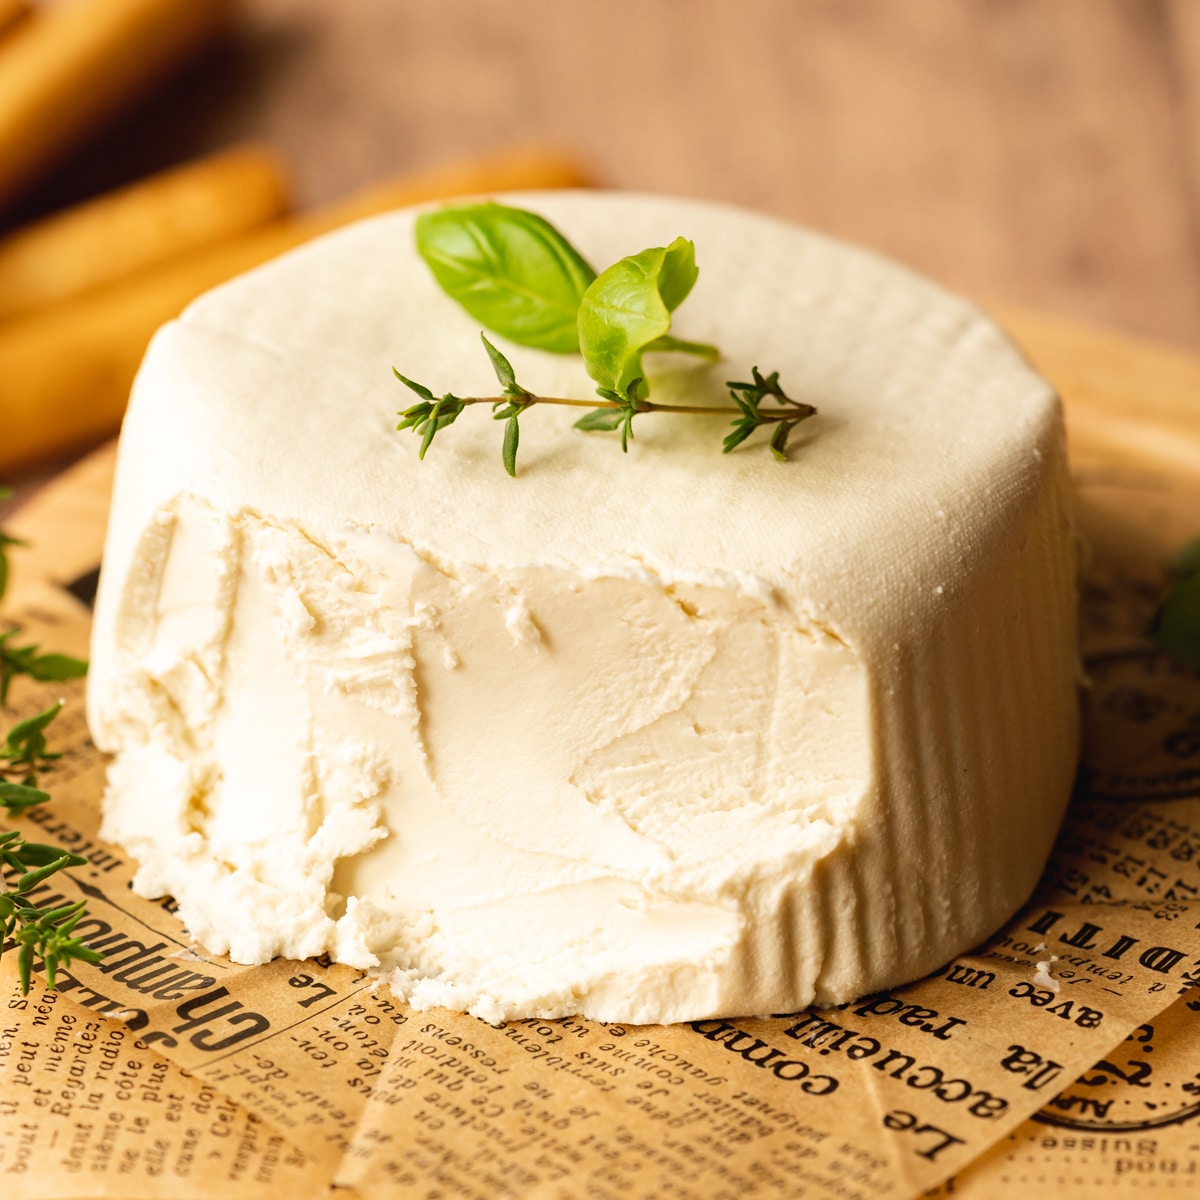
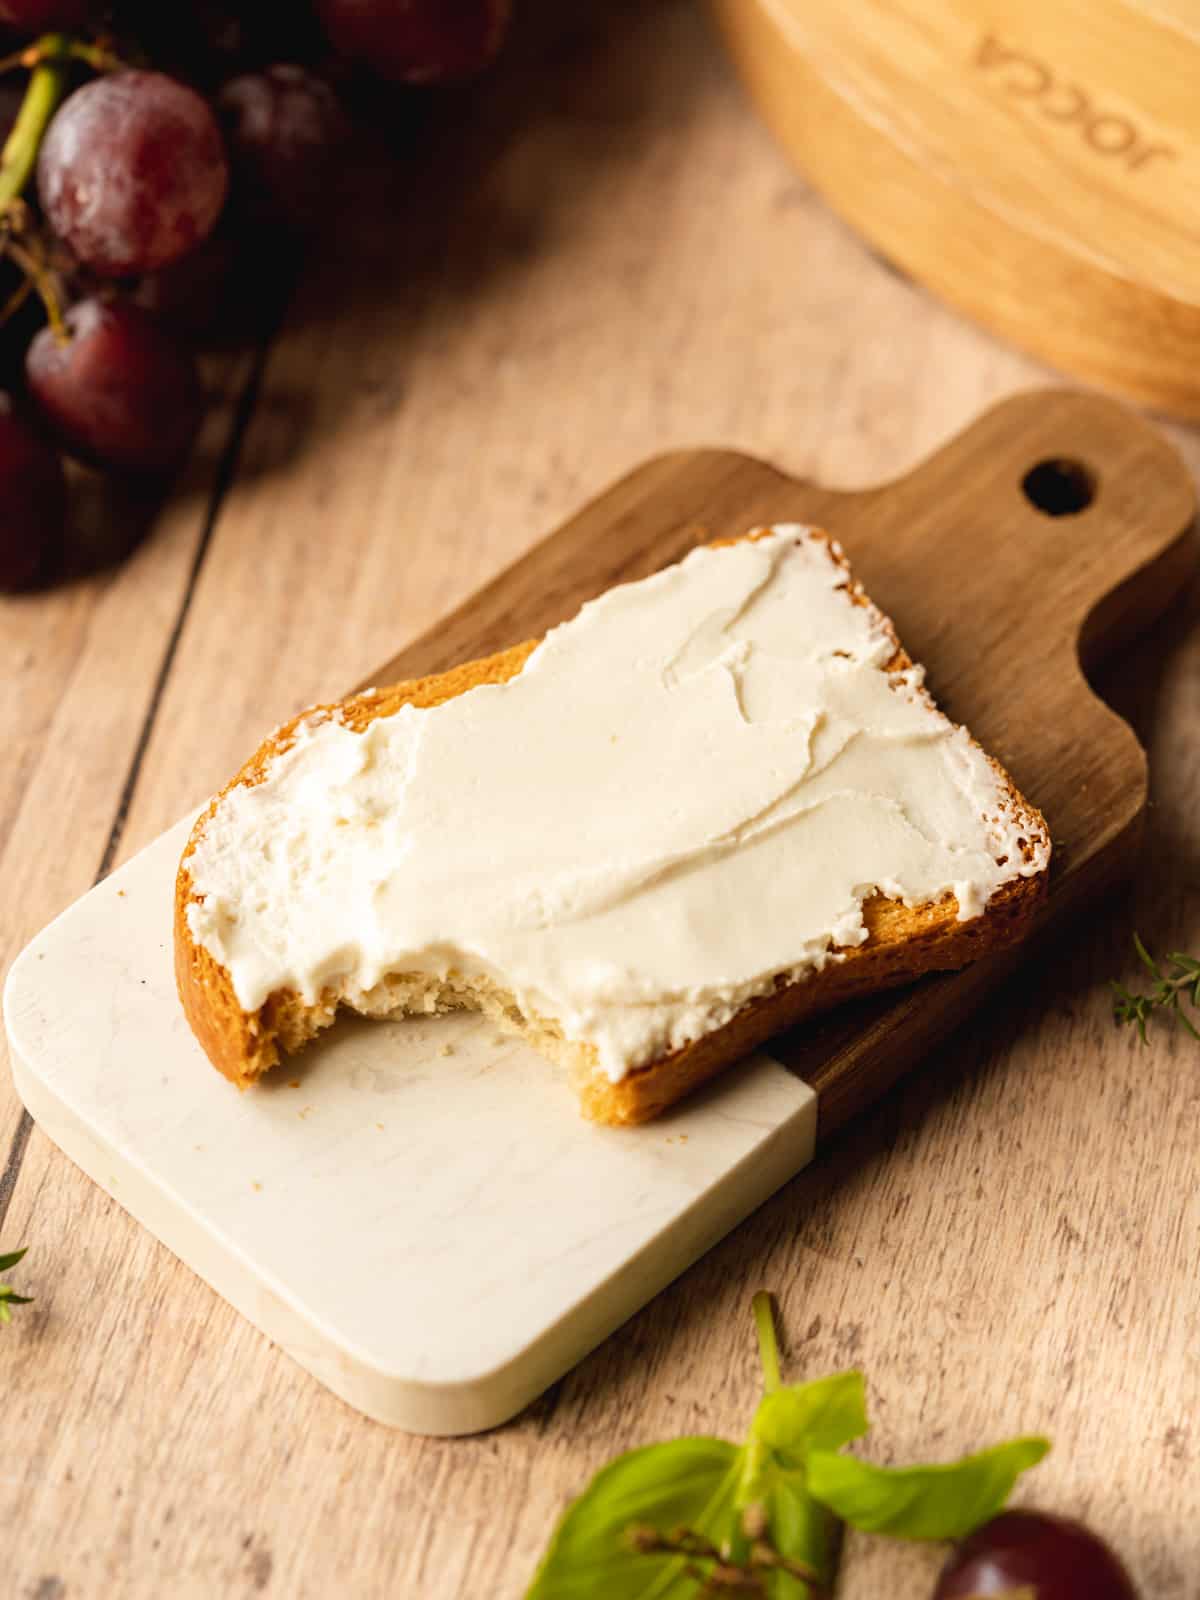
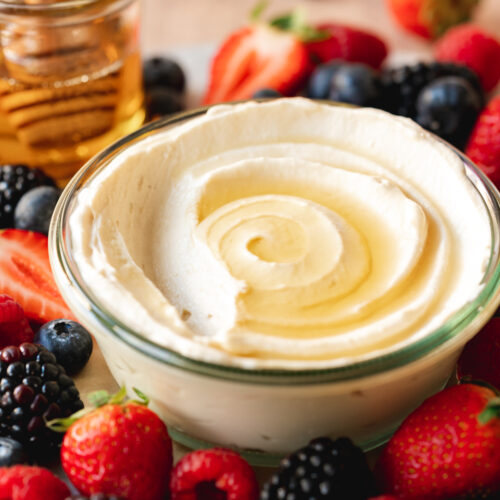
This is by far the best vegan cream cheese I've tasted, including storebought! It's made without tofu or nuts and no need for a high-powered blender or food processor. Plus you only need to spend about 15 minutes of active time to make it.
It honestly tastes so similar to Philadelphia cream cheese! If you'd prefer to make nut cheese, try my macadamia cheese or vegan Boursin recipe which is cashew-based.
Jump to:
🧾 Ingredients Needed
As promised, you only need 4 ingredients to make my homemade vegan cream cheese recipe. Here's what to grab:

Ingredient Notes
Find the complete list of ingredients, quantities, and instructions in the recipe card at the end of this post.
- Full-Fat Coconut Milk: Avoid coconut milk with added guar gum or other stabilizers, as this prevents the cream from separating - which is necessary for this recipe. I recommend Biona or Nature's Charm natural coconut milk. Alternatively, you can purchase coconut cream. But DO NOT confuse it with canned "cream of coconut" which is a sweet bar mixer.
- Lemon Juice: Freshly squeezed lemon juice makes the best tasting cheese. To get the most juice out of your fruit, give it a firm roll on the countertop for 10-15 seconds before slicing it open.
- Vegan Greek-Style Yogurt or Skyr: I use Alpro brand Greek-style soy yogurt, which adds a delicious cultured flavor to homemade cheese like vegan mascarpone and vegan ricotta. Please note that I haven't tried this recipe with coconut, nut, or oat-based yogurt, so the taste may change the consistency somewhat. Soy is a great choice for a neutral flavor and firm texture.

Get Your Free E-Book!
Sign up to the Addicted to Dates newsletter for your FREE Guide To Vegan Cheesecakes!
🥣 Instructions
Here are step-by-step images showing how to make this dairy-free cream cheese. Please refer to the detailed printable recipe card at the end of this page for full measurements and written instructions:
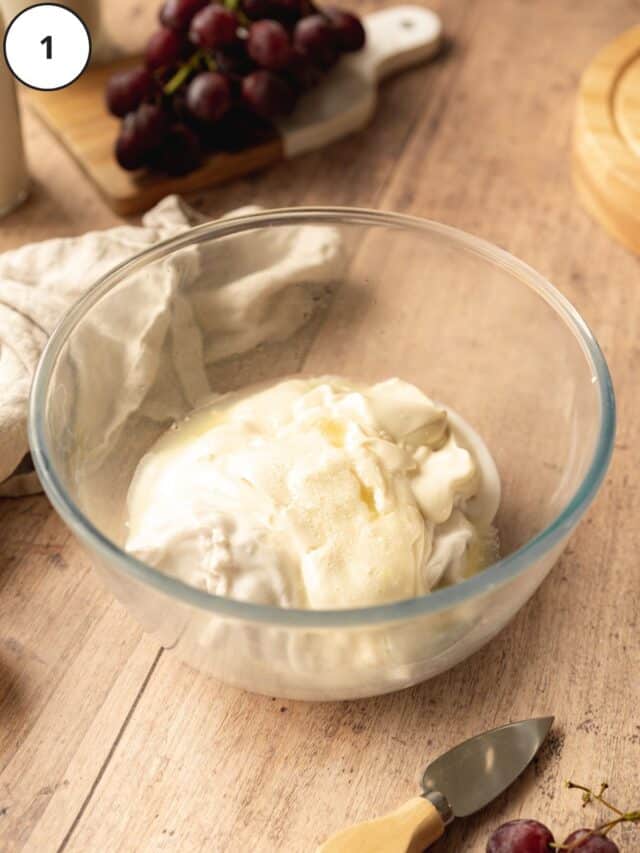
Step 1: Add the thick coconut milk from the top of the can to a mixing bowl with vegan yogurt, lemon juice, and sea salt.
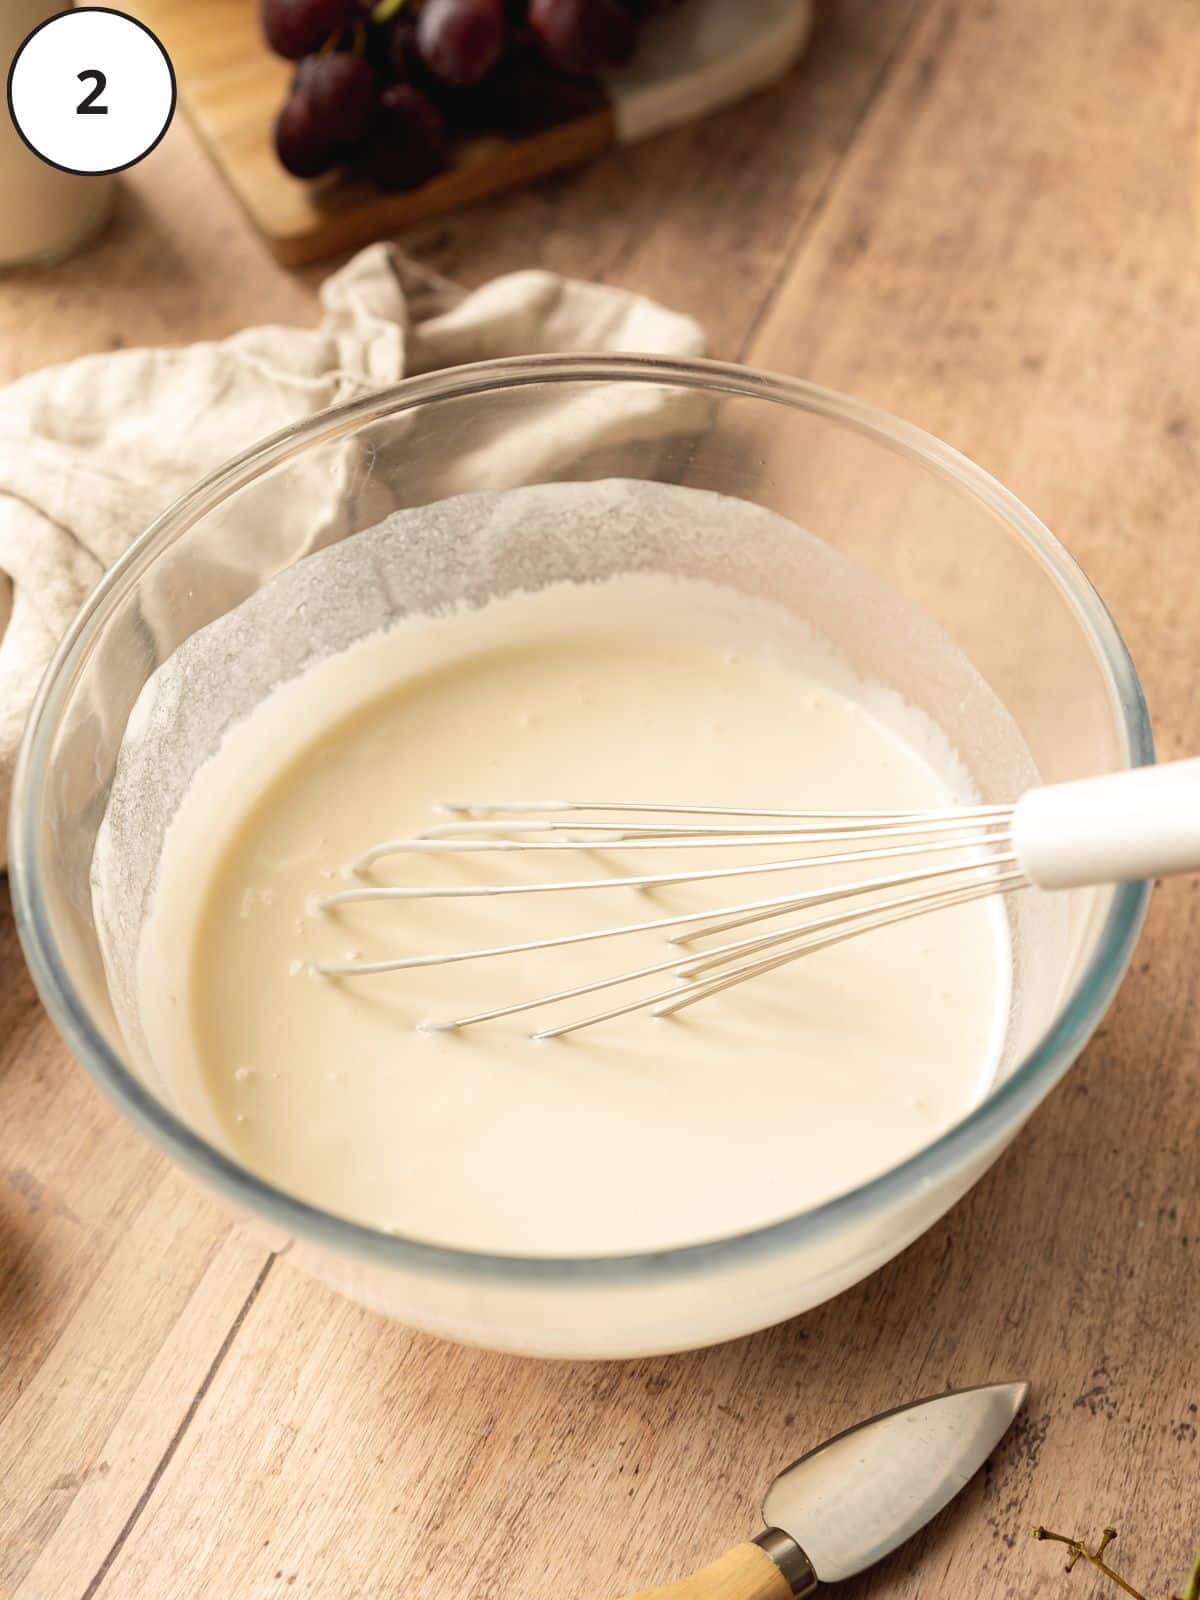
Step 2: Whisk everything together until smooth.
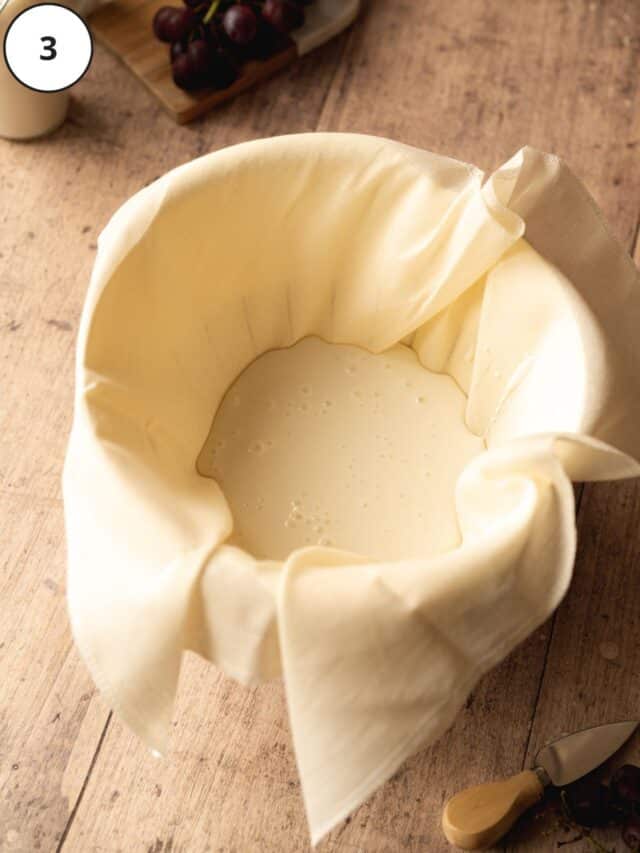
Step 3: Place a sieve or colander over a second large mixing bowl and line it with cheesecloth. Transfer the cheese mixture to the prepared vessel.
Step 4: Lightly squeeze to strain out some excess liquid, then secure the top of the cheesecloth with a rubber band.
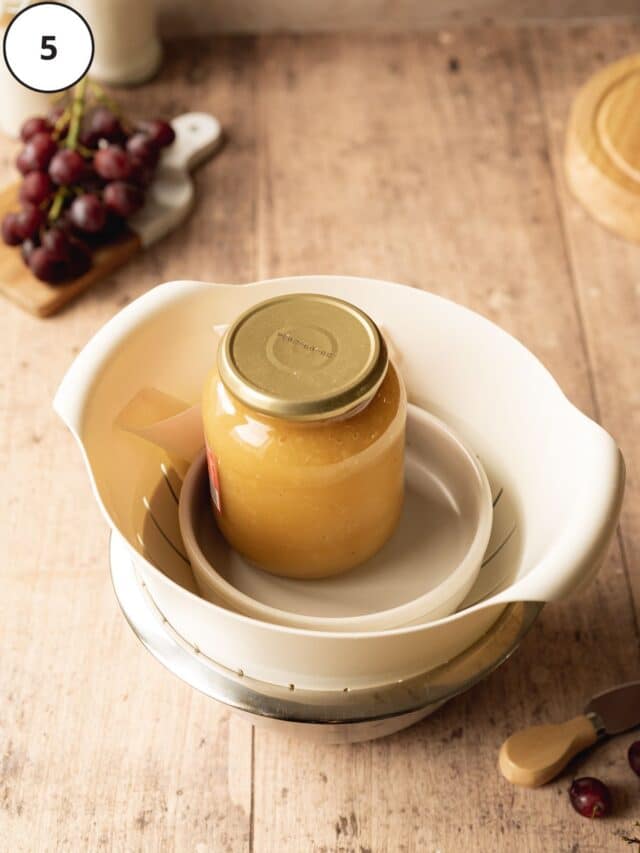
Step 5: Place a small plate on top with 1-2 heavy cans to help drain off the liquid. (I used a 700g jar of apple sauce, but 2x 400g cans of any unopened foods you have will do the job!) Refrigerate for 4 hours.
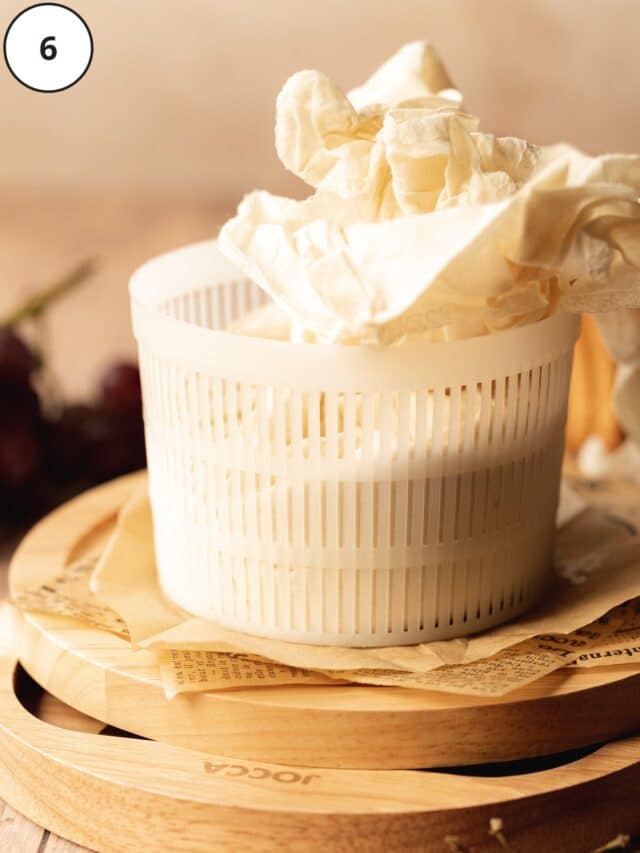
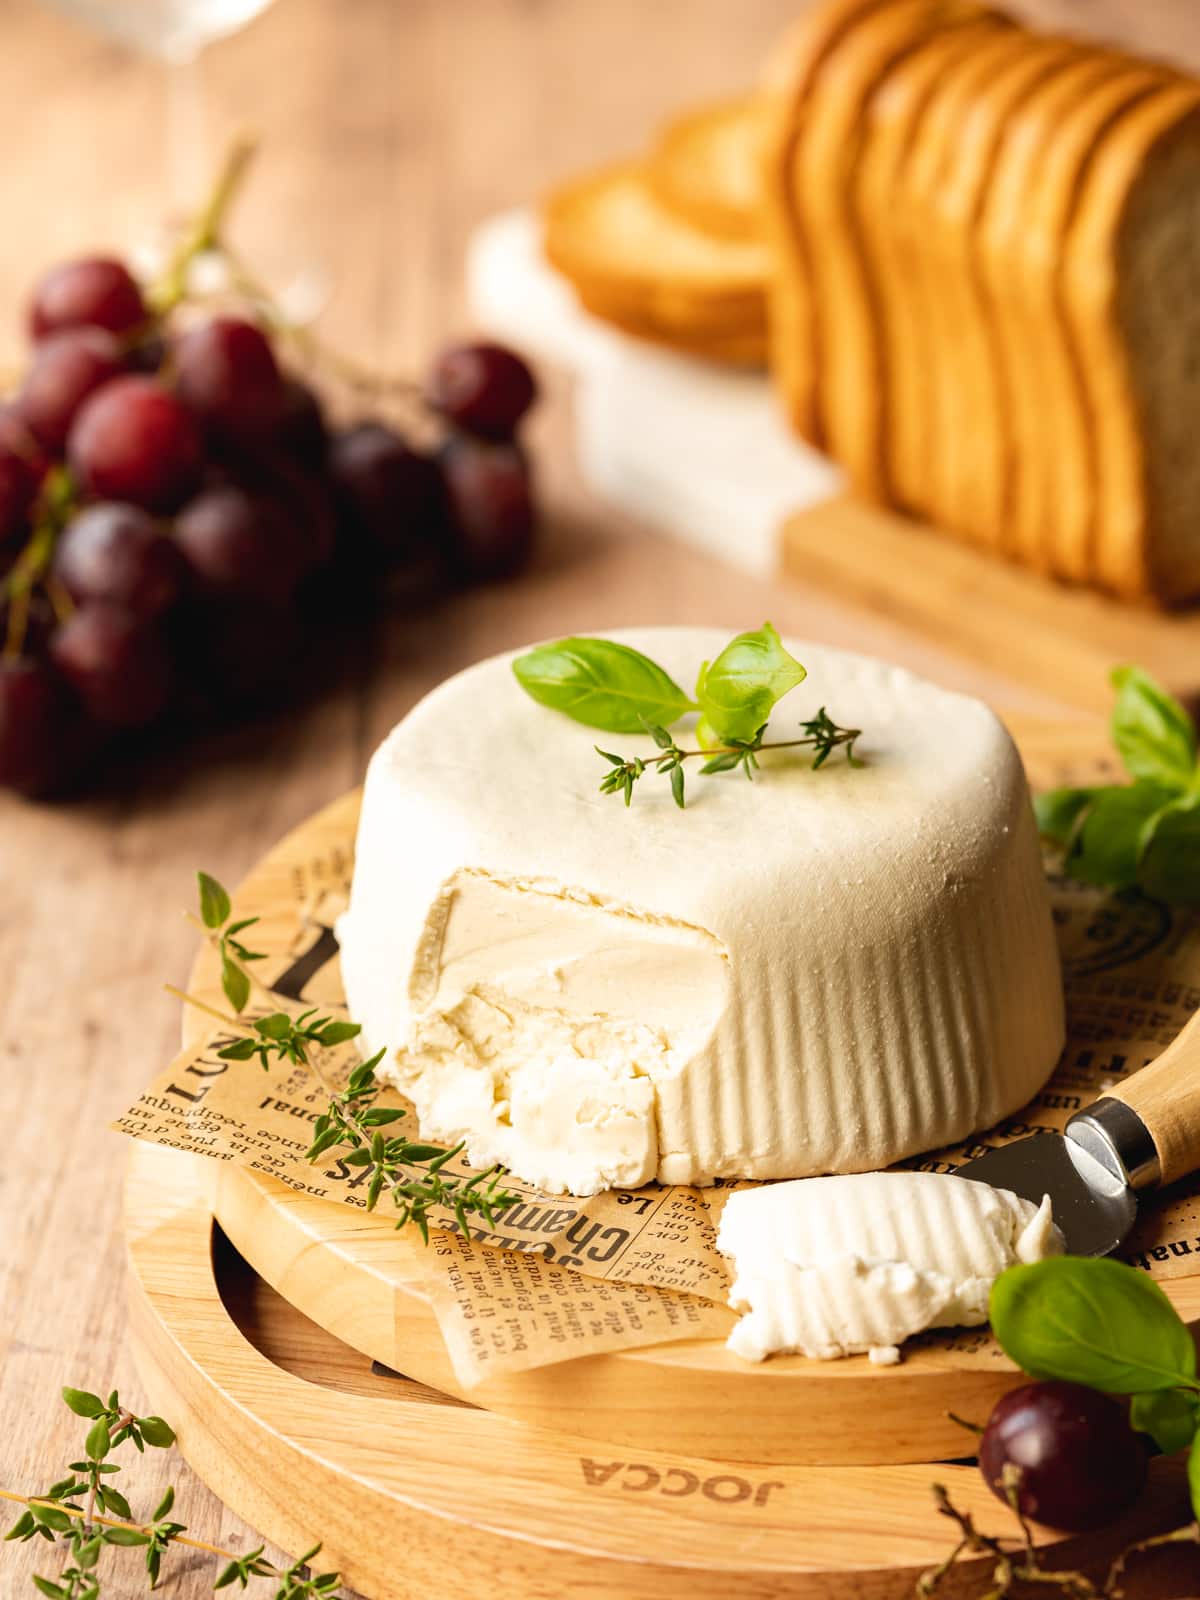
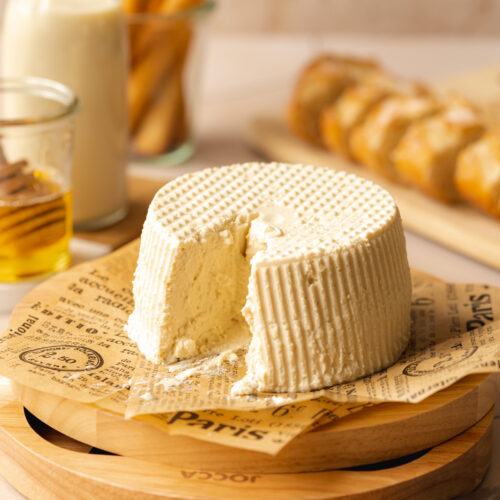
Step 6: If you want a cream cheese block as pictured, place the cheesecloth sack into a cheese-making mold and refrigerate overnight (24-48 hours for best results). If you're not using a mold, just continue to refrigerate for the same amount of time in the original straining vessel.
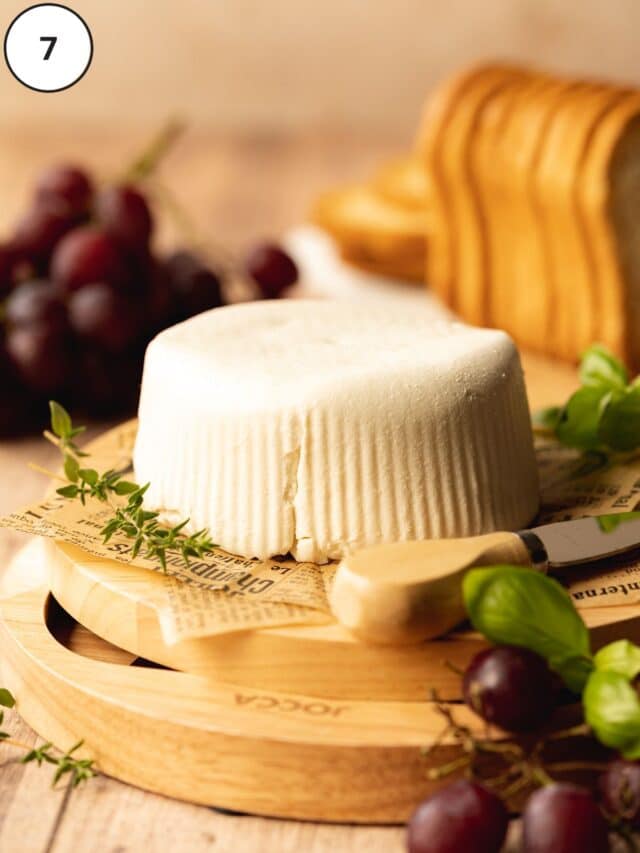
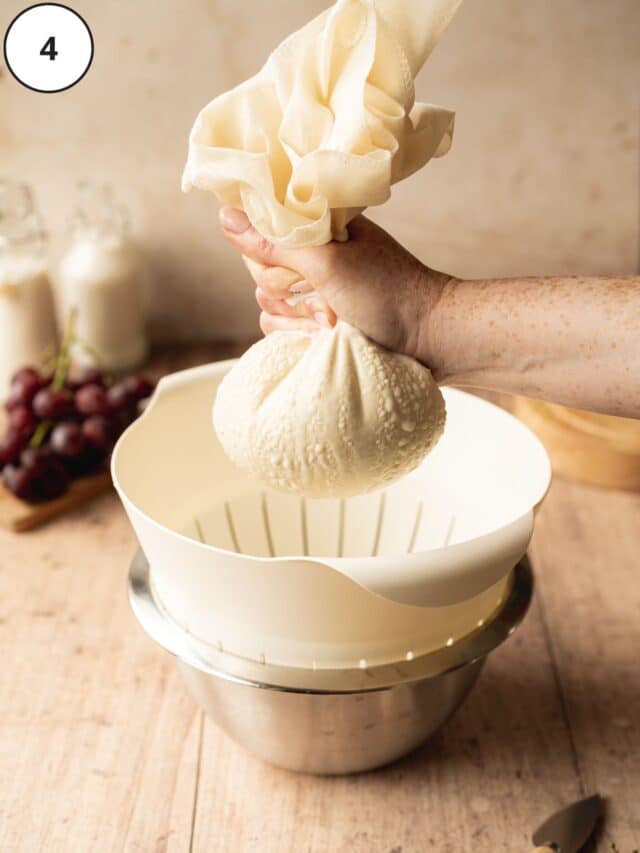
Step 7: Remove the block of cream cheese from the cheesecloth. You'll be left with a mixture of water and light cream in the bowl. You can reserve this and use it for other recipes. What's left in the cheesecloth will be thick and creamy vegan cheese.
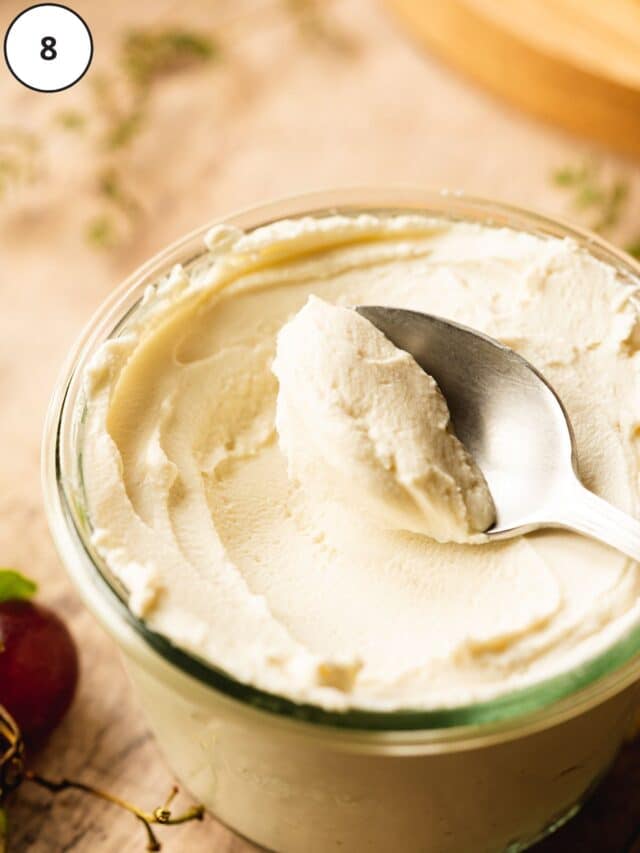
Step 8: Place the cream cheese in an airtight container and refrigerate for up to 7 days, or freeze for up to 2 months.
🍽 Serving Suggestions
This vegan cream cheese substitute can be used in place of traditional cream cheese, including sweet or savory recipes:
- Cream Cheese Bagels
- Vegan Cheesecake
- Pound Cake by Vegan Richa
- Cookies
- Whoopie Pies by Floured Frame
- Frosting
- Vegan Carrot Lox & Bagels by Love And Lemons
- Mac & Cheese by This Savory Vegan
- Vegan Pimento Cheese by Glue & Glitter
- Party Dips like this Spinach Cream Cheese Dip by Karrisa's Vegan Kitchen
- Stuffed French Toast by Make It Dairy-Free
💭 Expert Tips
Coconut Milk. You'll only use the thick part that floats to the top of the can, so save the remaining milk for other uses.
Waste not, want not. Reserve the leftover water and cream from step 7 to use in smoothies, soups, curries, and stir-fries.
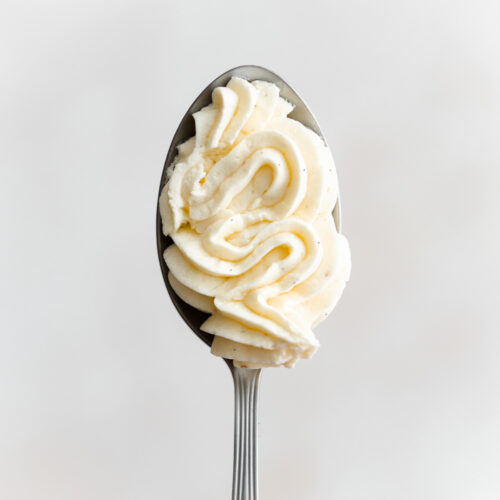
Don't rush the straining & chilling steps. Pressing out all of the liquid takes time, but it results in a supremely luscious consistency. If you stop it too soon, you'll end up with more of a creme fraiche consistency than a spreadable vegan cream cheese.
💬 FAQs
There sure is! While you can buy several vegan cream cheese brands in grocery stores, it can be tricky to find a plain vegan cream cheese that tastes great and is also suitable to use in recipes. I find that this from-scratch recipe yields the most convincing plant-based cream cheese around.
Absolutely! While all of my cheesecakes that call for DF cream cheese are no-bake (like this tasty vegan banoffee cheesecake), feel free to use this just like you would regular cream cheese next time you need an impressive plant-based dessert. 🤓
This vegan recipe yields a very convincing Philadelphia cream cheese doppelganger that melts just as well as the original.
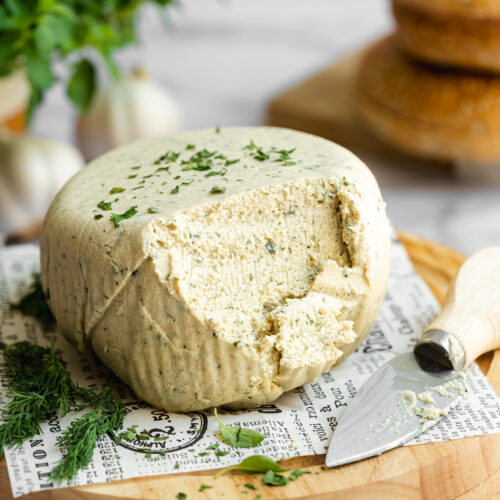
If you intend to use it for desserts (eg. cheesecake filling), I would keep it as plain cream cheese.
If not, however, you could make this into a savory cream cheese. Feel free to add a small amount of garlic powder, nutritional yeast (for a more cheesy flavor), salt, black pepper, and fresh herbs.
🥯 More Vegan Cheese
📖 Recipe
Vegan Cream Cheese (Nut-Free)
Equipment
Ingredients
- 350 g (1 ½ cups) full-fat canned coconut milk use thick part from the top only - (you will need 2x 400ml cans), *see note 1
- 200 g (⅘ cup) vegan Greek-style yogurt or Skyr I use Alpro (soy Greek-style)
- 1 tablespoon lemon juice freshly squeezed
- ½ teaspoon sea salt
Instructions
- Add all of the ingredients to a large mixing bowl and whisk together until smooth.
- Place a fine-mesh sieve or colander over a second large mixing bowl and line the sieve/colander with cheesecloth. Transfer the mixture to the lined sieve/colander.
- Carefully squeeze out some of the excess liquid. Secure the top of the cheesecloth with a rubber band.
- Place a small plate on top with 1-2 heavy cans on top (these act as a weight to help drain off the liquid!). I used a 700g jar of apple sauce, but 2x 400g cans of any unopened foods you have will do the job! Refrigerate for 2-4 hours.
- After 4 hours, if you want to shape the cheese as pictured, place it into a cheese-making mold (while remaining in the cheesecloth) and refrigerate overnight (24-48 hours in total). If you're not using a mold, just continue to refrigerate for the same amount of time.
- Remove the block of cream cheese from the cheesecloth. After the cheese is chilled and strained, you'll be left with a mixture of water and light cream in the bowl. You can reserve this and use it for other recipes like smoothies, soups, and stir-fries. What's left in the cheesecloth will be thick vegan cream cheese.
- Storage: Place the cream cheese in an airtight container and refrigerate for up to 7 days, or freeze for up to 2 months.
Notes
- Coconut Milk - Avoid coconut milk with added guar gum or other stabilizers, as this prevents the cream from separating - which is necessary for this recipe. I recommend Biona or Nature's Charm natural coconut milk.
- Reserve the leftover water from the cans of coconut milk to use in smoothies, stir-fries, or soups.
- Use fresh lemon juice. Bottled lemon juice is usually spiked with lemon essential oil, which gives it somewhat of a heavy-handed flavor.
- Don't rush the straining & chilling. Pressing out all of the liquid takes time, but results in a luscious consistency. If you stop it too soon, you'll end up with more of a creme fraiche consistency.
© addictedtodates.com. All content and images are protected by copyright. If you want to share this recipe, please do so using the share buttons provided. Do not screenshot or republish the recipe or content in full. Instead, include a link to this post for the recipe. Thank you!