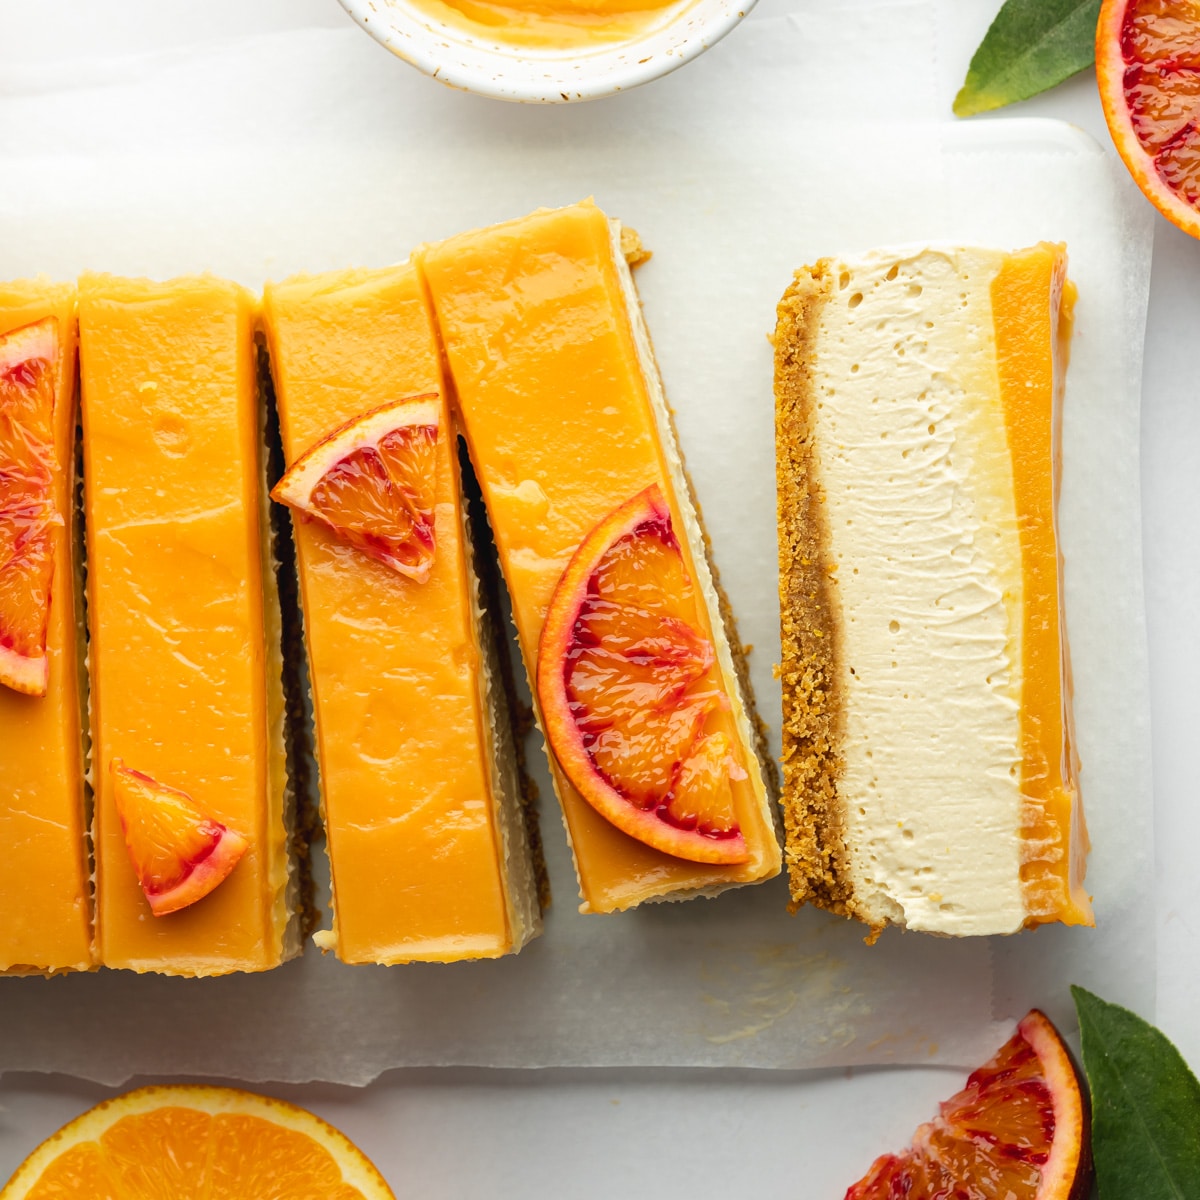
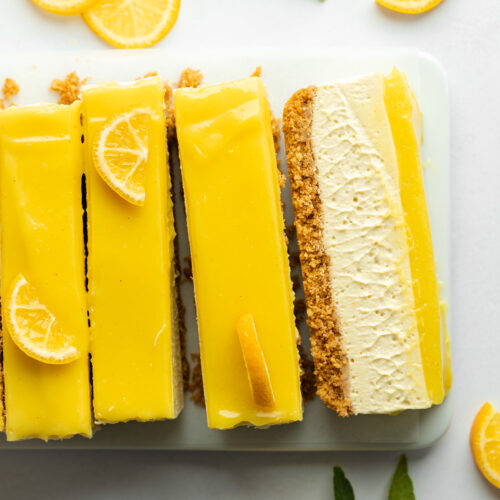
If you love my lemon cheesecake bars you will adore this bright and zesty orange version. The filling is flavored and topped with homemade orange curd.
The combination of orange vanilla cream cheese and juicy orange topping makes it taste like orange creamsicles!
🧾 Ingredients
Here's everything you need to make this easy cheesecake:

Ingredient Notes
Find the complete list of ingredients, quantities, and instructions in the recipe card at the end of this post.
- Orange Curd: My homemade curd uses freshly squeezed orange juice and zest for an intense orange flavor. Use a combination of blood oranges and regular oranges for a gorgeous vibrant color.
- Orange Zest: Freshly grated orange zest gives the ginger cookie crust a kick of orange flavor.
- Soaked Cashews: For a slightly cheesy flavor, creamy consistency, and structure.
- Vegan Greek Yogurt: Use thick Greek-style yogurt for the best results. You can swap this for vegan sour cream or coconut yogurt if needed.
- Vegan Cream Cheese: I use violife cream cheese, which is great for no-bake cheesecake. You can also use homemade dairy-free cream cheese.
- Vegan Cookies: I use ginger nuts as I love the flavor combination of orange and ginger, but you can use biscoff, digestives of vegan graham crackers.
- Pure Vanilla Extract: This mellows the citrus flavor, giving it that signature orange creamsicle taste.
- Optional Sweetener: The filling itself is quite tangy, so give it a taste and add a tablespoon of maple syrup, agave, or granulated sugar if needed.
If you're also a chocolate lover I think you'll enjoy this chocolate orange cheesecake too!
🔪 Instructions
Here are step-by-step images so you have a visual of how to make this simple yet delicious cheesecake. Please refer to the detailed printable recipe card at the end of this page for full measurements and written instructions:
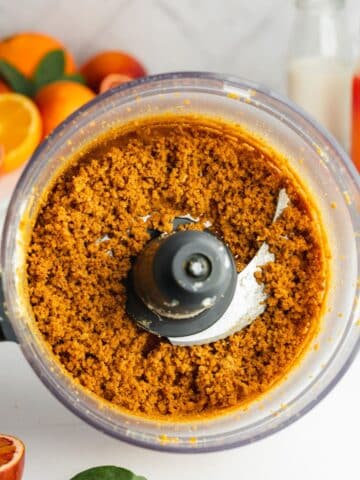
Step 1: In a food processor, blitz the cookies, zest, butter, and salt until it forms wet sand.
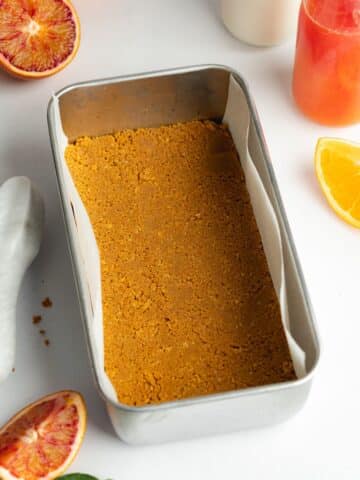
Step 2: Press the cookie crust into the base of a loaf pan lined with parchment paper. Use the back of a spoon or glass to compact it into the bottom of the pan.
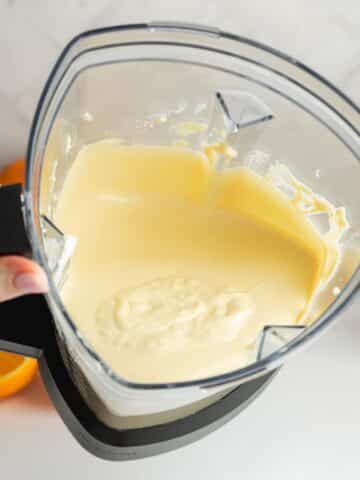
Step 3: Blend the filling ingredients in a high-speed blender for several minutes until smooth. There should be no visible lumps, so keep blending until you have a perfectly creamy cheesecake filling.
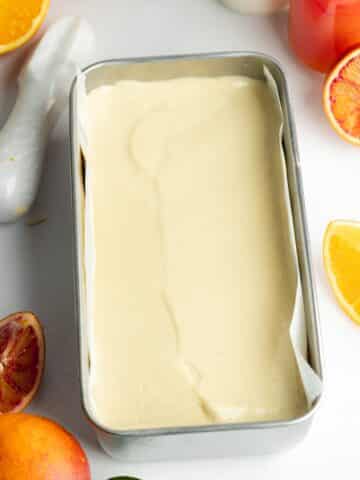
Step 4: Pour the cheesecake batter into the prepared pan and set it in the fridge or freezer.
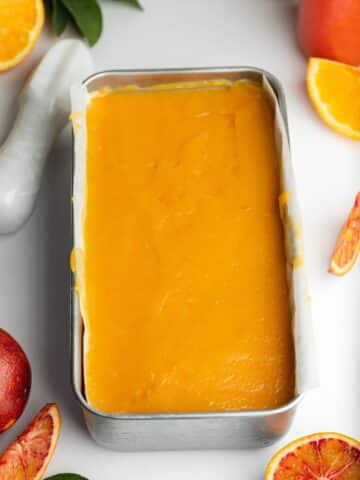
Step 5: Gently heat the remaining orange curd over a water bath and spread it on top of the set cheesecake with an offset spatula.
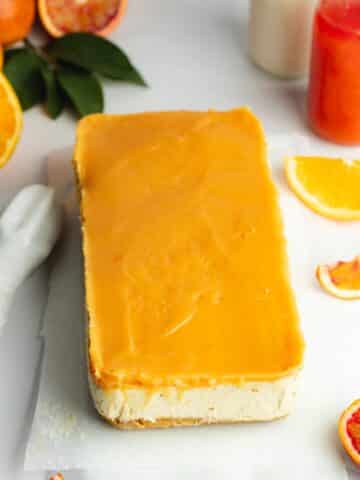
Step 6: Place it back in the fridge to set before carefully lifting it out of the pan and slicing it into servings.
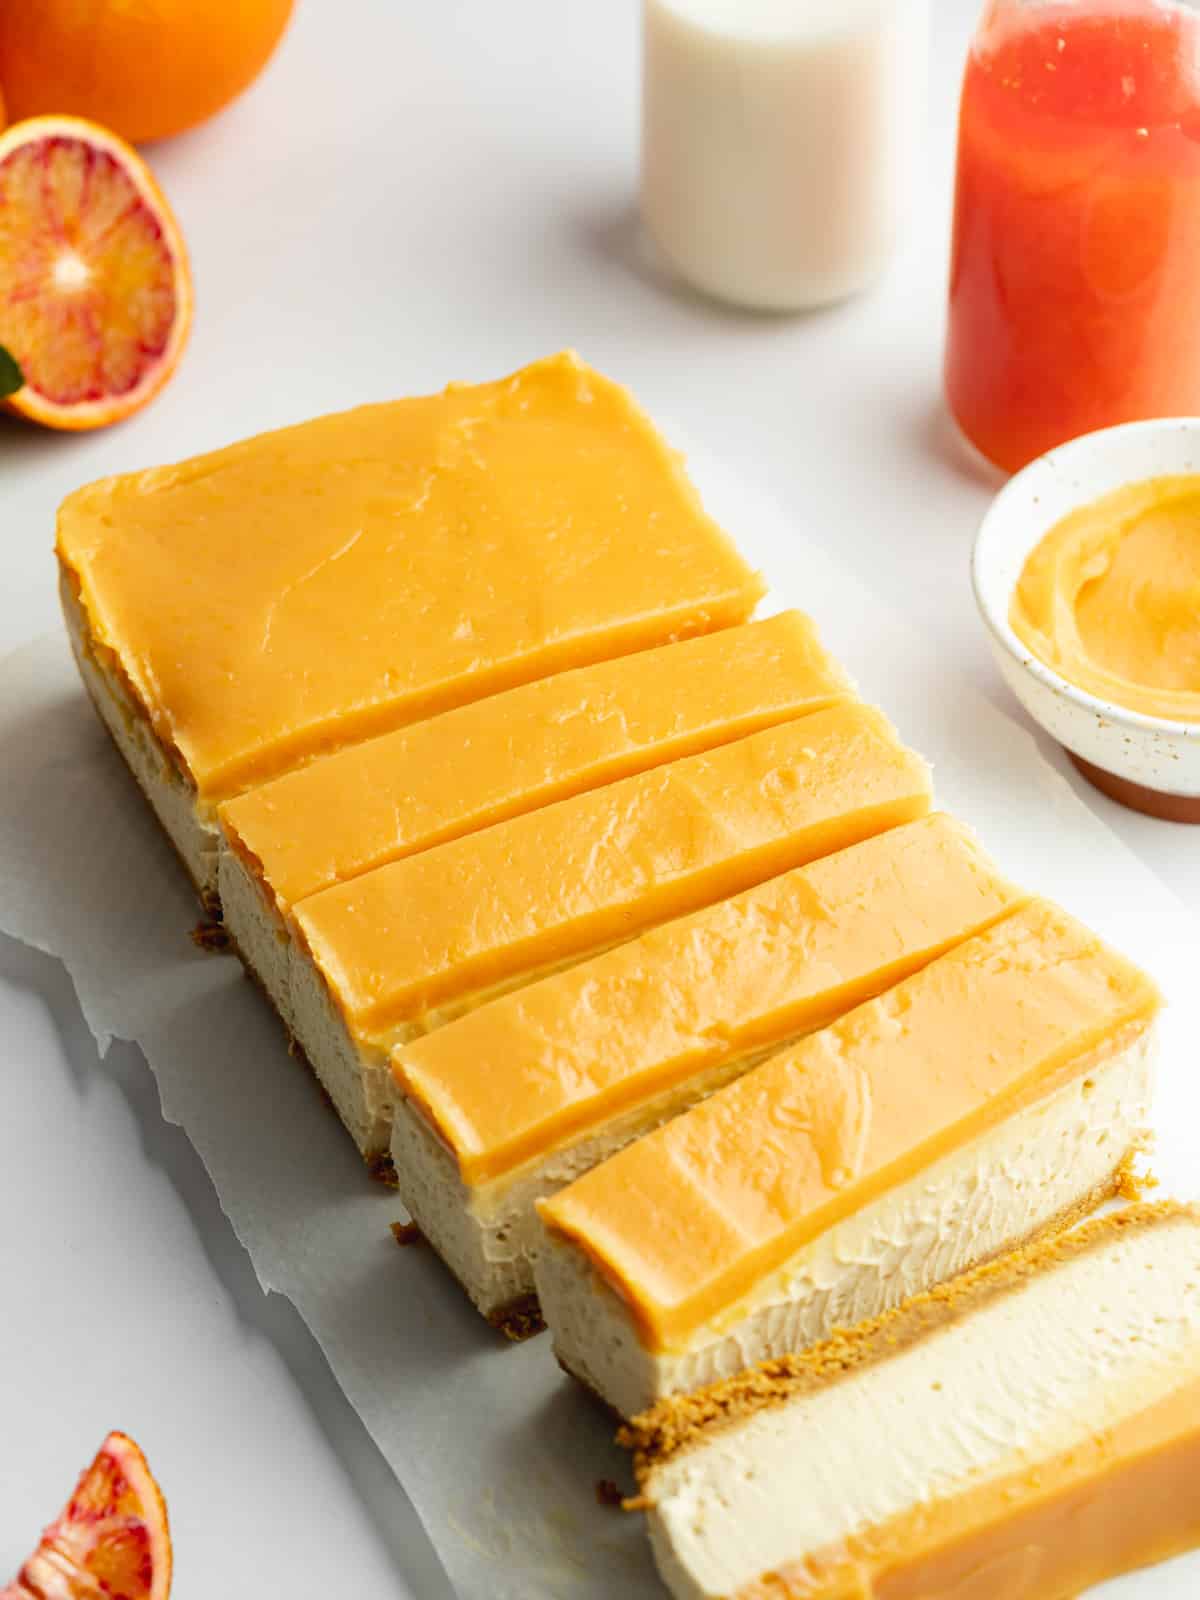
You can decorate the top of the cheesecake with fresh orange segments, orange peel, or candied orange slices.
💭 Recipe Tips
Use fresh orange juice. I cover this in my orange curd recipe, but make sure you don't use bottled orange juice or orange juice concentrate. Fresh juice is always going to give the best flavor.
Use a parchment sling. As we're using a loaf pan instead of a springform pan with a removable base, it's important to prep properly to prevent the cheesecake from sticking to the sides of the pan. Leave an overhang of parchment paper on the outside of the pan so you can easily lift out the cheesecake once set.
Use a sharp knife, wiping the blade clean with a kitchen towel between cuts.
Set it in the freezer if you're short on time. If you can't wait overnight, place it in the freezer for 3-4 hours. Slice the cheesecake while frozen, dip your knife in hot water, and wipe with kitchen paper between cuts. Let the slices defrost for an hour before serving.
💬 FAQs
Absolutely! It's a simple swap for gluten-free cookies to make this cheesecake gf. As always, please check the labels of the other ingredients to make sure they are suitable.
Absolutely. You can make it in a round 7.5-inch or 8-inch spring form pan. Just times the recipe by 1 +⅓ for a decent-height cheesecake! This small-batch recipe serves 8 people, whereas a full-sized version will serve around 12 people.
If you have a larger pan such as a 9-inch or 10-inch, I would double the recipe which will comfortably serve 15 people.
Place leftover cheesecake in an airtight container or plate covered with plastic wrap and refrigerate for up to 5 days.
You can freeze it for up to a month. Instead of freezing the whole cheesecake, slice it into servings and place them in a freezer-safe container. Separate the slices with pieces of parchment paper to prevent them from freezing together, that way you can grab a slice whenever you fancy! Let it defrost at room temperature for an hour before serving.

🍰 More Vegan Cheesecake

📖 Recipe
Easy Vegan No Bake Orange Cheesecake
Ingredients
- 1 batch (500 g) vegan orange curd prep-ahead option *note 1
Crust
- 150 g (5.3 oz) vegan cookies *note 2
- Zest of 1 orange
- 45 g (3 tablespoons) unsalted vegan butter (block-style)
- ¼ teaspoon sea salt
Filling
- 150 g (1 cup + 2 tablespoons) cashews soaked ahead of time *note 3
- 300 g (10.5 oz) vegan cream cheese
- 80 g (⅓ cup) vegan Greek-style yogurt *note 4
- 1 teaspoon vanilla extract
- 1 tablespoon pure maple syrup agave or sugar, optional
Instructions
- Prepare: Make this orange curd recipe (full recipe and instructions are linked in the pink text) up to 2 days ahead and refrigerate until ready to use. Pre-soak the cashews in water for 4 hours, rinse, and drain. Or quick-soak by simmering them in water for 30 minutes. Line the base and sides of a 9" loaf pan with parchment paper.
- Make the crust: Add the cookies, orange zest, butter, and salt to a food processor and blitz for a couple of minutes until the mixture sticks together between your fingers.
- Press the crust into the base of the pan and smooth it down with your fingers or using a spoon, making sure it is compact. Refrigerate while you make the filling.
- Make the filling: Add 200g (about ½ cup) of the orange curd to a high-speed blender with the other filling ingredients. Blitz until smooth and creamy without any lumps. Pour the filling into the pan and refrigerate for at least 6 hours (or overnight) until set. *note 5
- Add the topping: Gently heat the remaining orange curd over a double boiler while stirring until it becomes a spreadable consistency. Spread the curd over the cheesecake and smooth it out with an offset spatula or the back of a spoon. Place back in the fridge for an hour, or set it in the freezer for 30 minutes before slicing.
- Serving and storage: Once set, use a hot wet sharp knife to cut it into servings. They will keep for up to 5 days in a covered container in the fridge. They should keep well in a freezer-safe container for up to a month. To serve, simply defrost in the fridge overnight.
Notes
- Vegan Orange Curd: Prep up to 2 days in advance and store in the fridge. The full recipe and instructions are linked in the pink text above.
- Vegan Cookies: I use ginger nuts, you can swap for biscoff, digestives, or vegan graham crackers, GF if needed.
- Soaked Cashews: soak the cashews in water for 4 hours, rinse, and drain, or quick-soak your cashews by simmering for 30 minutes.
- Greek-Style Yogurt: Sub with vegan sour cream, vegan skyr, or very thick coconut yogurt.
- Setting Time: If you can't wait overnight, set the cheesecake in the freezer for 3-4 hours. Slice the cheesecake while frozen and let the slices defrost for an hour before serving.
© addictedtodates.com. All content and images are protected by copyright. If you want to share this recipe, please do so using the share buttons provided. Do not screenshot or republish the recipe or content in full. Instead, include a link to this post for the recipe. Thank you!