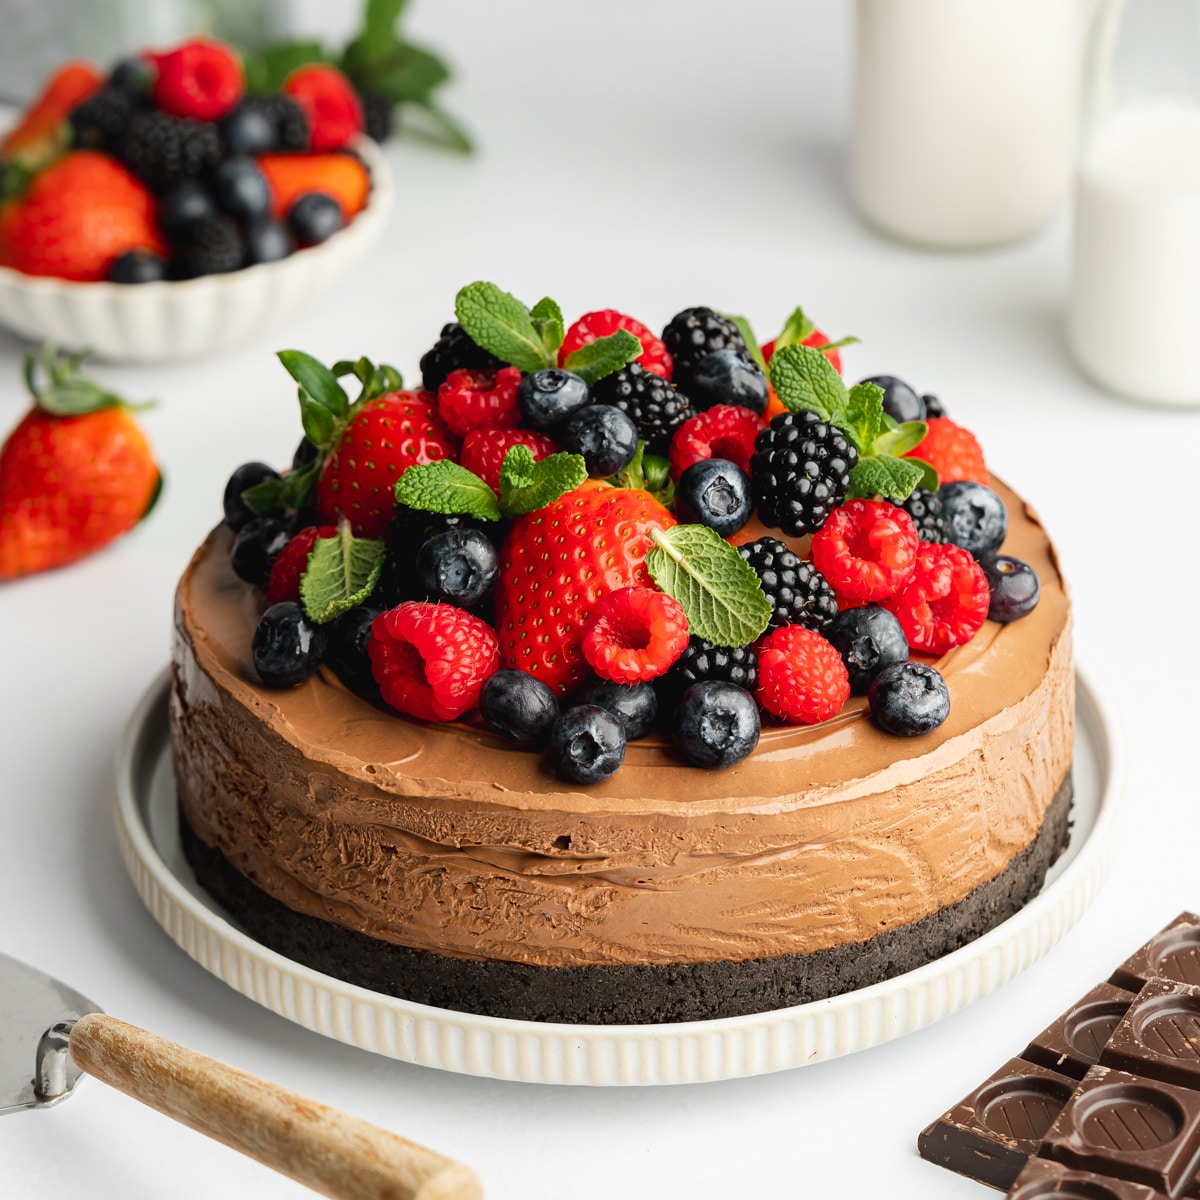
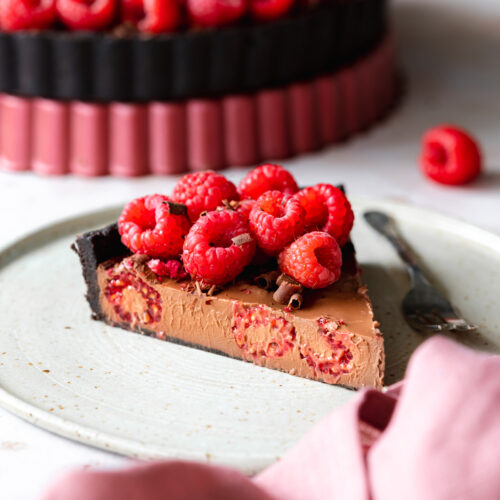
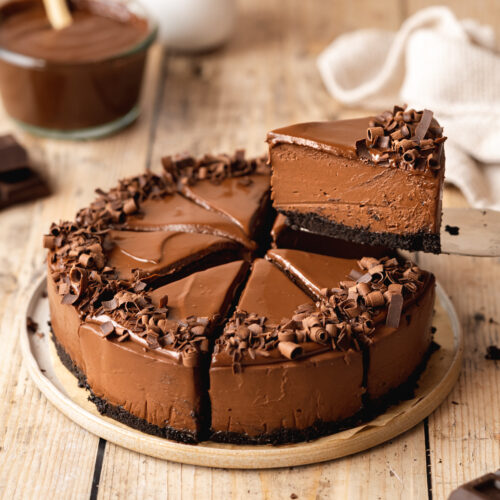
With a decadent chocolate mousse filling on top of a no-bake chocolate cookie crust, this easy recipe is the ultimate dessert for chocolate lovers, while being simple enough for bakers of all skill levels.
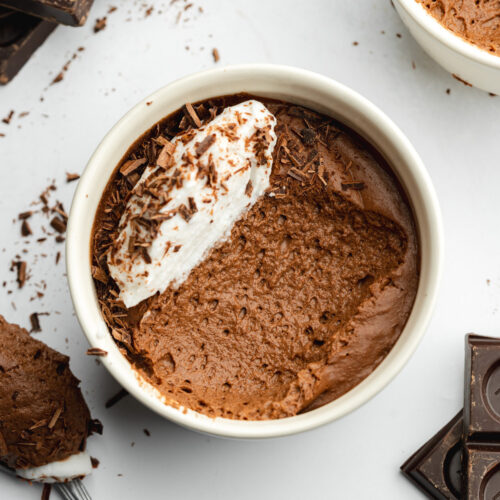
As the filling is based on silken tofu mousse, it has a super creamy texture quite different from this fluffy vegan chocolate mousse recipe made with aquafaba.
Note: Based on feedback, I have adjusted the recipe quantities for a slightly more set filling. I've included the original measurements in the recipe notes for those of you who loved it.
🧾 Ingredients
Here's everything you need to make this easy vegan chocolate mousse cake:
Ingredient Notes
Find the complete list of ingredients, quantities, and instructions in the recipe card at the end of this post.
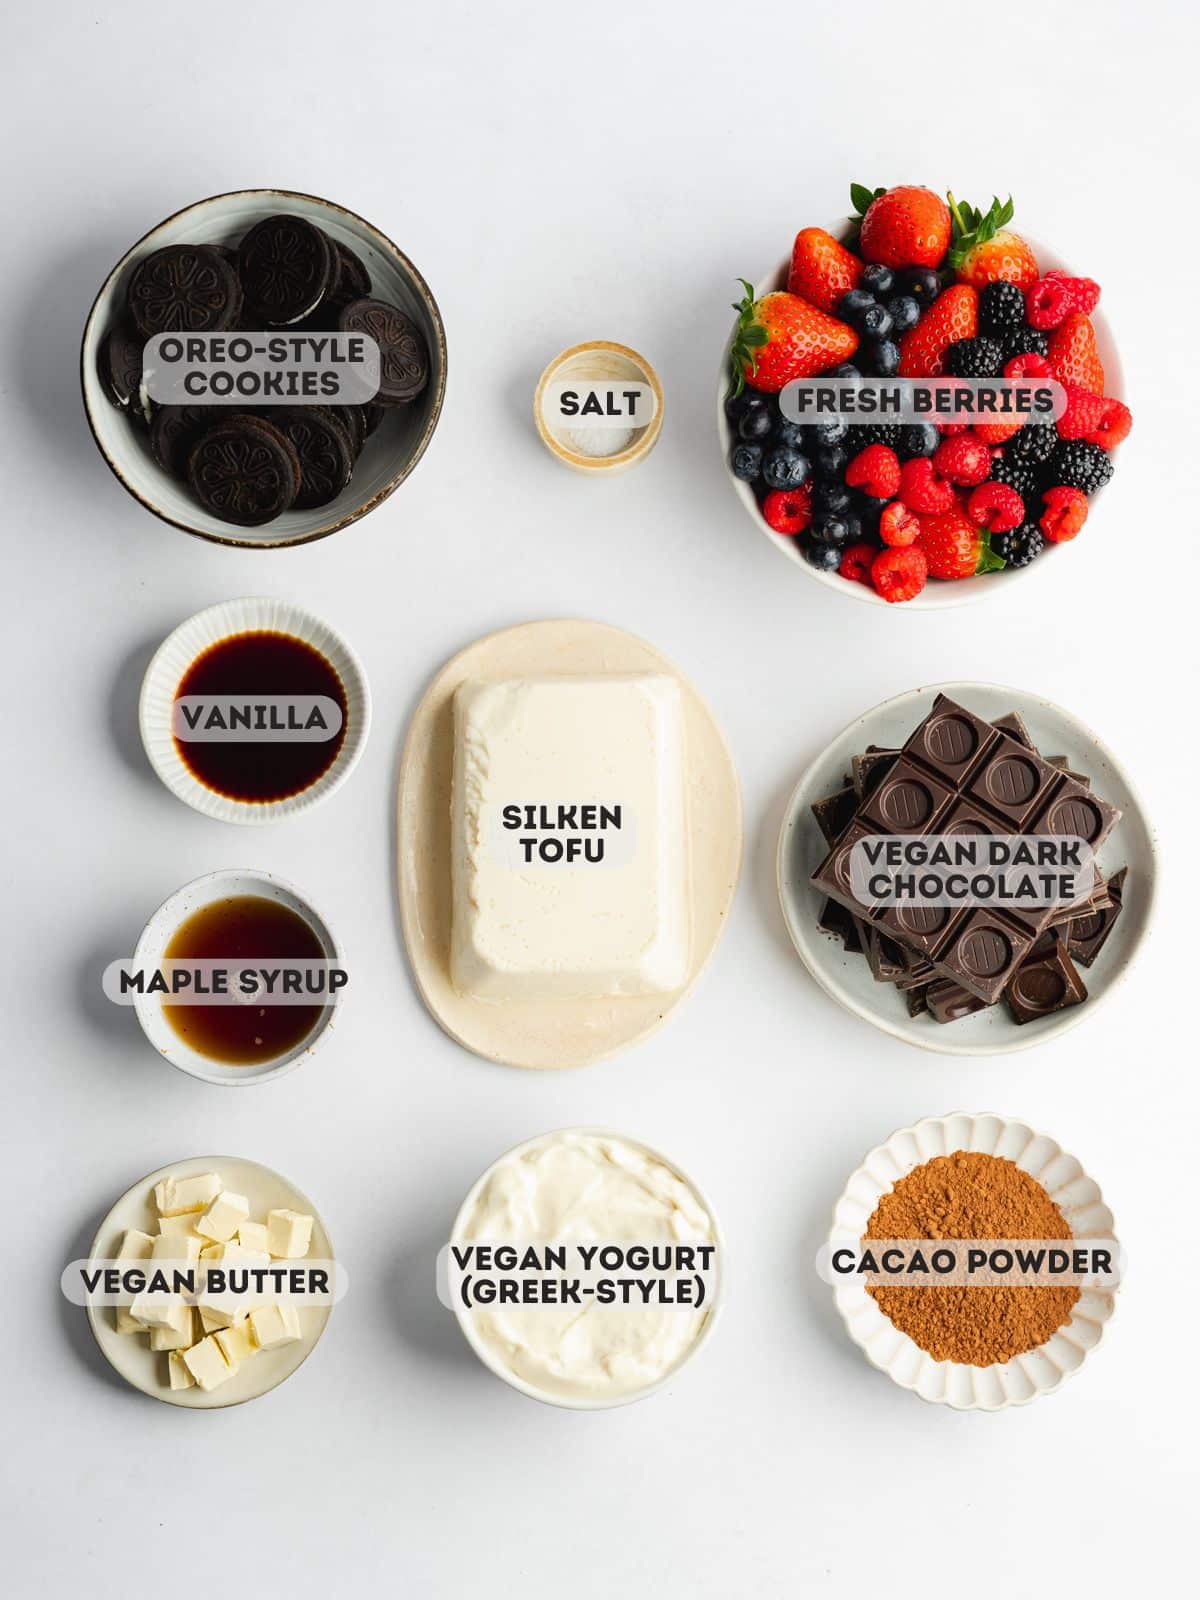
- Vegan Cookies: Oreo-style cookies form the base of the crust while the cream centers help to bind everything together. Go for a GF variety here to keep the recipe gluten-free if needed.
- Vegan Dark Chocolate Bars: The more bitter the chocolate, the less sweet the result. I usually go for 70% chocolate, but you can add one or two tablespoons of pure maple syrup to the filling according to your taste.
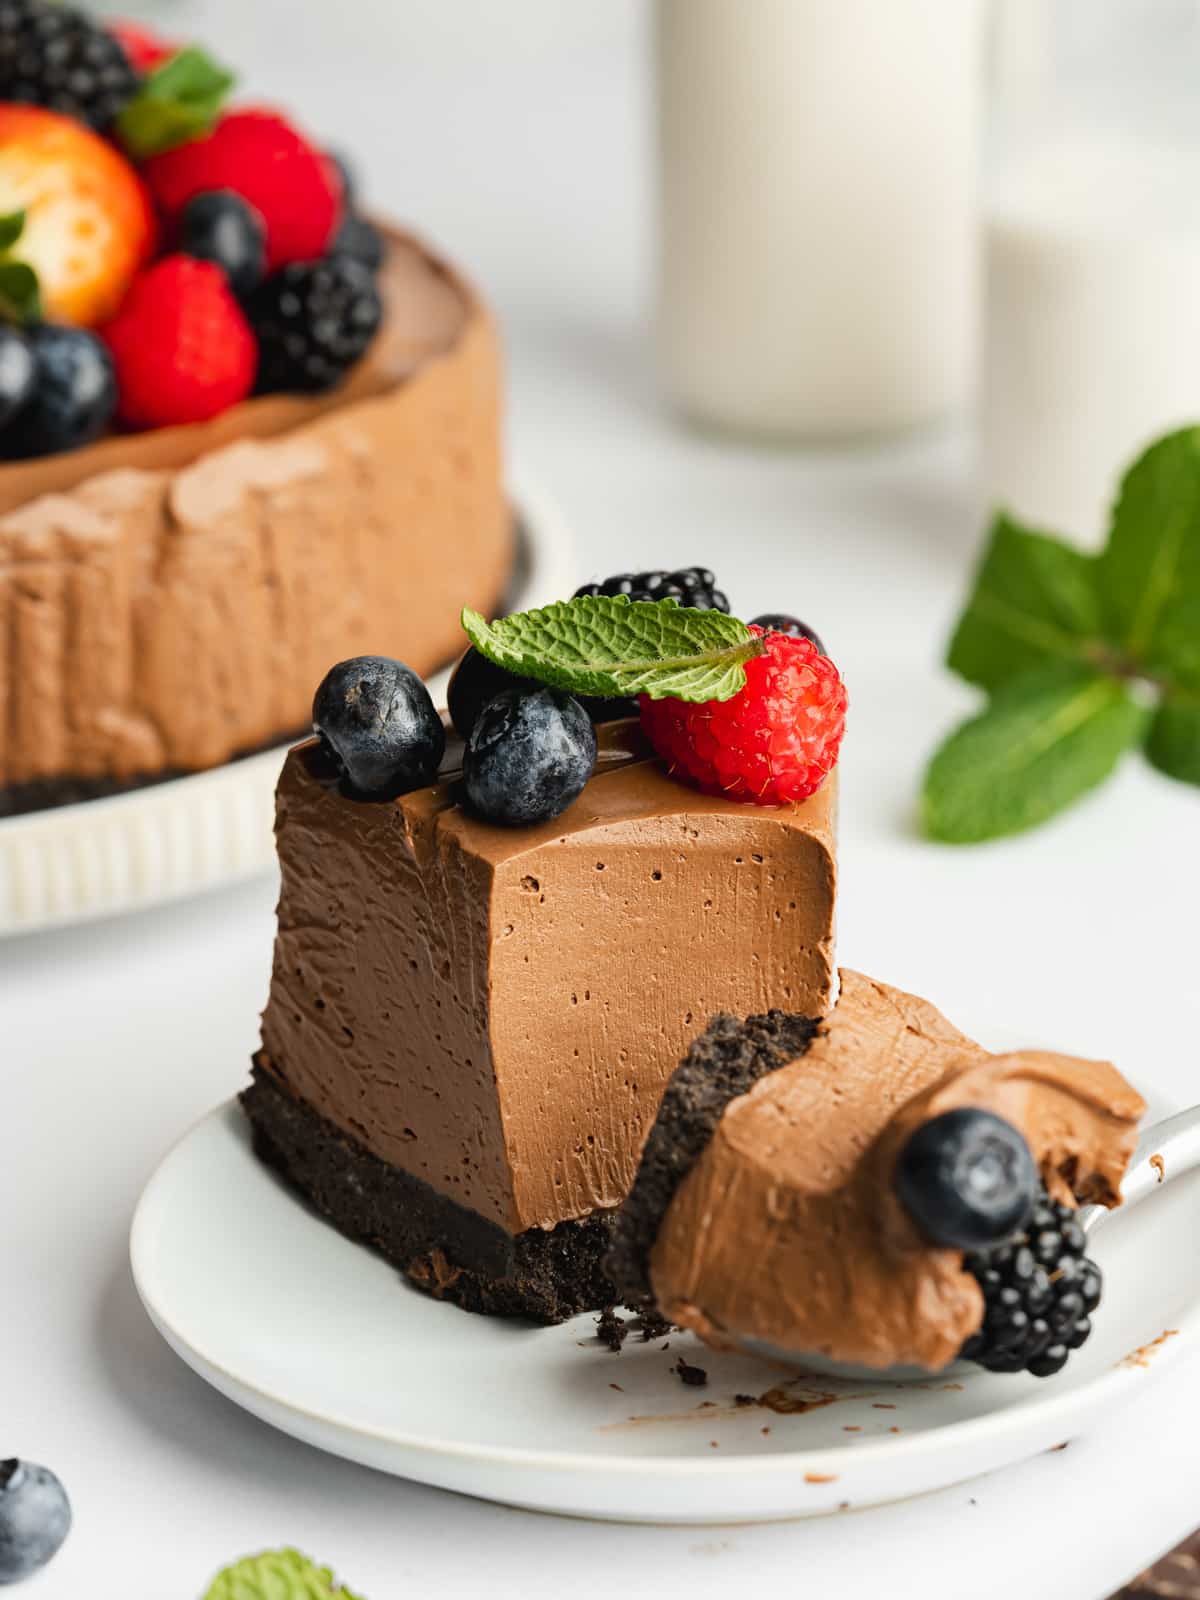
- Soft Silken Tofu: This high-protein ingredient is fantastic for creating creamy vegan desserts. It gives this cake its amazing creamy, silky texture, and don't worry you won't be able to taste it at all!
- Vegan Yogurt: I use Alpro Greek style but If you can't find vegan Greek-style yogurt, you can substitute it with thick coconut yogurt or additional silken tofu.
- Pure Maple Syrup: Since we're using bittersweet chocolate, maple syrup helps to lift the sweetness without added sugar.
- Cacao Powder: Use raw cacao powder for a slightly more acidic flavor or Dutch-processed cocoa powder for a deep rich chocolate flavor.
- Pure Vanilla Extract: Feel free to swap for half the amount of vanilla bean paste or half a scraped-out vanilla pod.
- Sea Salt: This intensifies the sweetness and enhances the chocolate flavor, so please don't skip it!
- Fresh Berries: I like to use fresh raspberries, blueberries, strawberries, and blackberries. Frozen berries should be avoided here as they end up mushy when defrosted.
Get Your Free E-Book!
Sign up to the Addicted to Dates newsletter for your FREE Guide To Vegan Cheesecakes!
🔪 Instructions
Here are step-by-step images showing how to make this vegan chocolate mousse cake recipe. Please refer to the detailed printable recipe card at the end of this page for full measurements and written instructions:
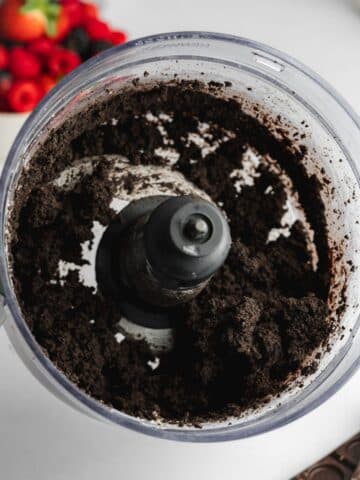
Step 1: Add the cookies and dairy-free butter to a food processor and blitz until the mixture resembles wet sand.
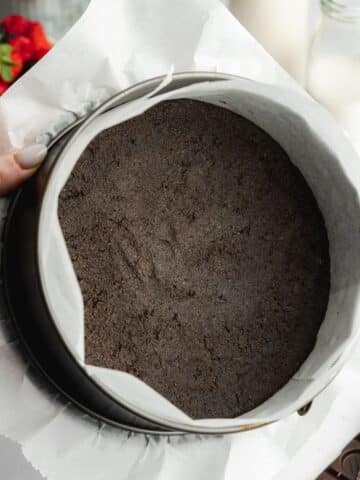
Step 2: Press the dough into the bottom of the pan lined with parchment paper.
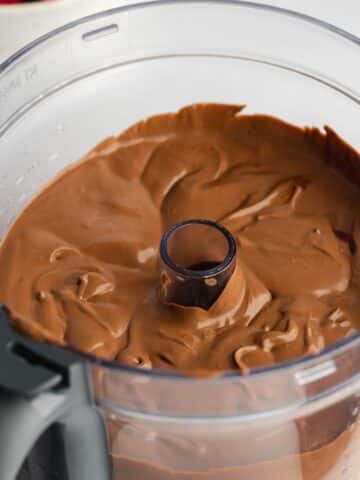
Step 3: Add all the filling ingredients to a high-speed blender and blitz until smooth. If using a food processor, it's best to blend the rest of the mousse ingredients before adding the chocolate. Then pour in the melted chocolate while the motor is running until evenly mixed.
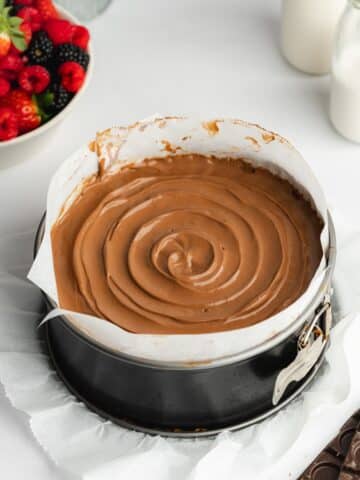
Step 4: Transfer the dark chocolate mousse to your pan and smooth out the top with an offset spatula. You can add a swirl on top as shown here by placing the cake on a turntable. Then use a spoon to swirl the top while spinning the cake turntable.
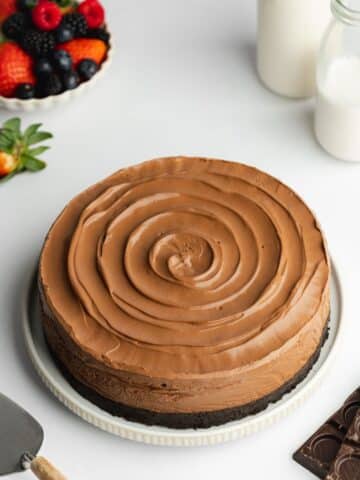
Step 5: Set the cake in the fridge for 4 hours, or in the freezer for half the time. You can also set it in the fridge overnight if that's easier. Once set, carefully remove the springform pan and strips of parchment paper.
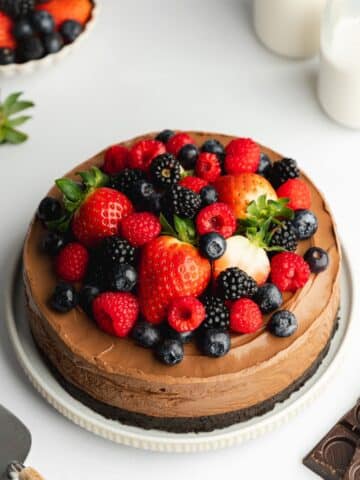
Step 6: Arrange fresh berries of your choice on top of the cake before serving, along with a few sprigs of fresh mint.
💭 Recipe Tips
Line both the bottom and the sides of your pan with parchment. This prevents the filling from sticking to the edges of the pan, making it easier to remove once set!
A high-speed blender is the quickest and most efficient way to blend the filling. However, if you don't have one, you can use your food processor instead. For the best results, blend all the ingredients apart from the melted chocolate, then mix in the chocolate with the motor running until combined.
Use a bain-marie to melt the chocolate. Add some water to a small saucepan and place the chocolate in a bowl on top of the pan (this is also known as a double boiler). Let the steam gently rise and melt the chocolate. Since we're using a lot of chocolate here, I don't recommend using a microwave as you risk burning it if heated for too long.
💬 FAQs
It will keep in an airtight container in the fridge for 5 days. That being said, the berries on top may not last as long depending on how fresh they were.
Absolutely! This just calls for an easy swap for gluten-free cookies. You can usually find them in the free-from section in large supermarkets. The variety I used here in the images is also gluten-free since I made this chocolate cake for a friend who can't have gluten 😊.
Yes, if you can't serve the entire cake within 5 days you can freeze it in a sealed container for 1-2 months. Make sure you remove the berries before freezing as they turn mushy when defrosted.
Also, slice the cake into servings to make it easier to grab one when you feel the craving! To defrost it, let it sit at room temperature for a couple of hours or in the fridge overnight.
🍫 More Vegan Chocolate Desserts
📖 Recipe
Vegan Chocolate Mousse Cake
Ingredients
Crust
- 250 g (8.8 oz) oreo-style cookies *note 2
- 4 tablespoons vegan butter or plantbased spread/coconut oil
Filling
- 400 g (14 oz) vegan dark chocolate 70%
- 400 g (14 oz) soft silken tofu
- 400 g (14 oz) vegan Greek-style yogurt *note 3
- 22 g (4 tablespoons) unsweetened cocoa powder *note 4
- 4 tablespoons pure maple syrup
- 2 teaspoons pure vanilla extract *note 5
- ½ teaspoon sea salt
Optional Toppings
- 400 g (2 ½ cups) fresh berries of choice
- fresh mint leaves optional
Instructions
- Note: Based on feedback, I have adjusted the recipe quantities for a slightly more set filling. I've included the original measurements in the recipe notes section below for those of you who loved it. *see note 1
- Preparation: Line the bottom and sides of a 7.5-inch or 8-inch springform cake pan with parchment paper.
- Crust: Add the cookies and vegan butter to a food processor and blitz blitz for a few minutes until the mixture sticks together between your fingers. Press the cookie mixture into the base of the cake tin, smoothing it out with a flat-bottomed glass or spoon, making sure it is compact. Set aside in the fridge.
- Melt chocolate over bain-marie/water bath: Add a little water to a small saucepan and place the chocolate in a medium bowl on top. Gently heat and let the steam from the water melt the chocolate, stirring often.
- Blend: Add the silken tofu, yogurt, cocoa powder, maple syrup, vanilla, and sea salt to a high-speed blender or food processor. If using a blender you can add the melted chocolate at this stage too and blend until smooth. If using a food processor, blend the other ingredients until smooth, then pour in the melted chocolate with the motor running until combined.In both cases, stop blending every so often to scrape down the sides of the jug as needed.
- Transfer the filling to the cake tin and use an offset spatula to even it out. To create the swirl effect on top, place the cake tin on top of a turntable, and use your spatula to make a swirl print on the surface of the cake whilst spinning the turntable.
- Chill: Place in the fridge to set for 4 hours (or overnight if preferred). Or you can set it in the freezer for 2 hours.
- Decorate: Once set, carefully remove the cake from the tin. Top with fresh berries and fresh mint sprigs.
Notes
- Original Recipe Quantities: 16/175g oreos, 11oz/310g dark chocolate, 12.5oz/350g silken tofu, 10.5oz/300g vegan yogurt, 2 tablespoons maple syrup. The rest of the ingredients remain the same.
- Oreo-Style Cookies: Use a gluten-free variety if needed.
- Vegan Greek-Style Yogurt: Sub for thick coconut yogurt or additional silken tofu.
- Cocoa Powder: Use raw cacao for a bitter flavor or Dutch-processed for a deep smooth flavor.
- Pure Vanilla Extract: Swap for 1 teaspoon vanilla bean paste or half a scraped-out vanilla pod.
© addictedtodates.com. All content and images are protected by copyright. If you want to share this recipe, please do so using the share buttons provided. Do not screenshot or republish the recipe or content in full. Instead, include a link to this post for the recipe. Thank you!
Thank you Christina, for sharing this outstanding recipe! It looked delicious and after following exactly all of your instructions it had came out divinely perfect; I'm not joking, I was surprised by how rich with chocolate and creamy in texture it was. A literal chocolate dream for moi and my family - who were in love with this cake as well. Truly, one of the best desserts I've eaten in my life, I'll definitely let others know that it came from you/this website. I look forward to trying more of your recipes!
Wow, thank you so much for such a thoughtful comment Chloe! ❤️ Reading this truly made my day. I'm so happy the recipe turned out so well for you and that your family loved it too. Thank you for trusting my recipes and for sharing them with others, it means more than I can say!
I made this cake, it was delicious. However it wasn't as firm as I had hoped. I used silken tofu, could I use soft tofu instead? I blended it for a couple minutes, should I blend it longer?
Thanks
Hi Marybeth,
I'm happy you liked it 🙂 Silken tofu is right, when you blended it was it completely smooth as shown in the images? Which yogurt did you use?
with all the bitter chocolate how can this recipe even work with out sweetener? Even cup of puree dates, something, did you forget to type it?
Hi Lori,
The maple syrup is the sweetener here, its added last in the instructions so that you can add a little more according to your taste.
Hi! I'd like to make this for a party coming up, but was wondering if it would work in mini tart shells to serve individual servings? Or does it really need the tight spring form to bring it together? Can't wait to try.
Hi Marissa
Love that idea! You would definitely want to line the sides of the mini pans with some parchment paper to prevent the mousse from sticking to the sides. So it wouldn't really be suitable for tart shells that have ridges, if that makes sense!
I hope this helps 🙂
Hi.
Can I substitute the silken tofu. I can't find any.
Thanks
Carolyn
Hi Carolyn,
There is no direct swap for the tofu, but you could try coconut cream. This will set a little firmer than with the tofu.
Hi, can this cake be frozen at all?
Hi Michelle,
Yes it can be frozen 🙂
Hi, this looks delicious and easy to make I can’t wait to try it. Can you use ripe avocados for the mousse as a replacement to tofu?
Hi Serena,
I think that would work, the consistency would probably be a little thicker though! Do let me know how it goes 🙂
This was soooo good! We didn't have silken tofu on hand, so I just used our extra firm tofu. Obviously produced harder mousse, but was still silky smooth and a big hit. Looking forward to incorporating some peanut butter next time 🙂
Hi Jess,
That's great to hear that it worked with the extra firm tofu. Thanks for the amazing feedback 🙂
This looks amazing! 😀 do you know if it´s possible to sub the tofu for something else 0:)?
Hi Monika,
Thank you so much! There is no direct swap for the tofu, you could try coconut cream but it will set a little firmer than with the tofu.
Okay, thank you so much! 😀
This was DELICIOUS! I made it for my fiancé and I for NYE, perfectly decadent but also light. Will be making this again!
Awh I'm so happy to hear you loved it! Thank you so much for your incredible feedback