




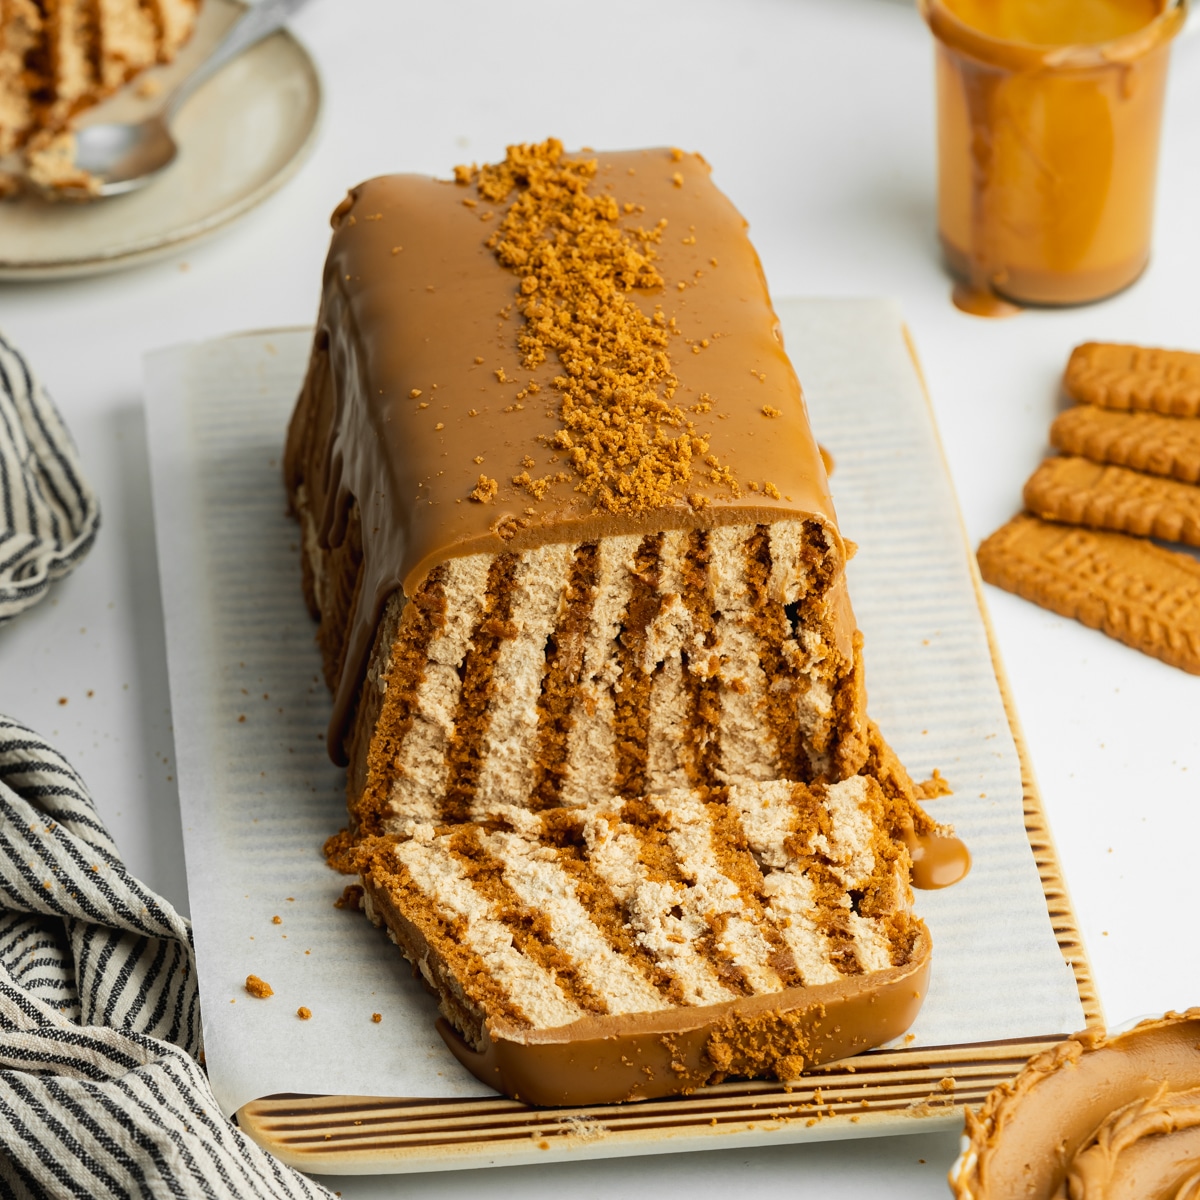
This vegan Biscoff icebox cake is made with just three ingredients, layering crisp Biscoff cookies with a light, creamy Biscoff filling. There's no baking involved, and after a few hours in the fridge the cookies soften into the filling to create an easy sliceable dessert that's perfect for making ahead.
If you're looking for an impressive dessert with minimal effort, this is it. The hardest part is waiting for it to chill!
If you're a Biscoff fan, this one is ridiculously easy. For something a little more decadent, try my vegan Biscoff cheesecake, or for another simple layered dessert, my Biscoff speculoos tiramisu is made with just five main ingredients.
Key ingredients
Here's everything you need to make this easy icebox cake. Find the complete list of ingredients, quantities, and instructions in the recipe card at the end of this post.
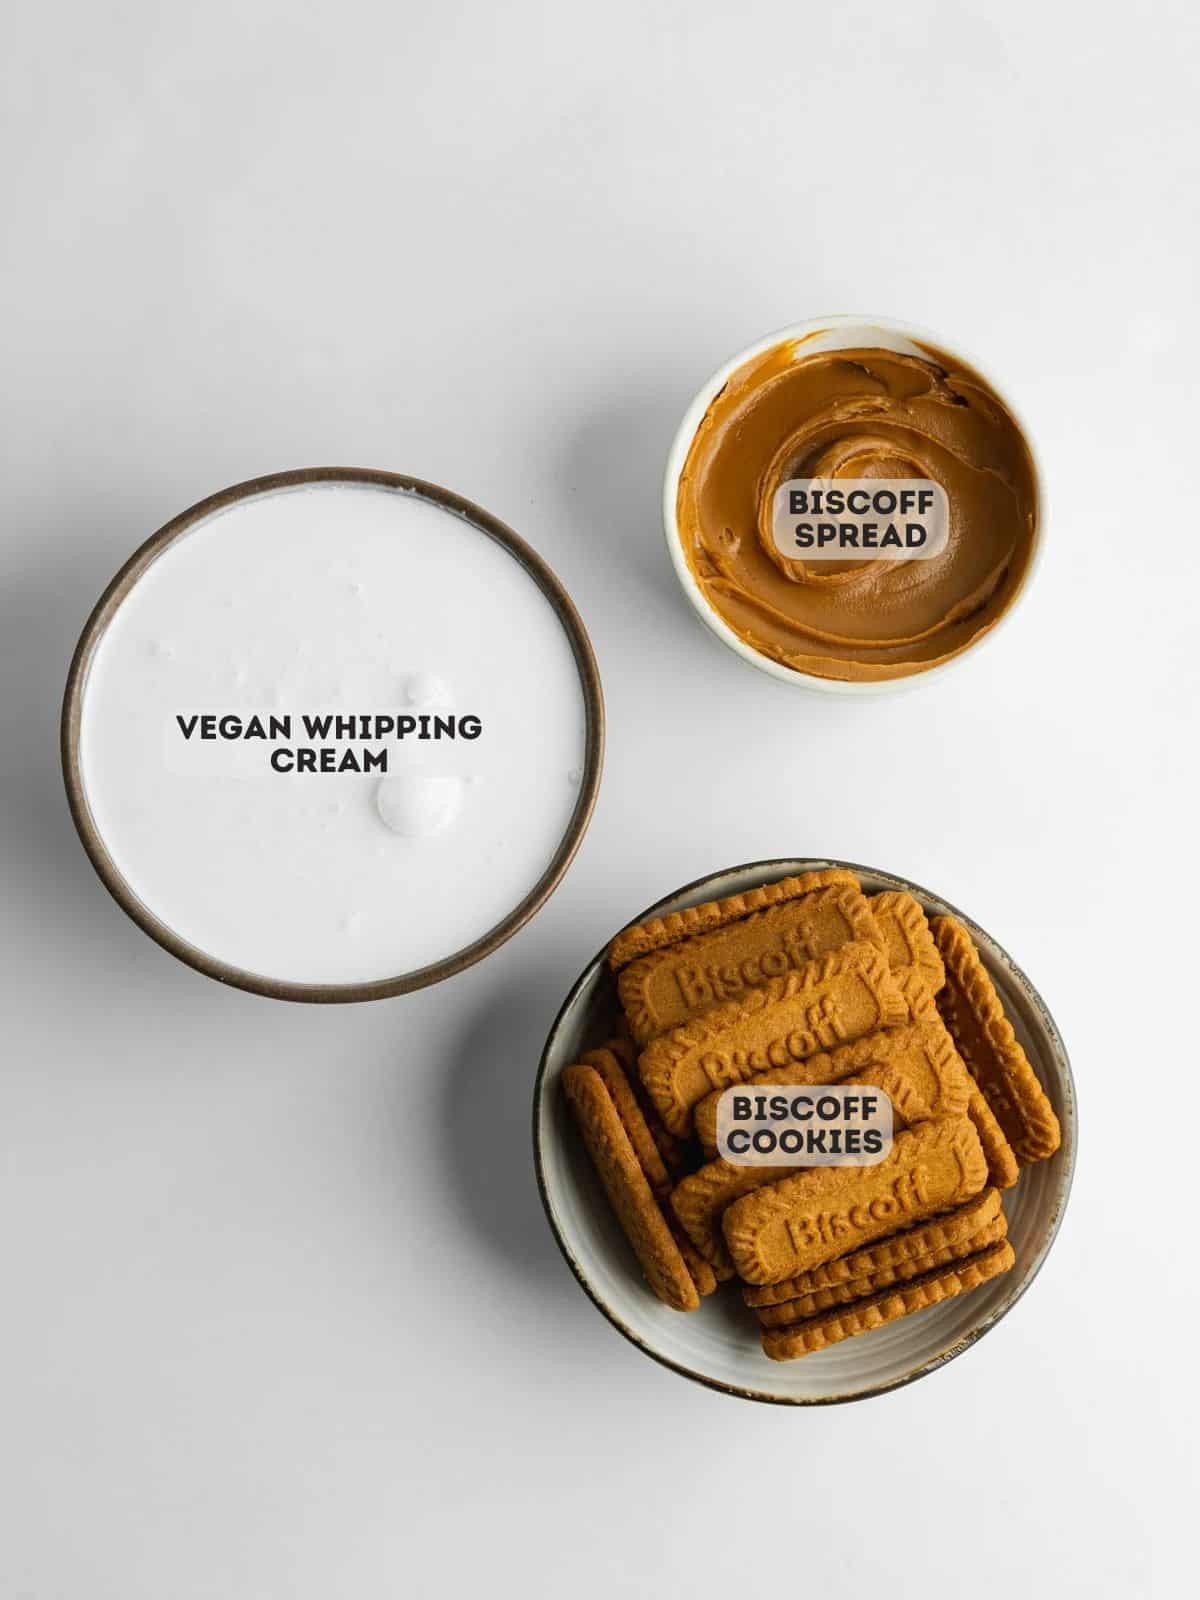
Biscoff cookies: These create the layers of the icebox cake. As the cake rests, the cookies absorb some moisture from the filling and soften enough to slice while still giving the dessert structure.
Smooth Biscoff spread: Smooth Biscoff spread flavors the whipped filling and creates the glossy topping. If you want to use up the rest of the jar, my vegan Biscoff coffee cake uses cookie butter in the cake, streusel, and glaze.
Vegan whipping cream: Use a cream specifically designed for whipping, as it needs to hold firm peaks to give the filling enough structure. Make sure it is well chilled before whipping.
Step-By-Step Images & Recipe Tips
Here's a visual overview of this recipe. Please refer to the detailed card at the end of this page for full written instructions.
Start by lining an 8-inch loaf pan with plastic wrap, leaving enough overhang to make unmolding easier later.
Warm the Biscoff spread just until it loosens up and becomes easy to stir, then let it cool slightly. Whip the vegan cream until it holds firm peaks, and gently fold in the Biscoff spread until the filling is smooth and evenly combined.
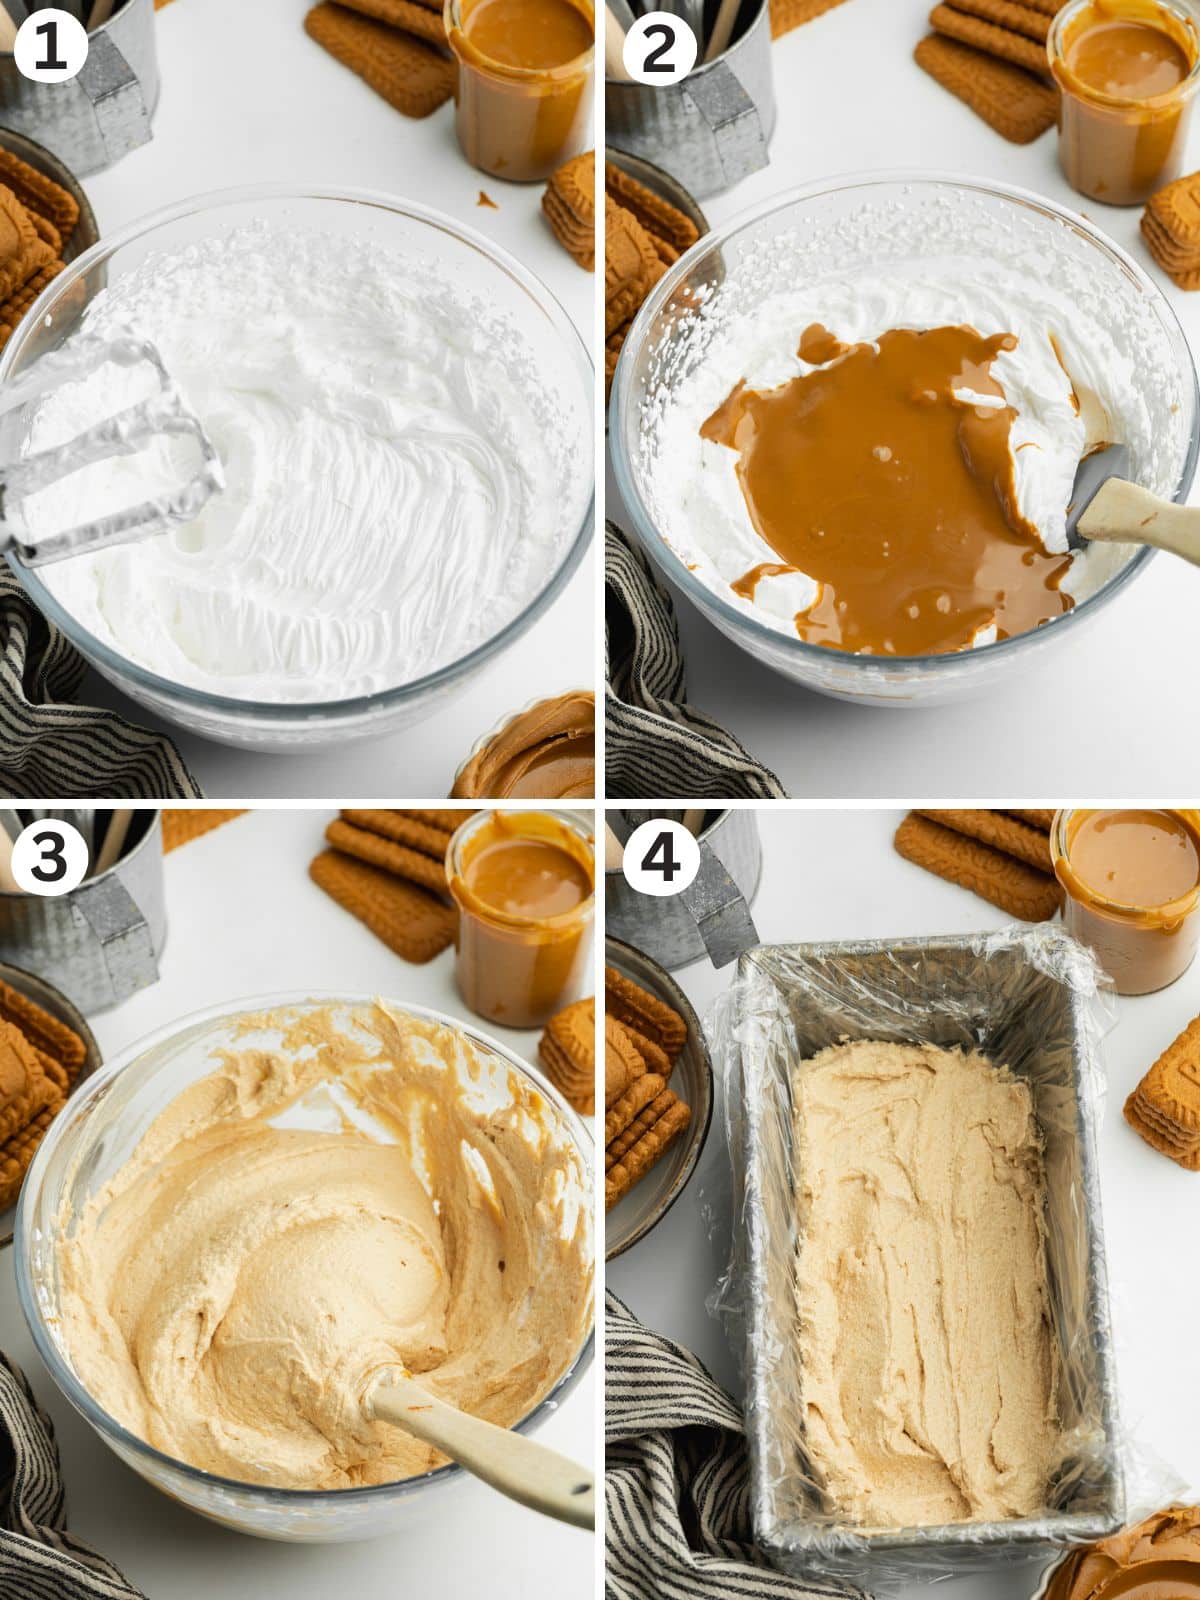
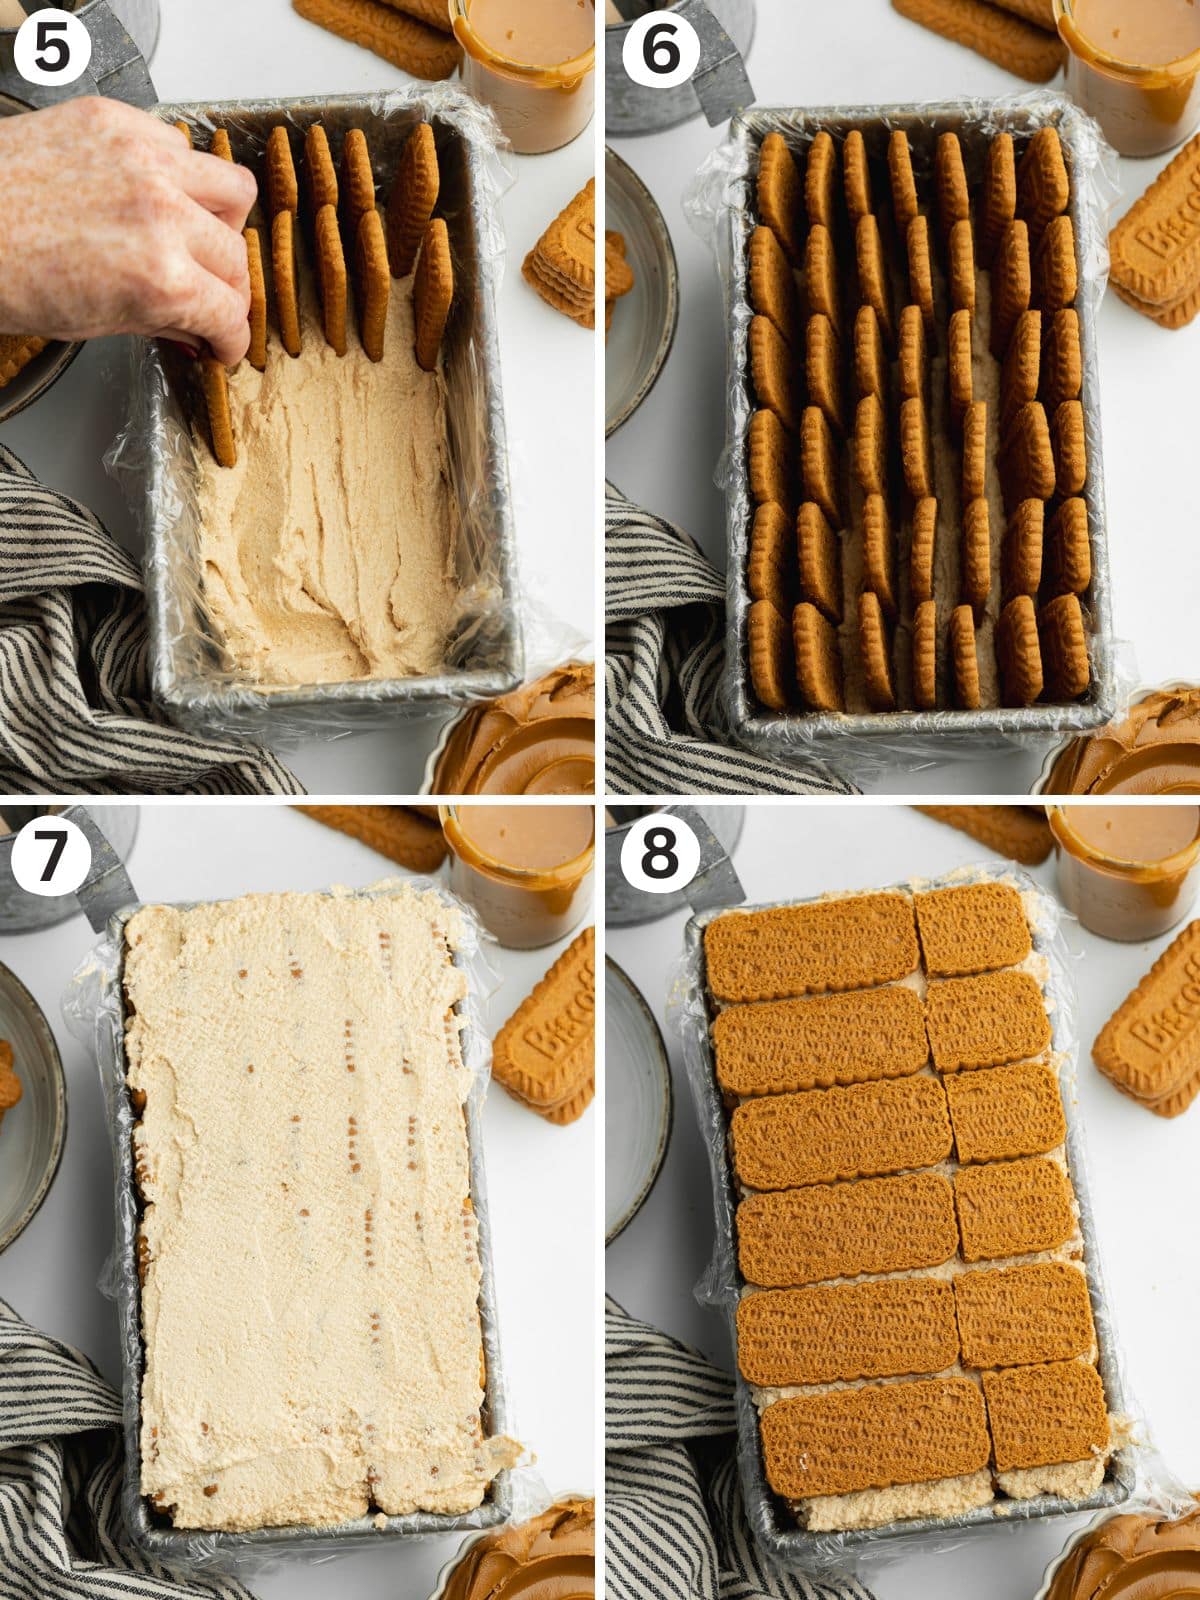
Spread a generous layer of filling over the base of the pan, then arrange the Biscoff cookies upright in rows, leaving a little space between each one. Pipe the remaining filling into the gaps so the cookies are completely surrounded - this helps create those neat layers when you slice the cake.
Smooth the top, finish with a final layer of cookies, then cover and chill for at least 4 hours. Overnight is even better, as the cookies have more time to soften into the cream while the cake firms up.
Once set, invert onto a serving plate, peel away the plastic wrap, and finish with the remaining warmed Biscoff spread and a crushed cookie.
Christina's Recipe Tips
Don't add piping-hot Biscoff spread to the cream. You only need to warm it enough to loosen the texture. Let it cool slightly if it feels hot before folding it into the whipped cream.
Fill the gaps between the cookies. Piping the cream between each cookie rather than simply layering everything together helps create a more even cake and keeps the rows securely in place.
Give it enough time to chill. Four hours is the minimum, but this is an ideal make-ahead dessert and can be left to set overnight. The resting time is what allows the cookies and filling to become one sliceable cake.
Keep it chilled until serving. The filling is whipped-cream based, so the cake has the best structure and texture when served cold.
Questions and Answers
Yes. In fact, this is one of those desserts that's particularly well suited to making ahead. Assemble the cake, cover it well, and leave it in the refrigerator overnight before decorating and serving.
The extra chilling time also gives the Biscoff cookies plenty of time to soften into the cream.
Allow at least 4 hours for the cake to set. For the softest cookie layers and easiest slicing, chilling it overnight is even better.
Keep the Biscoff icebox cake covered in the refrigerator and serve it chilled.
If you're making it ahead, I recommend leaving the cake undecorated in the loaf pan and adding the melted Biscoff topping and crushed cookie shortly before serving so the finish looks its best.
More Easy No-Bake Desserts




Love this recipe? Please leave a 5-star ★★★★★ rating in the recipe card below and consider leaving a comment as well, thanks!
Stay in touch with me through social media @ Instagram, Pinterest, TikTok, and Facebook, and subscribe via email to get all our new recipes!
📖 Recipe
Vegan Biscoff Icebox Cake (3 Ingredients)
Ingredients
- 52 biscoff cookies
- 400 g (1 cup) smooth biscoff spread
- 460 ml (2 cups) vegan whipping cream
Instructions
- Preparation: Line the base and sides of an 8" loaf tin with plastic wrap, leaving an overhang on each side.
- Melt the Biscoff spread: Warm 220g (1 cup) of the Biscoff spread in the microwave for 30 seconds, then stir until smooth. Alternatively, gently warm it over a double boiler. Set aside.
- Make the filling: Whip the vegan whipping cream with an electric mixer until stiff peaks form. Gently fold in the softened Biscoff spread until evenly combined.
- Assemble: Spread a thick layer of the filling over the base of the pan. Arrange the Biscoff cookies upright in 6 rows of 7, leaving a small gap between each cookie for the filling.
- Transfer the remaining filling to a piping bag and pipe it between the cookies, making sure all the gaps are filled. Smooth and gently compact the top with a spatula, then finish with a final layer of cookies.
- Chill: Cover with plastic wrap and refrigerate for at least 4 hours, or preferably overnight.
- Decorate: Once set, carefully invert the cake onto a serving plate and remove the plastic wrap. Pour the remaining Biscoff spread over the top and finish with a crushed cookie.
© addictedtodates.com. All content and images are protected by copyright. If you want to share this recipe, please do so using the share buttons provided. Do not screenshot or republish the recipe or content in full. Instead, include a link to this post for the recipe. Thank you!






Can this be frozen and eaten like ice cream?
Hi Dena,
Yes, absolutely! You can freeze the icebox cake and serve it frozen for more of an ice cream cake texture. I’d just let it sit at room temperature for around 10–15 minutes before slicing so it softens slightly and is easier to eat.
Hi Christina. Your Biscoff icebox cake looks delicious but do you think it would work as a frozen dessert?
Hi Thelma,
That sounds like it could work! Would love to hear if you give it a try