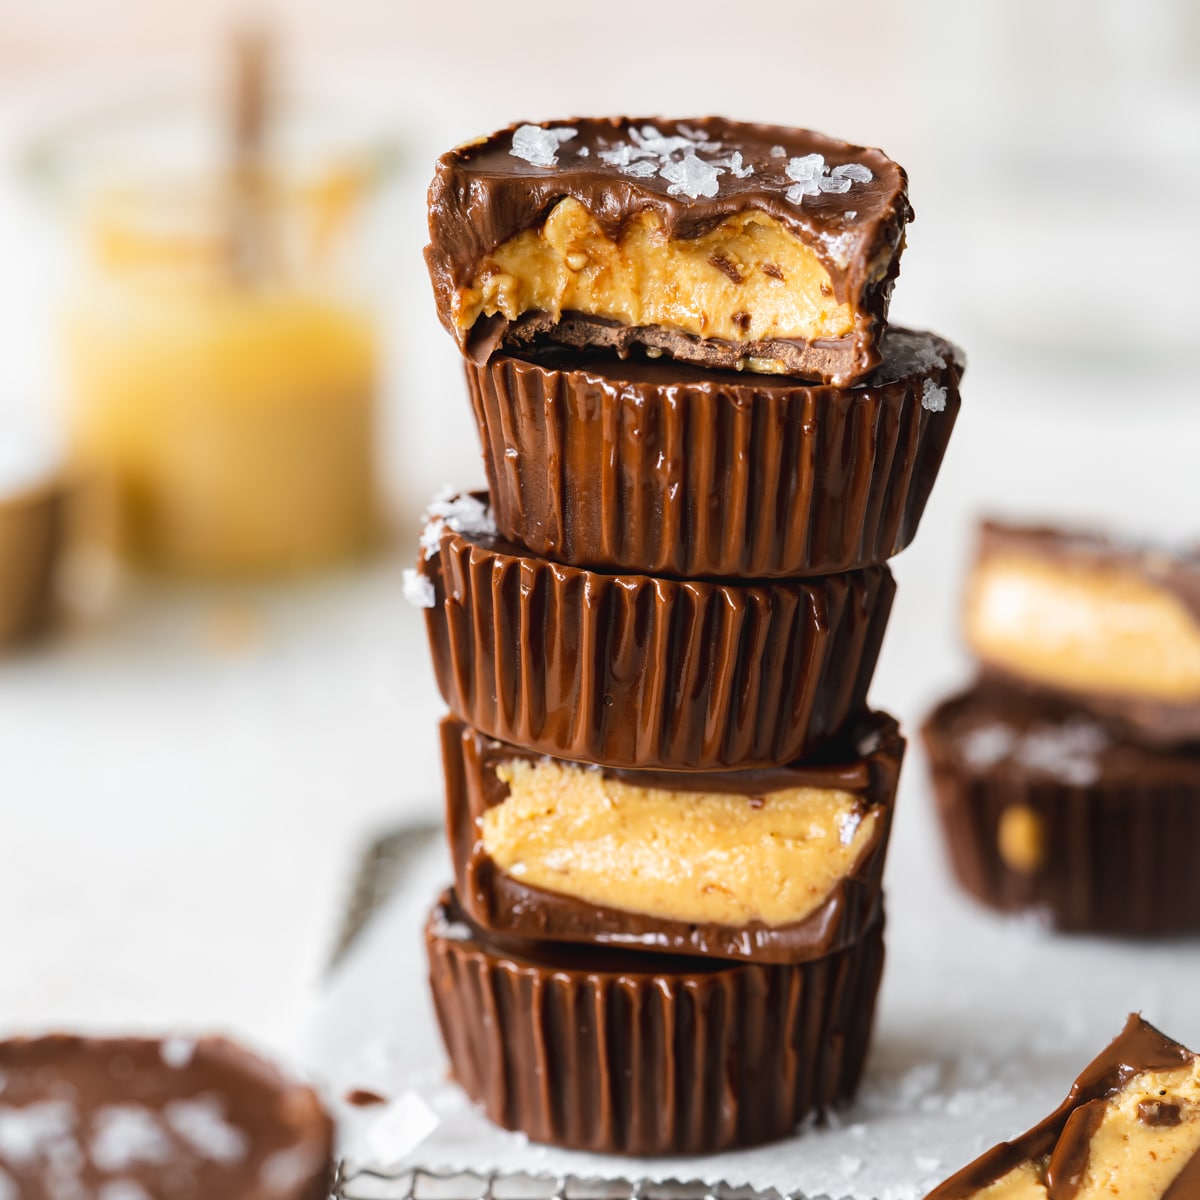
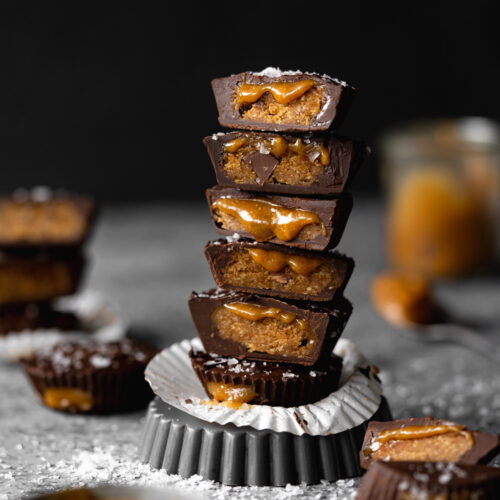
This homemade version of peanut butter cups is practically one of the easiest, yet most satisfying snacks you can make.
Just like my peanut butter jelly cups and cookie dough cups, you can enjoy them as a delicious treat or add them as a topping for vegan cakes or cheesecakes.

📝 Ingredients Needed
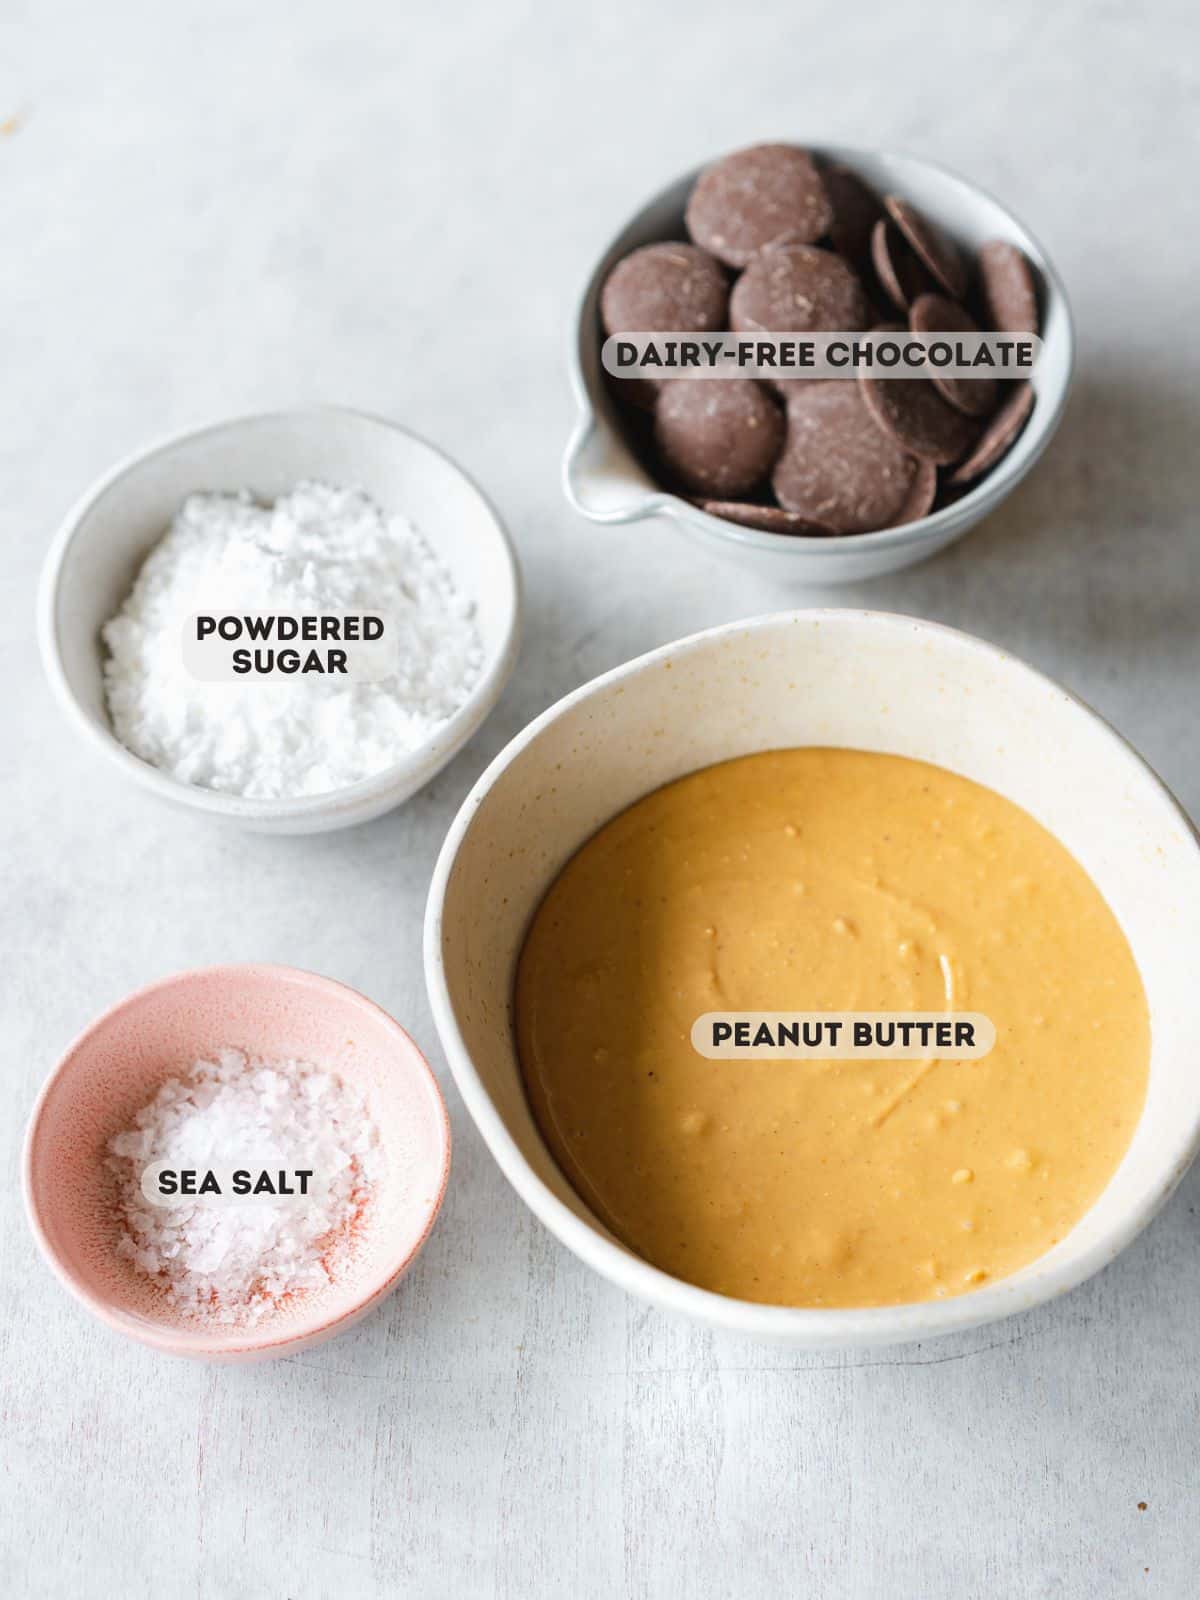
Here's everything you need to make these easy vegan peanut butter cups from scratch:
Ingredient Notes
Find the complete list of ingredients, quantities, and instructions in the recipe card at the end of this post.
- Smooth Peanut Butter: A good quality natural peanut butter without added oils or sugar works best for this recipe. You can also use homemade peanut butter. If you want to use American-style peanut butter, skip the powdered sugar as they're usually sweetened already.
- Vegan Chocolate: For less sweet peanut butter cups, use good quality dark chocolate with at least 70% cocoa content. Vegan milk chocolate will give a sweeter result, which more closely resembles the original Reese's peanut butter cups.
- Powdered Sugar: Otherwise known as confectioner's sugar or icing sugar, this sweetens the filling and provides stability. Without the sugar, the peanut butter filling will be runnier, which is fine if that's what you're going for!
- Coarse Sea Salt: Please don't skip this, it truly enhances the peanut butter and chocolate flavors.
Get Your Free E-Book!
Sign up to the Addicted to Dates newsletter for your FREE Guide To Vegan Cheesecakes!
🔪 Instructions
Here are step-by-step images showing how to make homemade peanut butter cups. Please refer to the detailed printable recipe card at the end of this page for the full recipe and written instructions:

Step 1: Add a teaspoon of melted chocolate to the bottom of each cupcake liner. Carefully lift and tilt each liner individually, and swirl them around so that the melted chocolate coats the sides of the liners. Refrigerate until set.

Step 2: Add the peanut butter and powdered sugar to a medium bowl and stir until completely smooth.

Step 3: Transfer the peanut butter mixture to a piping bag or use a spoon to spread it on top of the chocolate base. Don't fill them to the top, as you need space for the final layer of chocolate.
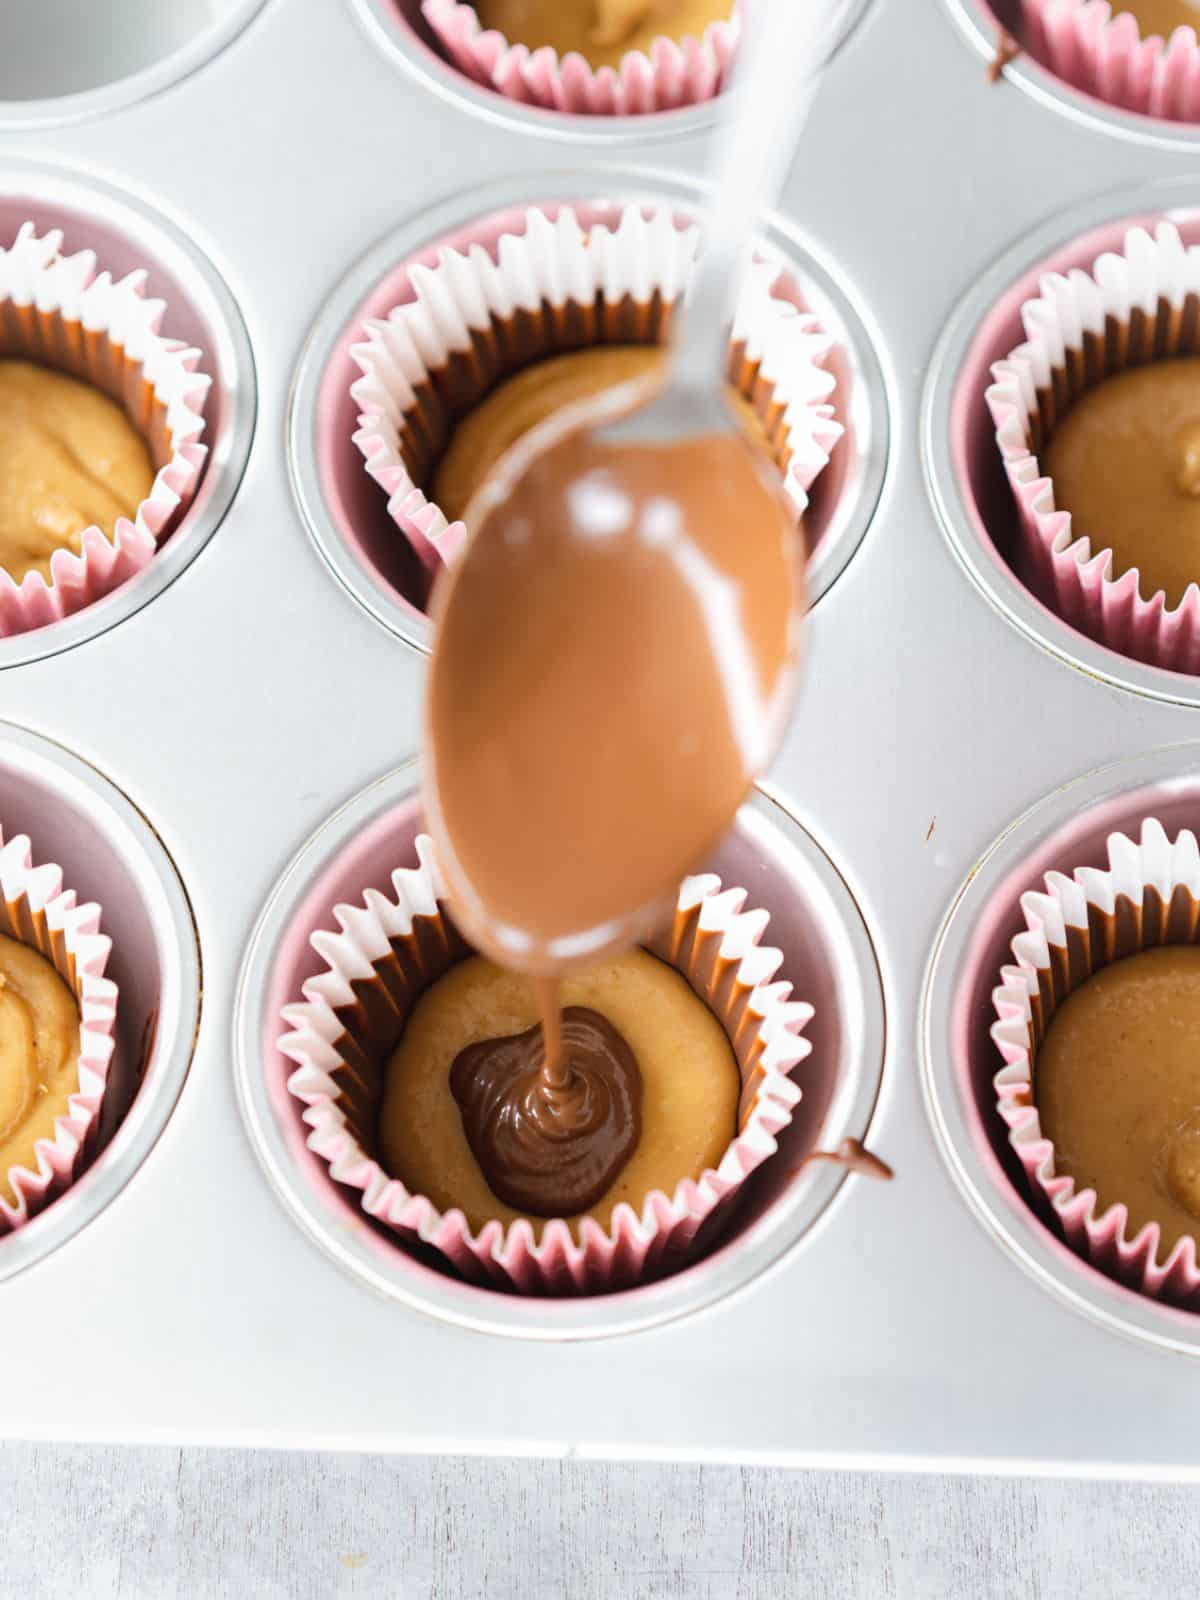
Step 4: Spoon the remaining chocolate on top of the peanut butter layer and refrigerate until set. Remove the chocolate cups from the muffin pan and sprinkle with flaky sea salt.
💭 Recipe Tips
Make sure you use a cupcake tin or muffin pan to hold the liners in place as they set. Without the pan, the paper liners will wobble and collapse with the weight of the filling.
I always recommend that you use a double boiler (a heat-safe bowl on top of a saucepan with simmering water) when working with chocolate, rather than melting it in the microwave.
Try vegan white chocolate peanut butter cups with this dairy-free chocolate recipe. You can also make half and half with white and milk chocolate.
If your chocolate is too thick and gloopy to pour, add a teaspoon of coconut oil and stir well. This will make it much easier to pour.
💬 FAQs
No, unfortunately, they contain dairy and are not suitable for vegans.
They'll last refrigerated in an airtight container for up to 2 weeks. Seriously though, they never make it that far in my house!
Yes, place them in an airtight container, separated with a sheet of parchment paper between each layer to prevent them from sticking and freezing to one another.
Defrost them at room temperature for about an hour before serving, or in the fridge overnight.
Yes, if you're not a fan of peanut butter, you can swap it out for any other nut butter of your choice. Cashew butter, hazelnut butter, pistachio butter, and almond butter are all amazing.
To make them nut-free, use sunflower seed butter, tahini, or Biscoff spread (cookie butter). If using cookie butter, skip the powdered sugar as they'll already be sweet enough.

🥜 More Peanut Butter Desserts

📖 Recipe
Vegan Peanut Butter Cups (CopyCat Reese's)
Ingredients
- 300 g (10.6 oz) vegan chocolate
- 175 g (⅔ cup) smooth peanut butter
- 40 g (⅓ cup) powdered sugar (confectioner's/icing sugar) *see notes
- 1 teaspoon flaky sea salt
Instructions
- Line a muffin tray with 9 muffin cases.
- Finely chop the chocolate and add it to a heat-resistant bowl. Place the bowl on top of a saucepan that is about ¼ ways filled with simmering water (bain-marie). Stir the chocolate with a rubber spatula every so often to melt it evenly.
- Add one tablespoon of melted chocolate to each muffin case, and swirl the case so that the chocolate comes up around and coats the edges. Place in the fridge to set for at least 10 minutes.
- Add the peanut butter and powdered sugar to a bowl and mix using a spoon until smooth. Distribute the peanut butter between all of the chocolate cups, using a piping bag or spoon. Give the muffin tray a shake to help the peanut butter settle in an even layer.
- Pour the remaining melted chocolate over the peanut butter. Place in the fridge to set for 30 minutes. Sprinkle with flaky sea salt.
Storage
- Store them in an airtight container either and refrigerate for up to 2 weeks. You can also freeze them in an airtight container for up to 3 months. Either leave them in the muffin liners, or separate them out with sheets of parchment paper to prevent the chocolate cups sticking to each other.
Notes
- Some white sugar in the US is not vegan, if in doubt use organic sugar.
- Make sure you use a muffin pan to hold the liners in place as they set.
- I always recommend that you use a double boiler when working with chocolate.
- Try vegan white chocolate peanut butter cups with this dairy-free chocolate recipe. Or try half and half with white and milk chocolate.
- If your chocolate is too thick and gloopy to pour, add a teaspoon of coconut oil and stir well. This will make it much easier to pour.
© addictedtodates.com. All content and images are protected by copyright. If you want to share this recipe, please do so using the share buttons provided. Do not screenshot or republish the recipe or content in full. Instead, include a link to this post for the recipe. Thank you!
*This recipe was originally published in December 2020. The recipe has since been improved and updated to minimize the ingredients used, simplify the instructions and make it even more delicious!
I hope to make these very very soon!!
Can I ask what brand of vegan chocolates buttons you have in the picture?
Hi Allie,
Yay, I’m excited for you to try them! 😊 The chocolate buttons in the photo are from Tesco Free-From, they’re a great vegan-friendly option. Hope you enjoy the recipe when you get the chance to make it!
I used maple syrup instead of sugar with the peanut butter and came out delicious too!
Love your recipes. Thank you so much!
Sounds delicious Fernanda, thanks for your feedback!