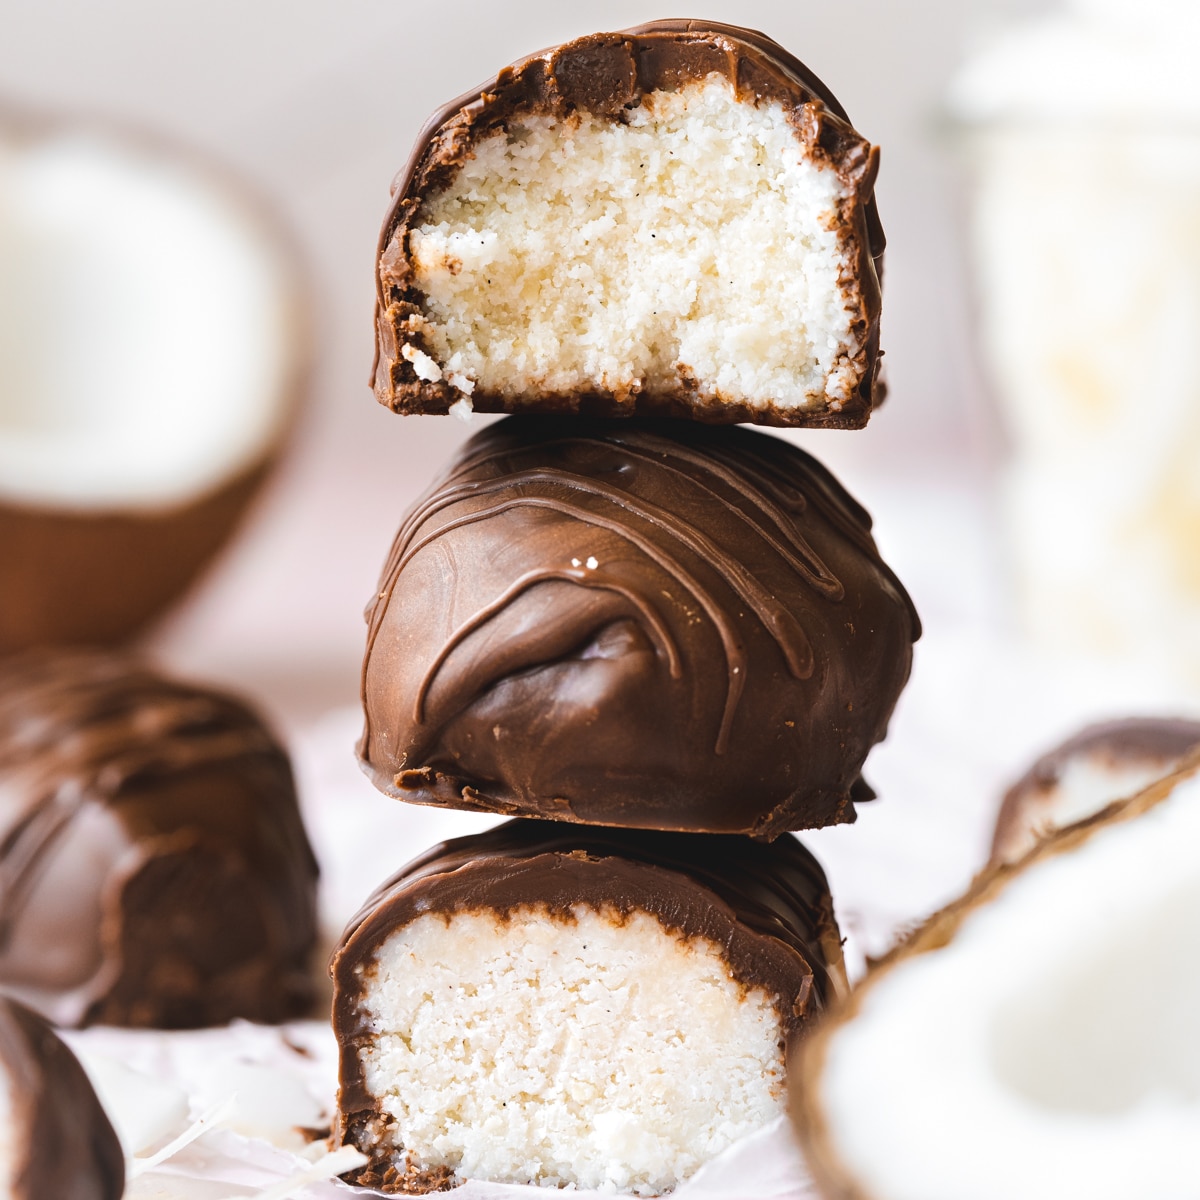
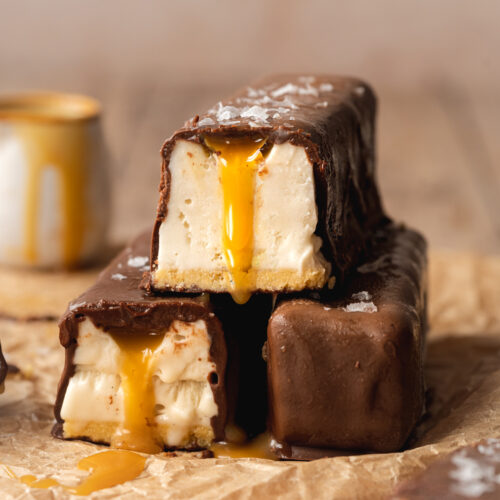
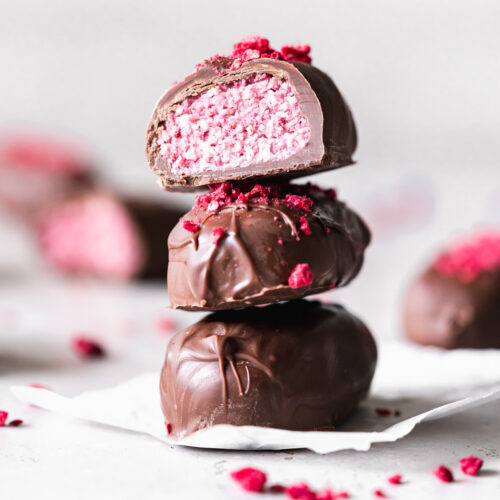
This is the classic version of my raspberry bounty bar recipe, and it is a must if you are a fan of the original bounty bar.
These incredibly easy CopyCat bounty bars come together with minimal ingredients. Plus you can whip them (ready to eat) in less than an hour, so they're perfect when you want something tasty that doesn't take hours to set!
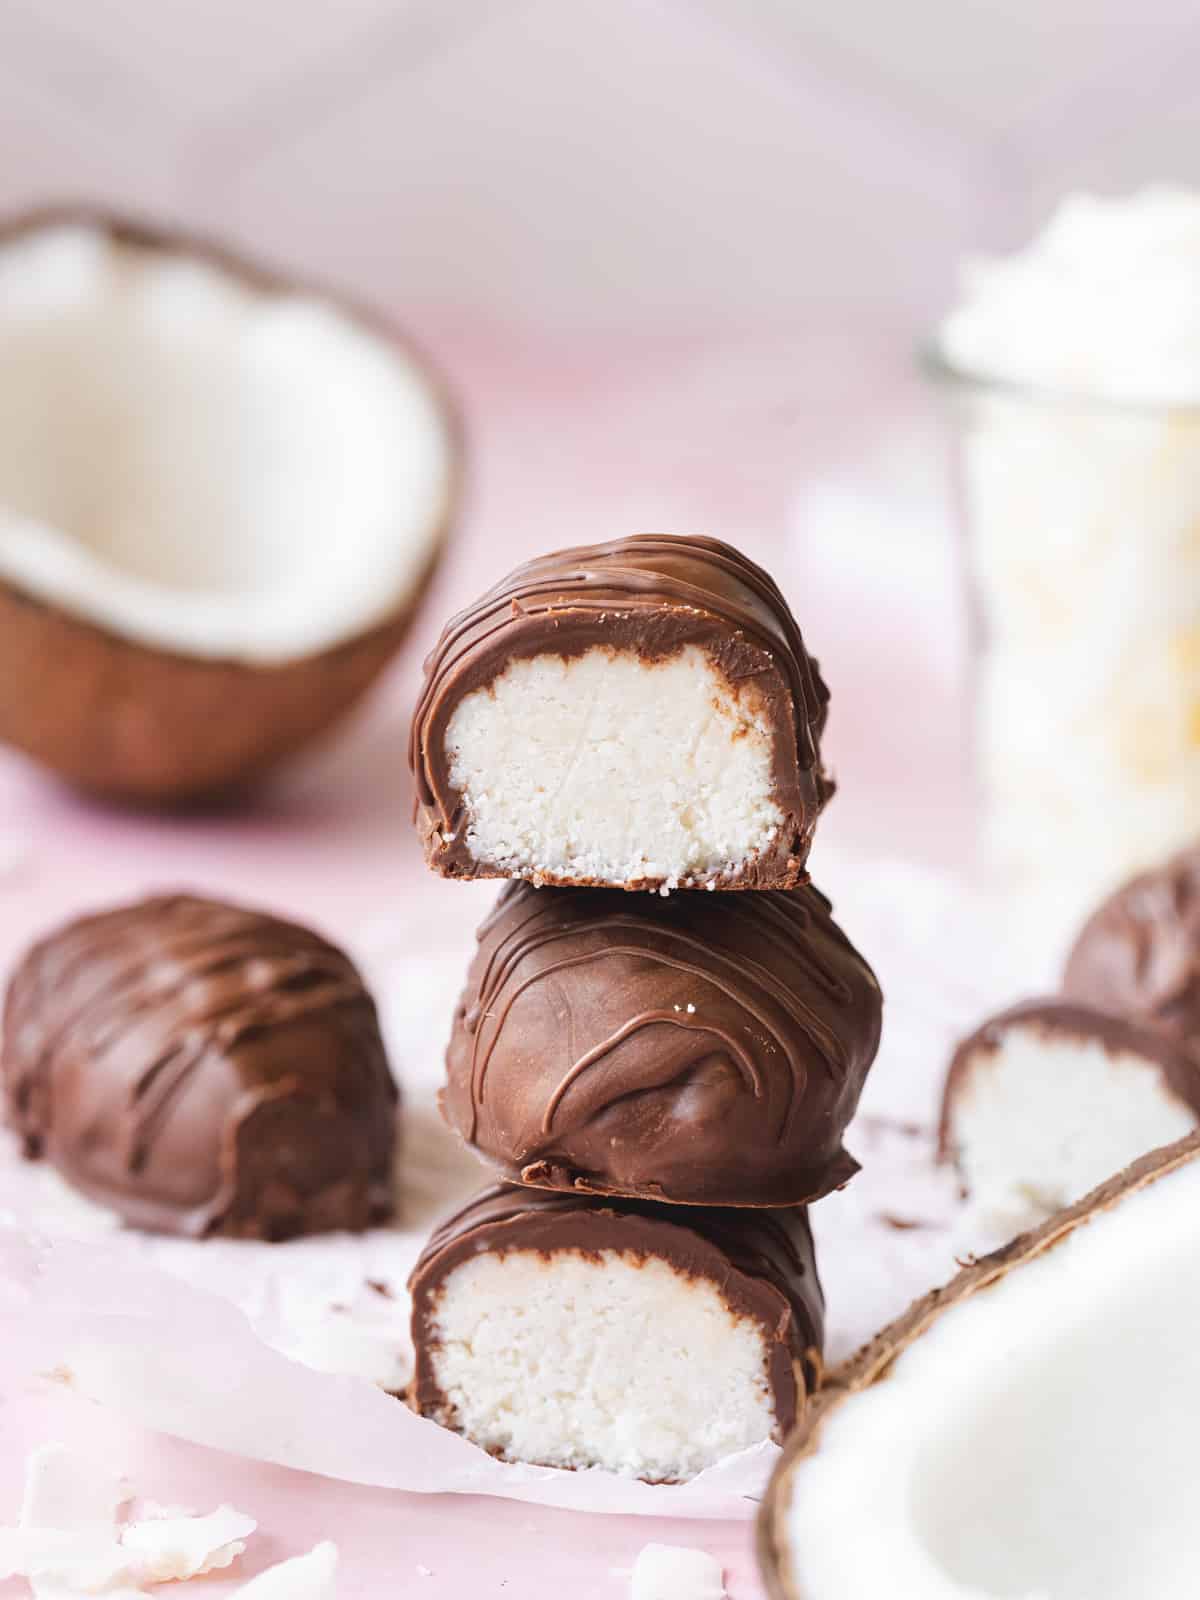
They have an intense coconut flavor which is complemented by a thick layer of dairy-free chocolate.
Jump to:
📖 Recipe Overview
- No-Bake & Easy - This is such an easy recipe suitable for bakers of all levels of experience. There is technically no baking involved, and the food processor does most of the heavy lifting for you.
- Made with just 6 ingredients, most of which you may already have in your pantry!
- Completely eggless, dairy-free, gluten-free, and nut-free, and you can keep them refined sugar-free by using maple syrup and unsweetened chocolate.
If you love making homemade candy, try my vegan Mars Bars, Snickers, Rice Crispy Treats, Butterfingers, and Twix Bars next!
🧾 Ingredients Needed
As promised, you need just a few simple ingredients to make these incredible homemade bounty bars. Here's what to grab:

Ingredient Notes
- Desiccated Coconut - You might also come across this labeled as shredded coconut. Both are forms of dried, finely ground coconut. Desiccated coconut is generally a little drier than shredded coconut, but both will work well for these homemade bounties.
- Coconut Butter - You can reach for storebought or homemade which generally works out a bit more cost-effective. Sometimes coconut butter will be labeled as coconut manna. Creamed coconut in block form is a perfect swap for this too. You can find it in the Asian section of supermarkets. Creamed coconut/coconut butter comprises 100% dehydrated flesh of mature coconuts. Be careful not to confuse it with "coconut cream", a completely different product that is more similar to coconut milk.
- Sweetener - For an all-out coconut flavor, go for vegan condensed coconut milk. Otherwise, pure maple syrup is a great natural sweetener for these bars.
- Vanilla & Sea Salt: Adding vanilla bean paste or extract and a pinch of salt to these homemade candy bars brings their flavor to the next level.
- Dairy-Free Chocolate - You can opt for dark chocolate or vegan milk chocolate, both of which as equally delicious! I personally prefer to use "milk" chocolate for these bounty bars as that is closest to the taste of the original bars. Ombar chocolate is a great option if you're using storebought.
Get Your Free E-Book!
Sign up to the Addicted to Dates newsletter for your FREE Guide To Vegan Cheesecakes!
🥣 How To Make Vegan Bounty Bars
Find the complete list of ingredients, quantities, and instructions in the recipe card at the end of this post.
These vegan bounty bars are one of the easiest no-bake desserts you can make. Here are the steps to get them perfect, every time!

Step 1: Add all of the ingredients to a food processor.
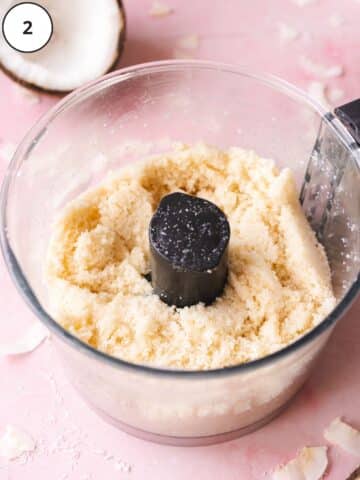
Step 2: Blitz until the ingredients come together and they stick together when pressed between your fingers.
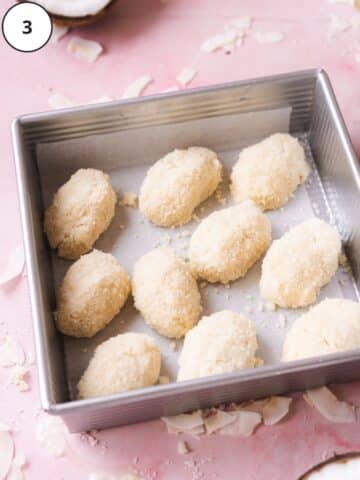
Step 3: Roll the dough into 10 balls and shape them into little bars by pressing and molding them using your hands. Place them on a tray lined with parchment paper and freeze for 30 minutes.

Step 4: Dip the bars in melted dairy-free chocolate and set them back on a tray lined with parchment.
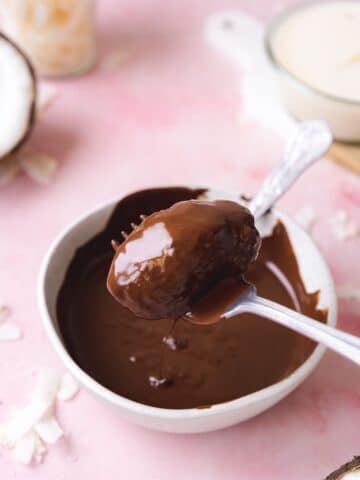
If desired you can coat them in a second layer of chocolate - totally recommend this!

Step 5: Place them back in the freezer to set for 5-10 minutes and drizzle with any remaining melted chocolate before serving.
📝 Recipe Tips
If you want super accurate bounty bars, you can use your weighing scales to evenly weigh them into 10x 40g sections.
Melt the chocolate over a double boiler. This is referred to as "au bain-marie" (meaning water bath in French). A term that was drilled into me in culinary school! Place a bowl on top of a saucepan with a few inches of simmering water, making sure that the water does not touch the bottom of the bowl. Then add finely chopped chocolate to the bowl and slowly melt. The steam that rises will melt the chocolate without the risk of burning it.
Double-dip your bars. One thing I that always bothered me about the original bounty (other than it containing dairy of course!) was the low chocolate-to-coconut ratio. If you also love a generous coating of chocolate on your bounty bar then this is a must.
💬 FAQs
Store them in an airtight container and refrigerate them for up to a week. These bars will also keep well at room temperature for a couple of days.
You can absolutely freeze these bars, just pop them in an airtight container and they will be good for up to 4 weeks.
No, coconut cream will not work for this recipe due to its high water content which will prevent the bars from setting properly. It also lacks the rounded flavor of creamed coconut or coconut butter.
Generally, if you live in a warmer climate, your creamed coconut/coconut butter may not be as solid at room temperature. If yours looks a little on the melted side, You can refrigerate it for a couple of hours before using it and then scoop out what you need.
Solid creamed coconut or coconut butter has a better consistency for shaping the bounty bars with your hands without it being too liquid - but either will work just fine!

🍫 More CopyCat Candy Bars

Love this recipe? Please leave a 5-star ★★★★★ rating in the recipe card below and consider leaving a comment as well, thanks!
Stay in touch with me through social media @ Instagram, Pinterest, TikTok, and Facebook. And if you like one of my recipes, tag me!
📖 Recipe
Vegan Bounty Bars
Ingredients
- 170 g (2 cups) desiccated coconut or shredded coconut
- 200 g (1¼ cups) coconut butter or creamed coconut, NOT coconut cream *see notes 1+2
- 4 tablespoons (60 ml) vegan condensed milk or pure maple syrup
- 2 teaspoons (10 ml) vanilla bean paste or vanilla extract
- ¼ teaspoon (1.5 g) sea salt
- 220 g (8 oz) vegan chocolate *see note 2
Instructions
- Add the desiccated coconut, coconut butter, vegan condensed milk (or maple syrup), vanilla, and salt to a food processor and blitz for a few minutes until everything has combined and the mixture starts to stick together. It should be sticky when pressed between your fingers.
- Roll the dough into 10 balls and shape them into little bars by pressing and molding them using your hands. Place them on a tray lined with parchment paper and freeze for 30 minutes.
- Melt the chocolate over a double-boiler. Place a bowl on top of a saucepan with a few inches of simmering water, making sure that the water does not touch the bottom of the bowl. Then add finely chopped chocolate to the bowl and slowly melt. The steam that rises will melt the chocolate without the risk of burning it.
- Dip the bars in melted dairy-free chocolate using a spoon and a fork to coat them in chocolate and lift them out onto a tray lined with parchment. If desired, you can dip them in a second coat of chocolate. Place them in the freezer to set for 5-10 minutes. Drizzle with any leftover melted chocolate.
- Storage: Place them in an airtight container and refrigerate them for up to a week. These bars will also keep well at room temperature for a couple of days. To freeze, just pop them in an airtight container and they will be good for up to 4 weeks.
Notes
- Coconut cream will not work for this recipe due to its high water content. You need to use creamed coconut or coconut butter as these will solidify once set.
- Solid creamed coconut or coconut butter from the fridge has a better consistency for shaping the bounty bars with your hands without it being too liquid - but runny/room temp will work just fine!
- You can opt for dark chocolate or vegan milk chocolate, both of which as equally delicious! I personally prefer to use "milk" chocolate for these bounty bars as that is closest to the taste of the original bars.
© addictedtodates.com. All content and images are protected by copyright. If you want to share this recipe, please do so using the share buttons provided. Do not screenshot or republish the recipe or content in full. Instead, include a link to this post for the recipe. Thank you!
I just made a batch with dark chocolate and love them! I thought when shaping them, they might be a bit too dry but they've turned out really nice, with more the texture of protein bars, rather than Bounty which is perfect. I got 12 very decent size bars out that mixture! Will definately make them again, perhaps with milk chocolate next time🙂
Hi Madeleine,
Thank you so much 😊 So glad you loved them!
Would love to try this but don’t have coconut butter/creamed coconut. What’s a replacement? Coconut milk?
Hi Adelle,
Coconut milk will be too soft, but you can make your own coconut butter with just coconut flakes. This is the recipe for it: https://addictedtodates.com/coconut-butter/
Bonjour !!
J'ai essayé votre recette et elle est délicieuse ! Le seul problème que j'ai c'est que je dois les garder température pièce car si je les mets au frigo elles deviennent très dures .... et j'aime moins ça température pièce. Est-ce-que je devrais diminuer le beurre de coco pour qu'elle soient plus moelleuses lorsqu'elles sont refroidies ? Peux-tu m'aider haha
Merci beaucoup 🙂
Hi Nathalie!
I reckon you could reduce the coconut butter slightly, or you could increase the amount of condensed coconut milk to help make them a little softer - I hope this helps!
These bars tasted great. Awesome to have a coconut bar with a lighter chocolate.
Hi Simone,
So happy that you loved them. And I definitely agree, the vegan milk chocolate makes them taste so much closer to the originals!
Such a joy to have a recipe to one of my favourite childhood bars that is ethical and absolutely delicious!! Definitely the kind of recipe one could remake with confidence to share with friends.
Hi Emma,
I'm so happy you loved them! They're one of my favorites too xx
Can I use coconut oil instead of coconut butter ?
Hi Janina,
You can use coconut oil, but you won't get as nice a flavour and texture as with coconut butter/creamed coconut
It tastes so good! And is so easy to make. I used santen for the creamed coconut, I think they're the same thing. My mothers favorite candybar is a bounty, so I'm going to surprise her with this one.
Hi Inge,
That's so great to hear! Yes I had to look it up but I'm sure they're the same thing. That's so sweet that you'll be making them for your mom, I hope she loves them too 🙂