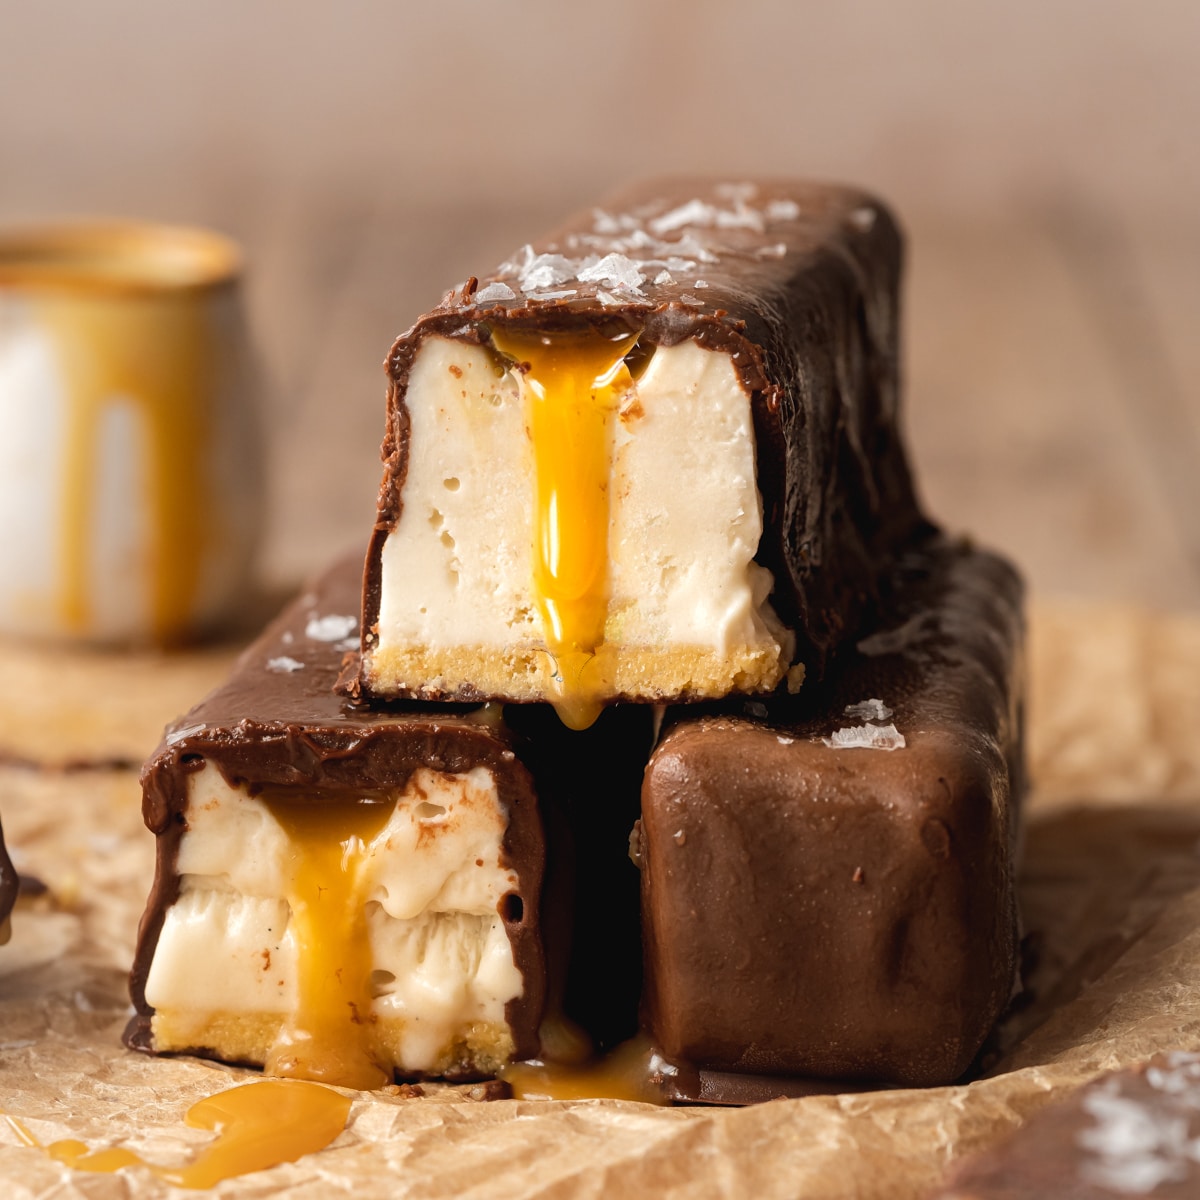

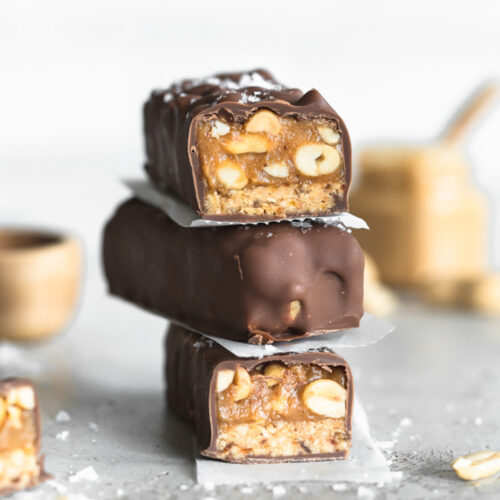
If you've ever had a twix ice cream bar before, this vegan version will certainly be a nostalgic frozen treat.
Of course, twix is not suitable for vegans as it contains dairy. So these CopyCat Twix ice cream bars are made with oat milk-based ice cream, a vegan caramel salted sauce, and a thick layer of non-dairy chocolate.
This recipe is sponsored by Nature's Charm. All opinions are my own. Thank you for supporting the brands who sponsor my work!
Jump to:
📖 Recipe Overview
- Made Using 8 Main Ingredients - The shopping list for this recipe is pretty short, considering you'll end up with your very own homemade twix ice cream bars!
- No Churn - The ice cream comes together with a whisk and no ice cream maker is needed. Just mix, pour, and freeze!
- Allergy-Friendly - Made without dairy, eggs, or nuts, and easily adapted as gluten-free.
If you love chocolate, caramel, and vanilla-based frozen desserts make sure you also try my vegan vanilla ice cream, no-churn caramel ice cream, easy chocolate ice cream, and Neapolitan ice cream bars!
🧾 Ingredients Needed
As promised, you only need 8 ingredients to make your very own homemade twix ice cream bars. Here's what to grab:

Ingredient Notes
- Vegan Cookies - Any vegan shortbread cookies will work, not only do these add to that "Twix" flavor, but they also help to structure the base of the ice cream bars and hold everything together!
- Vegan Condensed Milk - I use Nature's Charm sweetened condensed oat milk, but their condensed coconut milk is also perfect for this recipe.
- Vegan Whipping Cream - Again, I use Nature's Charm oat whipping cream. Their coconut whipping cream will also work.
- Vegan Chocolate - While you are free to go for dark chocolate here, I like to use store-bought or homemade vegan milk chocolate as this more closely resembles the original Twix bars.
- Vanilla Bean Paste - This flavors the oat milk ice cream base, so quality is the key. If you can't find the paste, you can use a good-quality vanilla extract instead.
Get Your Free E-Book!
Sign up to the Addicted to Dates newsletter for your FREE Guide To Vegan Cheesecakes!
🥣 How To Make Twix Ice Cream
Find the complete list of ingredients, quantities, and instructions in the recipe card at the end of this post.
Although this is a relatively easy ice cream no-churn recipe, there's a little patience required in the assembly of the bars. But I promise it's worth it for that classic candy bar look!
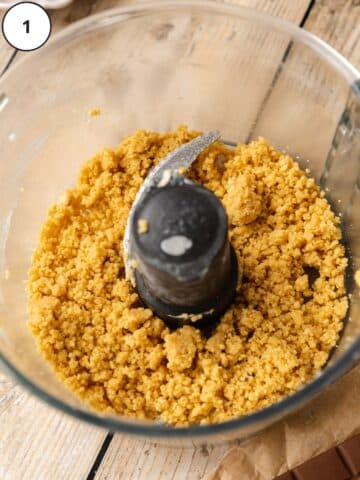
Step 1: Blitz the cookies, salt, and butter in a food processor until the mixture sticks together between your fingers.
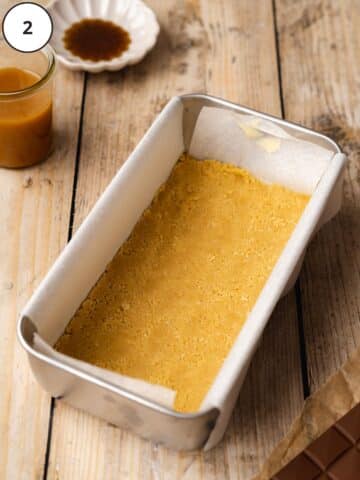
Step 2: Tightly press the crust into the base of the pan using a spoon or your fingers. Place it in the fridge while you make the filling.

Step 3: Whisk the oat whipping cream in a stand mixer or with a hand whisk until smooth.

Step 4: Add the vegan condensed milk and vanilla bean paste and whisk again to combine.

Step 5: Pour the ice cream filling into the pan and freeze for at least 4 hours. You can also leave it in the freezer overnight if you prefer.

Step 6: Once frozen, take it out of the freezer and let it sit out for 10 minutes to soften very slightly. Use a half-teaspoon measure or a small melon baller to carefully scoop out 7 wells, stopping about ½ cm before reaching the side of the pan so that the bars remain intact. Also, be sure to leave enough space in between each bar to cut it later.

Step 7: Pipe caramel sauce into the wells - be careful not to overfill them as you don't want the caramel to pour out over the edges. Place the bars back in the freezer to firm up for at least another hour, or longer if needed/preferred.

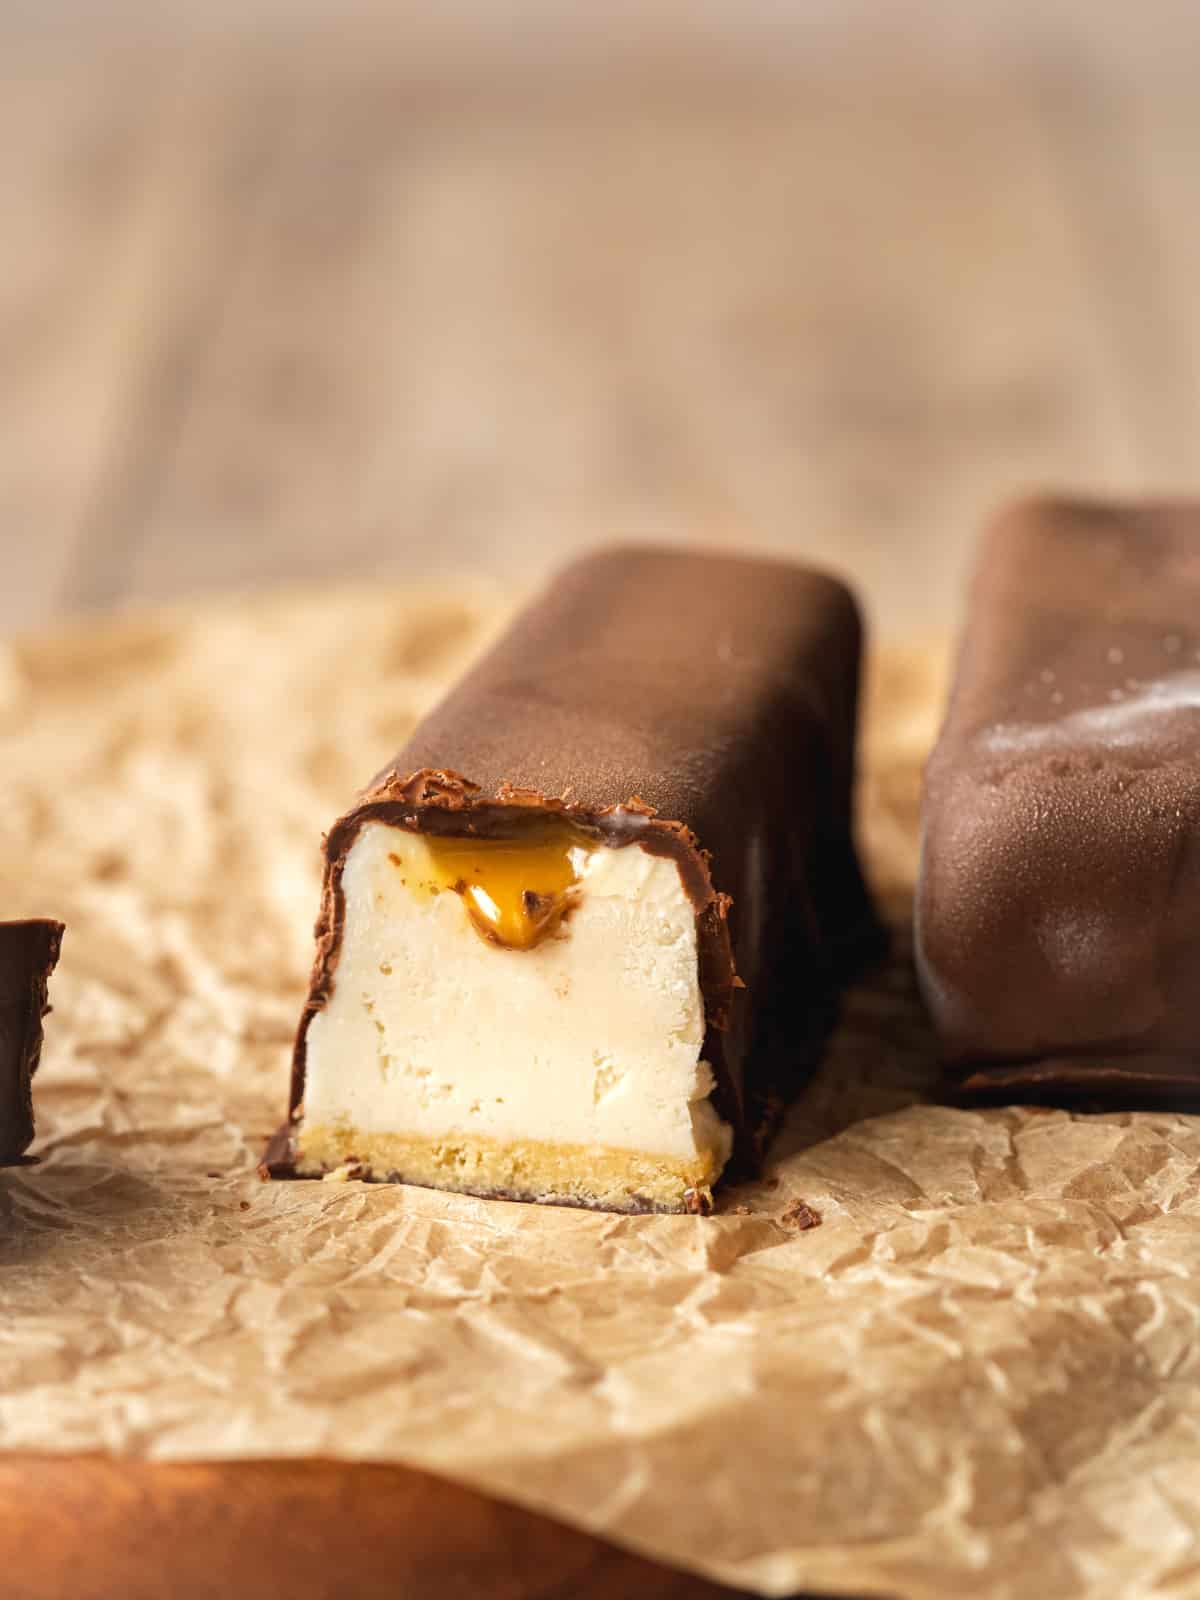
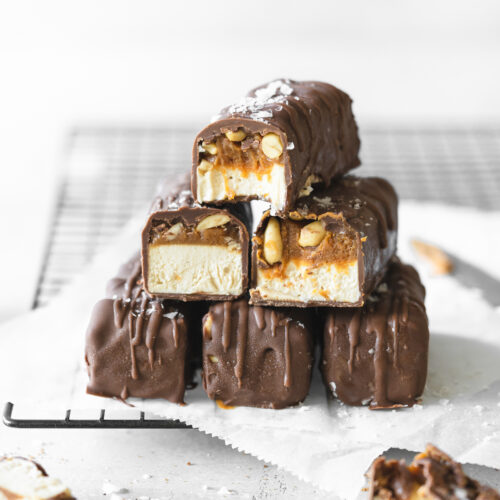
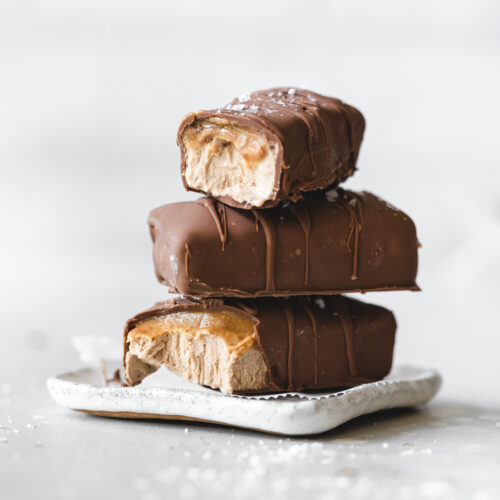
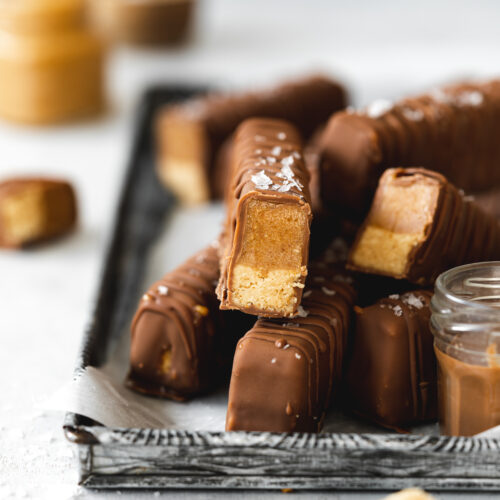
Step 8: Carefully cut the ice cream into bars using a sharp knife, so that there is a well of caramel in the center of each. Freeze the ice cream bars on a lined tray until you are ready to coat them in chocolate.

Step 9: Pour melted chocolate into a shallow bowl. Use a fork and a spoon to dip the bars into the chocolate.

Set the coated bars on a sheet of parchment paper. Sprinkle with sea salt, and allow them to set completely back in the freezer for 15 minutes.
🍯 Variations
Even though these vegan ice cream bars have been lovingly created and meticulously tested to be the best they can be, there's still room for you to make them your own:
- Homemade Caramel - Feel free to make your own vegan caramel sauce if you can't get the store-bought version.
- Gluten-Free - If you need to make this twix ice cream gluten-free, just swap out the cookies for a GF alternative.
- Berry Ice Cream Bars - Not a caramel fan? No problem! You can easily switch out the caramel for some strawberry coulis if that's more to your liking.
📝 Recipe Tips
Keep things frozen. Working with ice cream recipes during summer has its downfalls, one of them being that it can get a bit messy if it starts to melt. To help prevent as much melting as possible, freeze any trays you'll be using in advance, and make sure to place the ice cream bars back in the freezer between each step of the recipe.
Use a heated sharp knife to slice the ice cream into bars. Simply dip the knife in a jug of boiled water and wipe dry with some kitchen towels before each slice. Cut through the ice cream slowly, allowing the heat and sharpness of the knife to do the work for you!
💬 FAQs
It's no secret that delicious frozen desserts need to be kept in the freezer. However, it's really important that they are in a sealed container. Even better, you can individually wrap them in parchment paper first to help prevent any freezer burn.
Absolutely, you can half or even third each slice. Make sure you create an individual well for the caramel to sit in for each portion using your melon baller!
Yes, you can as pictured below! But be aware, because the caramel is on the runnier side, you will need to freeze them with the caramel until it is almost firm to the touch.
The result will be a thinner layer of caramel that encases the top and sides of the ice cream, rather than a well of oozing caramel sauce.


🍫 More CopyCat Recipes

Love this recipe? Please leave a 5-star ★★★★★ rating in the recipe card below and consider leaving a comment as well, thanks!
Stay in touch with me through social media @ Instagram, Pinterest, TikTok, and Facebook. And subscribe via email to get all our new recipes!
📖 Recipe
Vegan Twix Ice Cream
Equipment
Ingredients
- 100 g (3.53 oz) golden oreos or other vegan cookies
- 25 g (5 tsp) unsalted vegan butter (block-style)
- ¼ teaspoon sea salt
- 400 ml (14.19 oz) oat whipping cream or coconut whipping cream (I use Nature's Charm)
- 250 g (8.82 oz) sweetened condensed oat milk or sweetened condensed coconut milk (I use Nature's Charm)
- 1 teaspoon vanilla bean paste or vanilla extract
- 150 g (5.29 oz) vegan caramel I use Nature's Charm
- 1 tablespoon coconut oil optional
Instructions
- Prepare: Line the base and sides of a 9" loaf pan with parchment paper. Read all of the recipe instructions and notes thoroughly before starting to make sure you have all of your ingredients and equipment ready. I also recommend referring to the step-by-step images within the blog post.
- Make the crust: Add the cookies, salt, and butter to a food processor and blitz until the mixture sticks together between your fingers.
- Press the crust into the base of the pan and smooth it down with your fingers or using a spoon - make sure it is compact. Refrigerate while you make the filling.
- Make the filling: Whisk the oat whipping cream in a stand mixer or with a hand whisk until smooth. Add the condensed oat milk and vanilla and whisk again to combine.Pour the filling into the pan and freeze for at least 4 hours (or overnight if preferred).
- Once frozen, take it out of the freezer and let it sit out for 10 minutes to soften very slightly. Use a half-teaspoon measure or a small melon baller to carefully scoop out 7 wells, stopping about ½ cm before reaching the side of the pan so that the bars remain intact. Also, be sure to leave enough space in between each bar to cut it later. (see images in the blog post for reference)
- Add caramel: Transfer the caramel to a piping bag and pipe it into the wells - be careful not to overfill them as you don't want the caramel to pour out over the edges.Place the bars back in the freezer to firm up for at least another hour, or longer if needed/preferred.
- Slice into bars: Carefully cut the ice cream into bars using a sharp knife, so that there is a well of caramel in the center of each. Place the cut bars on a tray lined with parchment paper and back into the freezer until the very last second when you are ready to coat them.
- Coat: Melt the chocolate and coconut oil over a double boiler (bain-marie) and stir to combine. Pour the melted chocolate into a shallow bowl. Use a fork and a spoon to dip them into the chocolate. Set the coated bars on a sheet of parchment paper, sprinkle with sea salt, and allow them to set completely back in the freezer for 15 minutes.
- Storage: Store in an airtight container in the freezer for up to a month. For best results, individually wrap each bar in parchment paper before placing it into the container.
Notes
- If possible chill the oat whipping cream the night before as directed on the packaging - however, it is not essential for this recipe.
- To help prevent as much melting as possible, freeze any trays you'll be using in advance, and make sure to place the ice cream bars back in the freezer between each step of the recipe.
- Use a heated sharp knife to slice the ice cream into bars. Simply dip the knife in a jug of boiled water and wipe dry with some kitchen towels before each slice. Cut through the ice cream slowly, allowing the heat and sharpness of the knife to do the work for you!
© addictedtodates.com. All content and images are protected by copyright. If you want to share this recipe, please do so using the share buttons provided. Do not screenshot or republish the recipe or content in full. Instead, include a link to this post for the recipe. Thank you!